
Xbox has made great strides towards accessibility, allowing more people to enjoy video games. One of the most important functions for accessibility is allowing players to remap their controller configuration so it's most comfortable for them.
And on the Xbox Series X/Series S, you can easily configure your controller so it works as you prefer. Here's how to do this.
How to Configure Your Xbox Series X/S Controller
After turning on your Xbox, hit the Xbox button on your controller to open the Guide. Use RB to scroll over to the Profile & system menu, represented by your profile icon. Here, choose Settings.
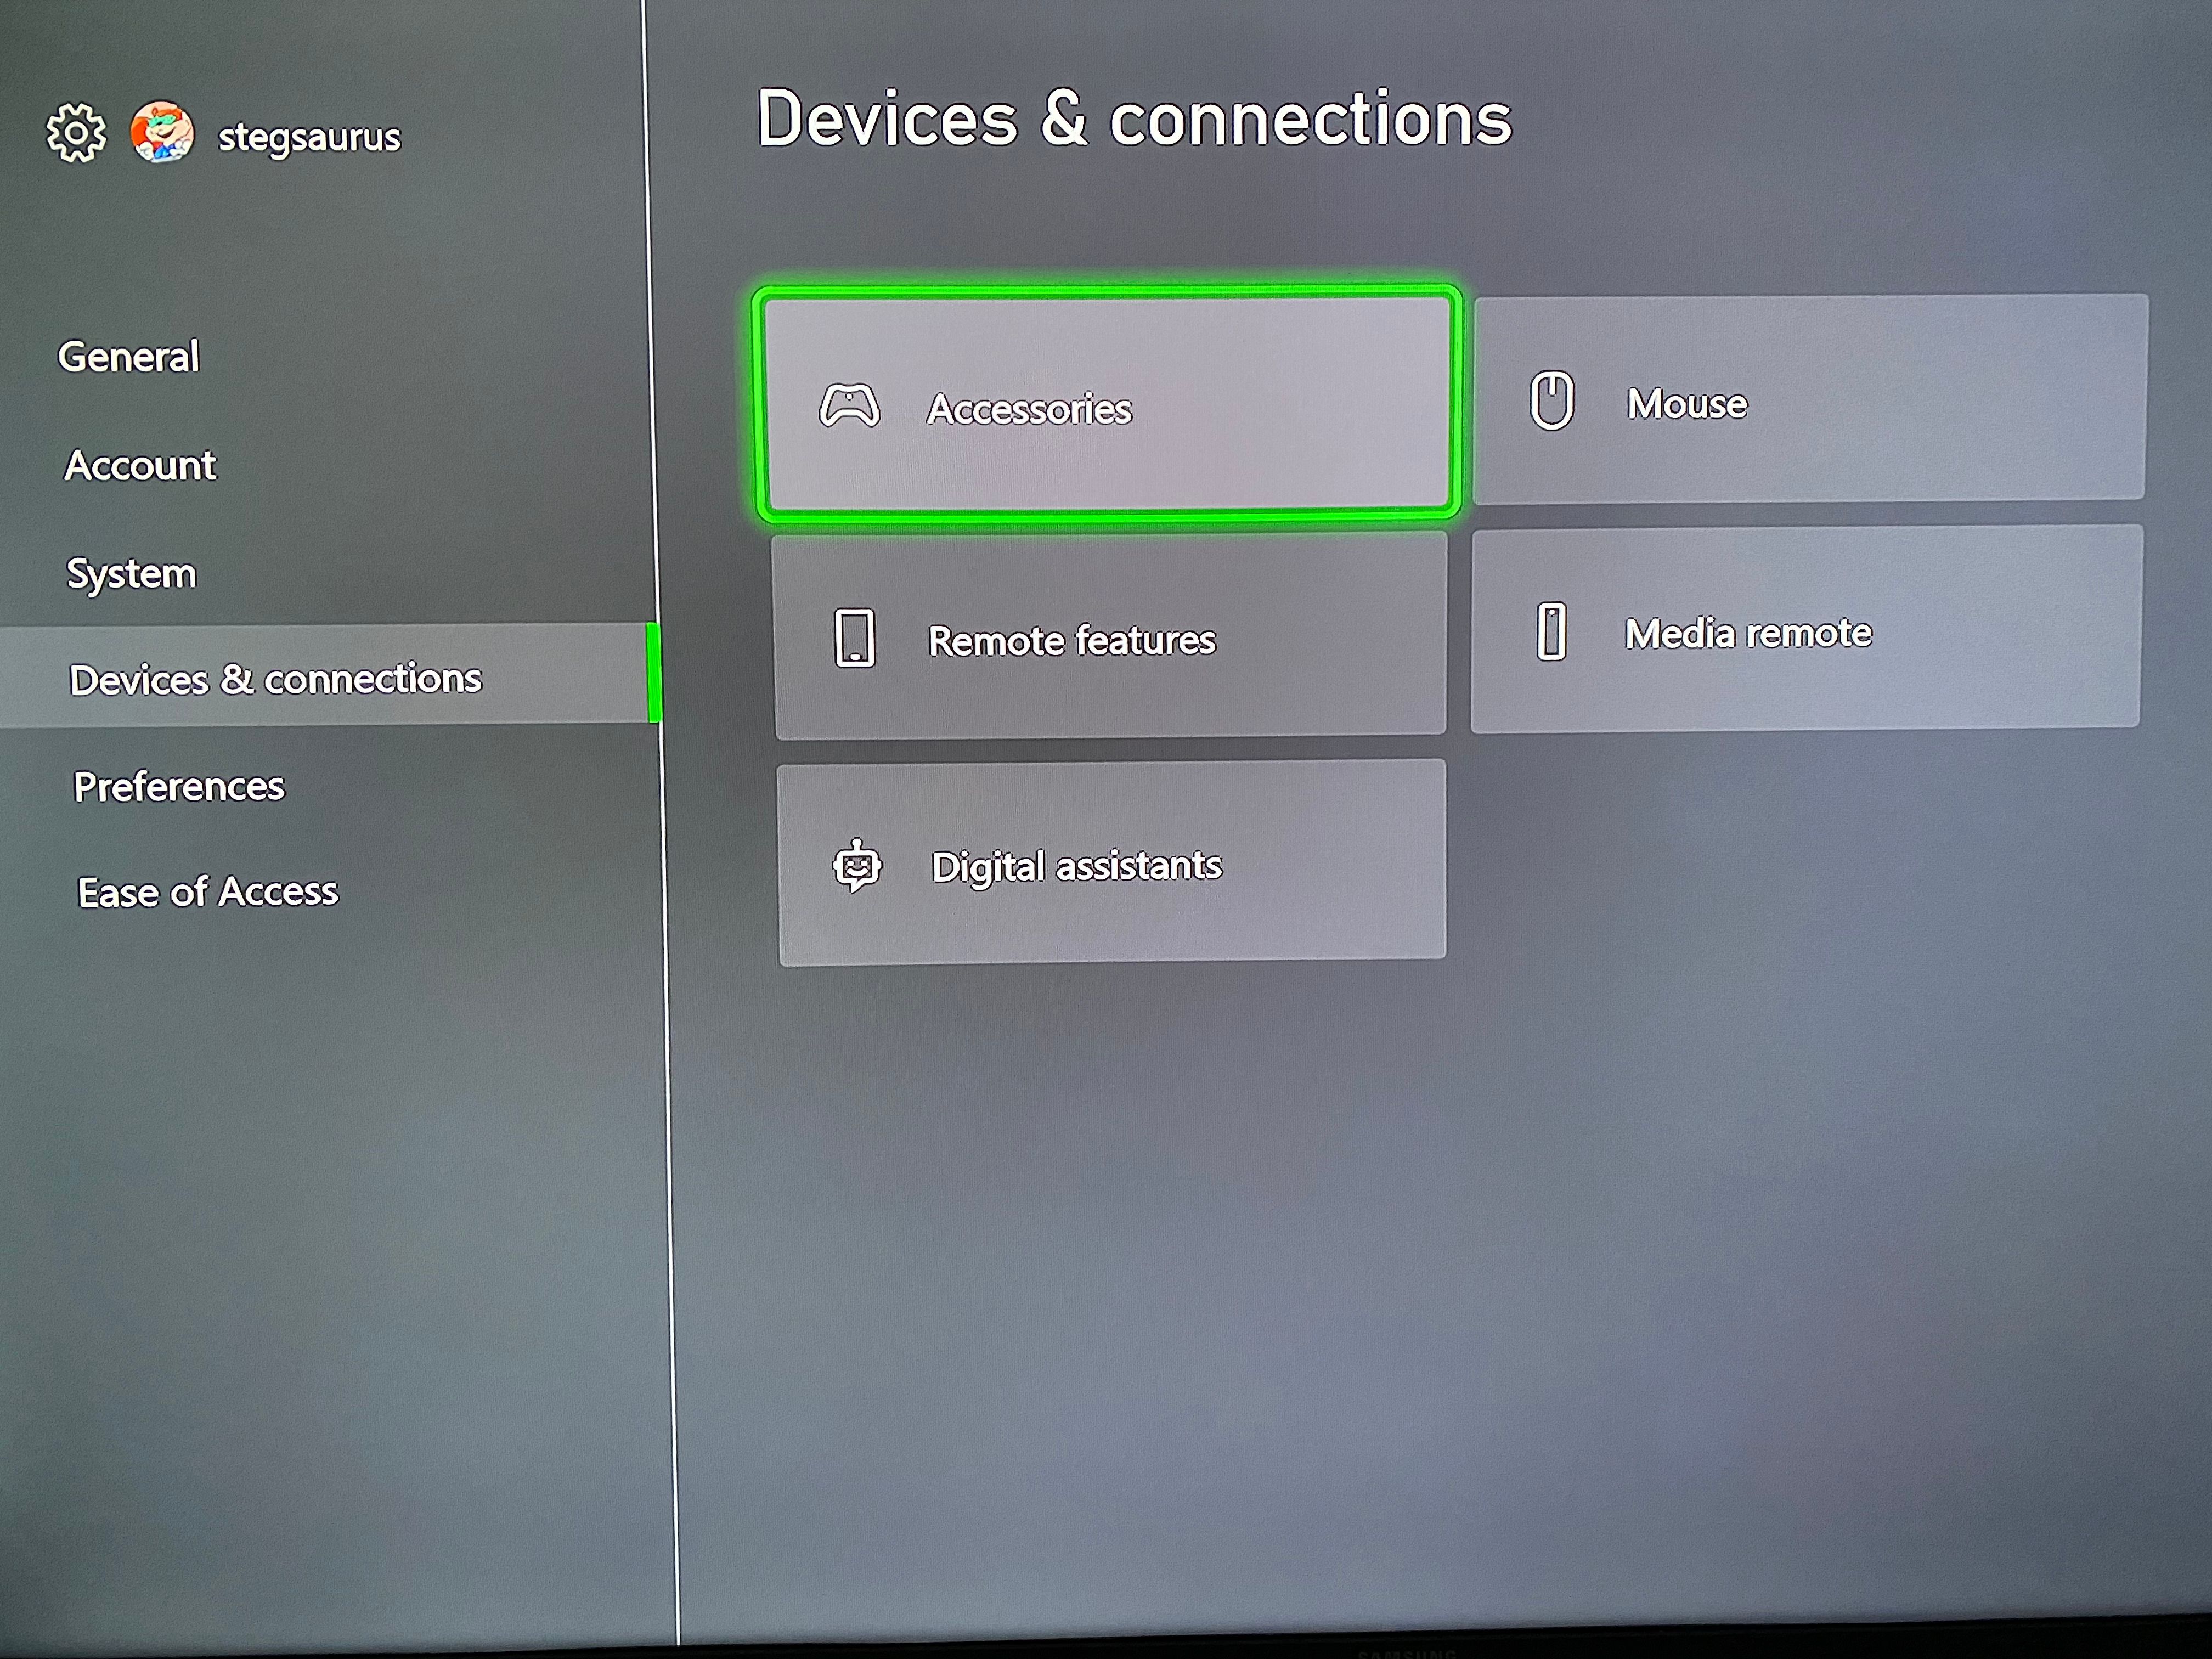
In the Settings menu, scroll down to Devices & connections and select the Accessories panel. This opens the Xbox Accessories app, allowing you to adjust a few options for how the controller works.
Button Mapping and Global Tweaks
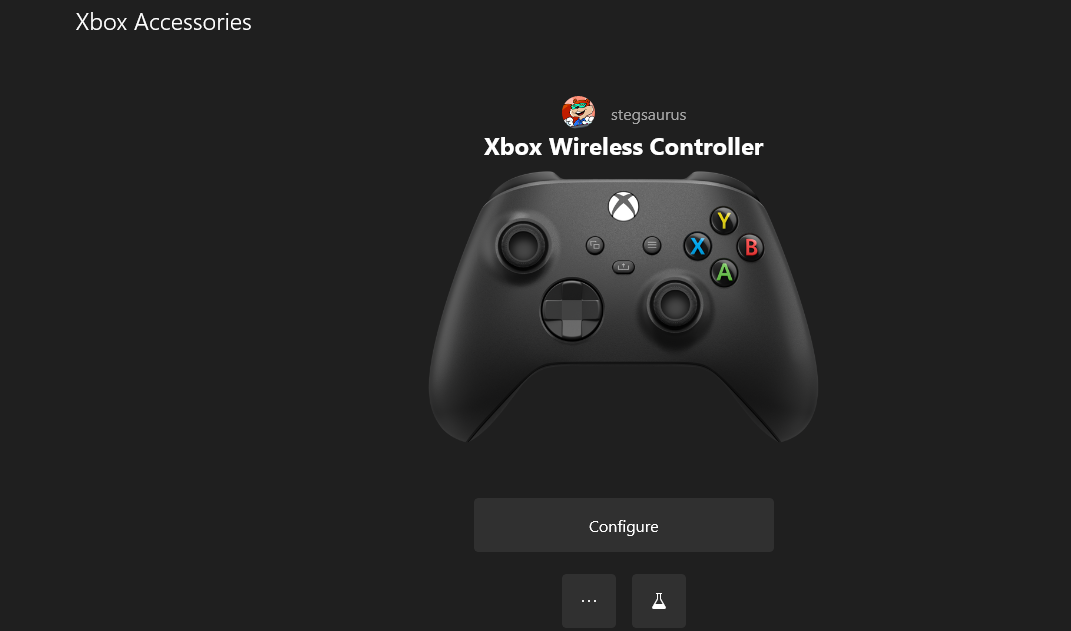
Choose Configure from the main Xbox Accessories page to open a list of controller profiles. Here, you can create a unique profile for specific games or players. Once you've picked a profile, select the Edit (pencil) button to configure button mapping for it.
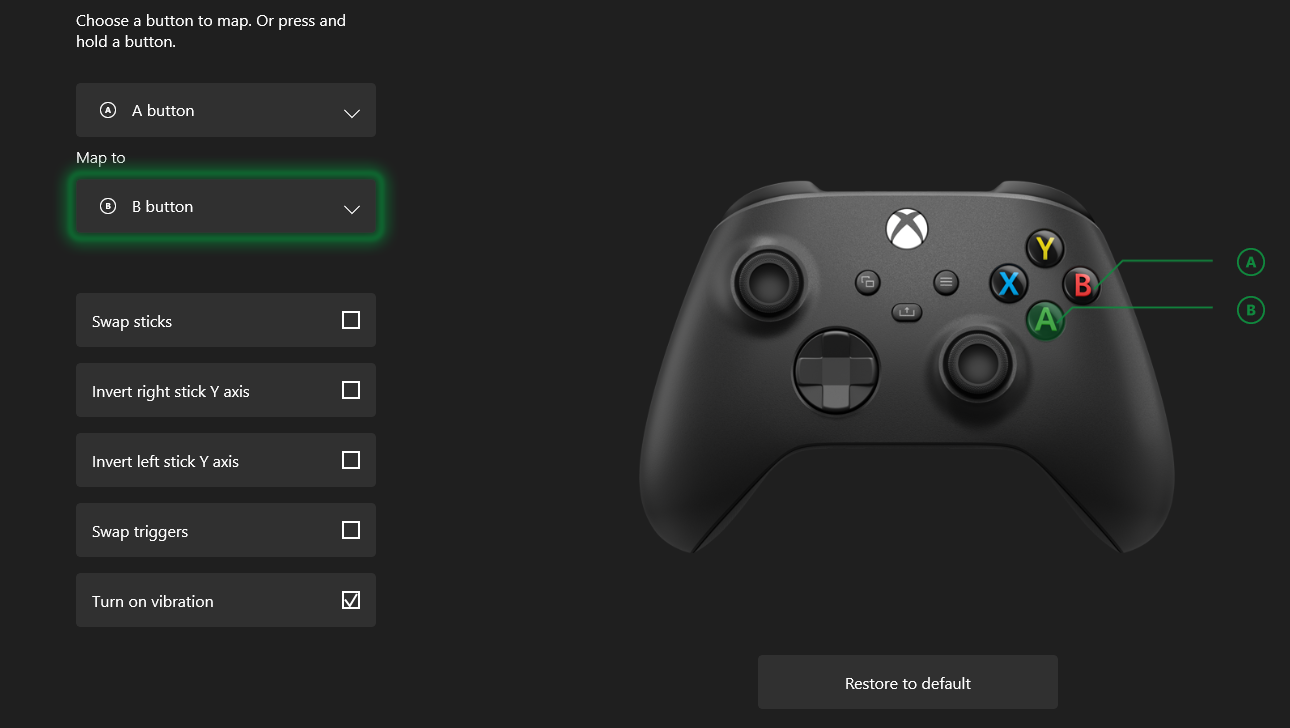
Here, you're able to change the button functionality for anything on your controller. Select the dropdown box at the top that says Share button, press by default to choose a button to remap, then select what it should do in the Map to box.
For example, if you are used to the Nintendo Switch controller layout and prefer to have the right button act as "accept" instead of the bottom one, you can remap A to B to swap the two. What you do is completely up to your preferences.
Of particular note are the Share button, hold and Share button, press options. By default, pressing Share will take a screenshot, and holding it will record what just happened. But you can change these, as well as setting one to Start/Stop recording if you prefer.
Take a look at the checkboxes below on this page, too. These let you swap the two control sticks, invert the Y axis globally, and swap the triggers. You can also disable vibration if you don't want it in any game.
Linking Your Controller and Copilot Mode
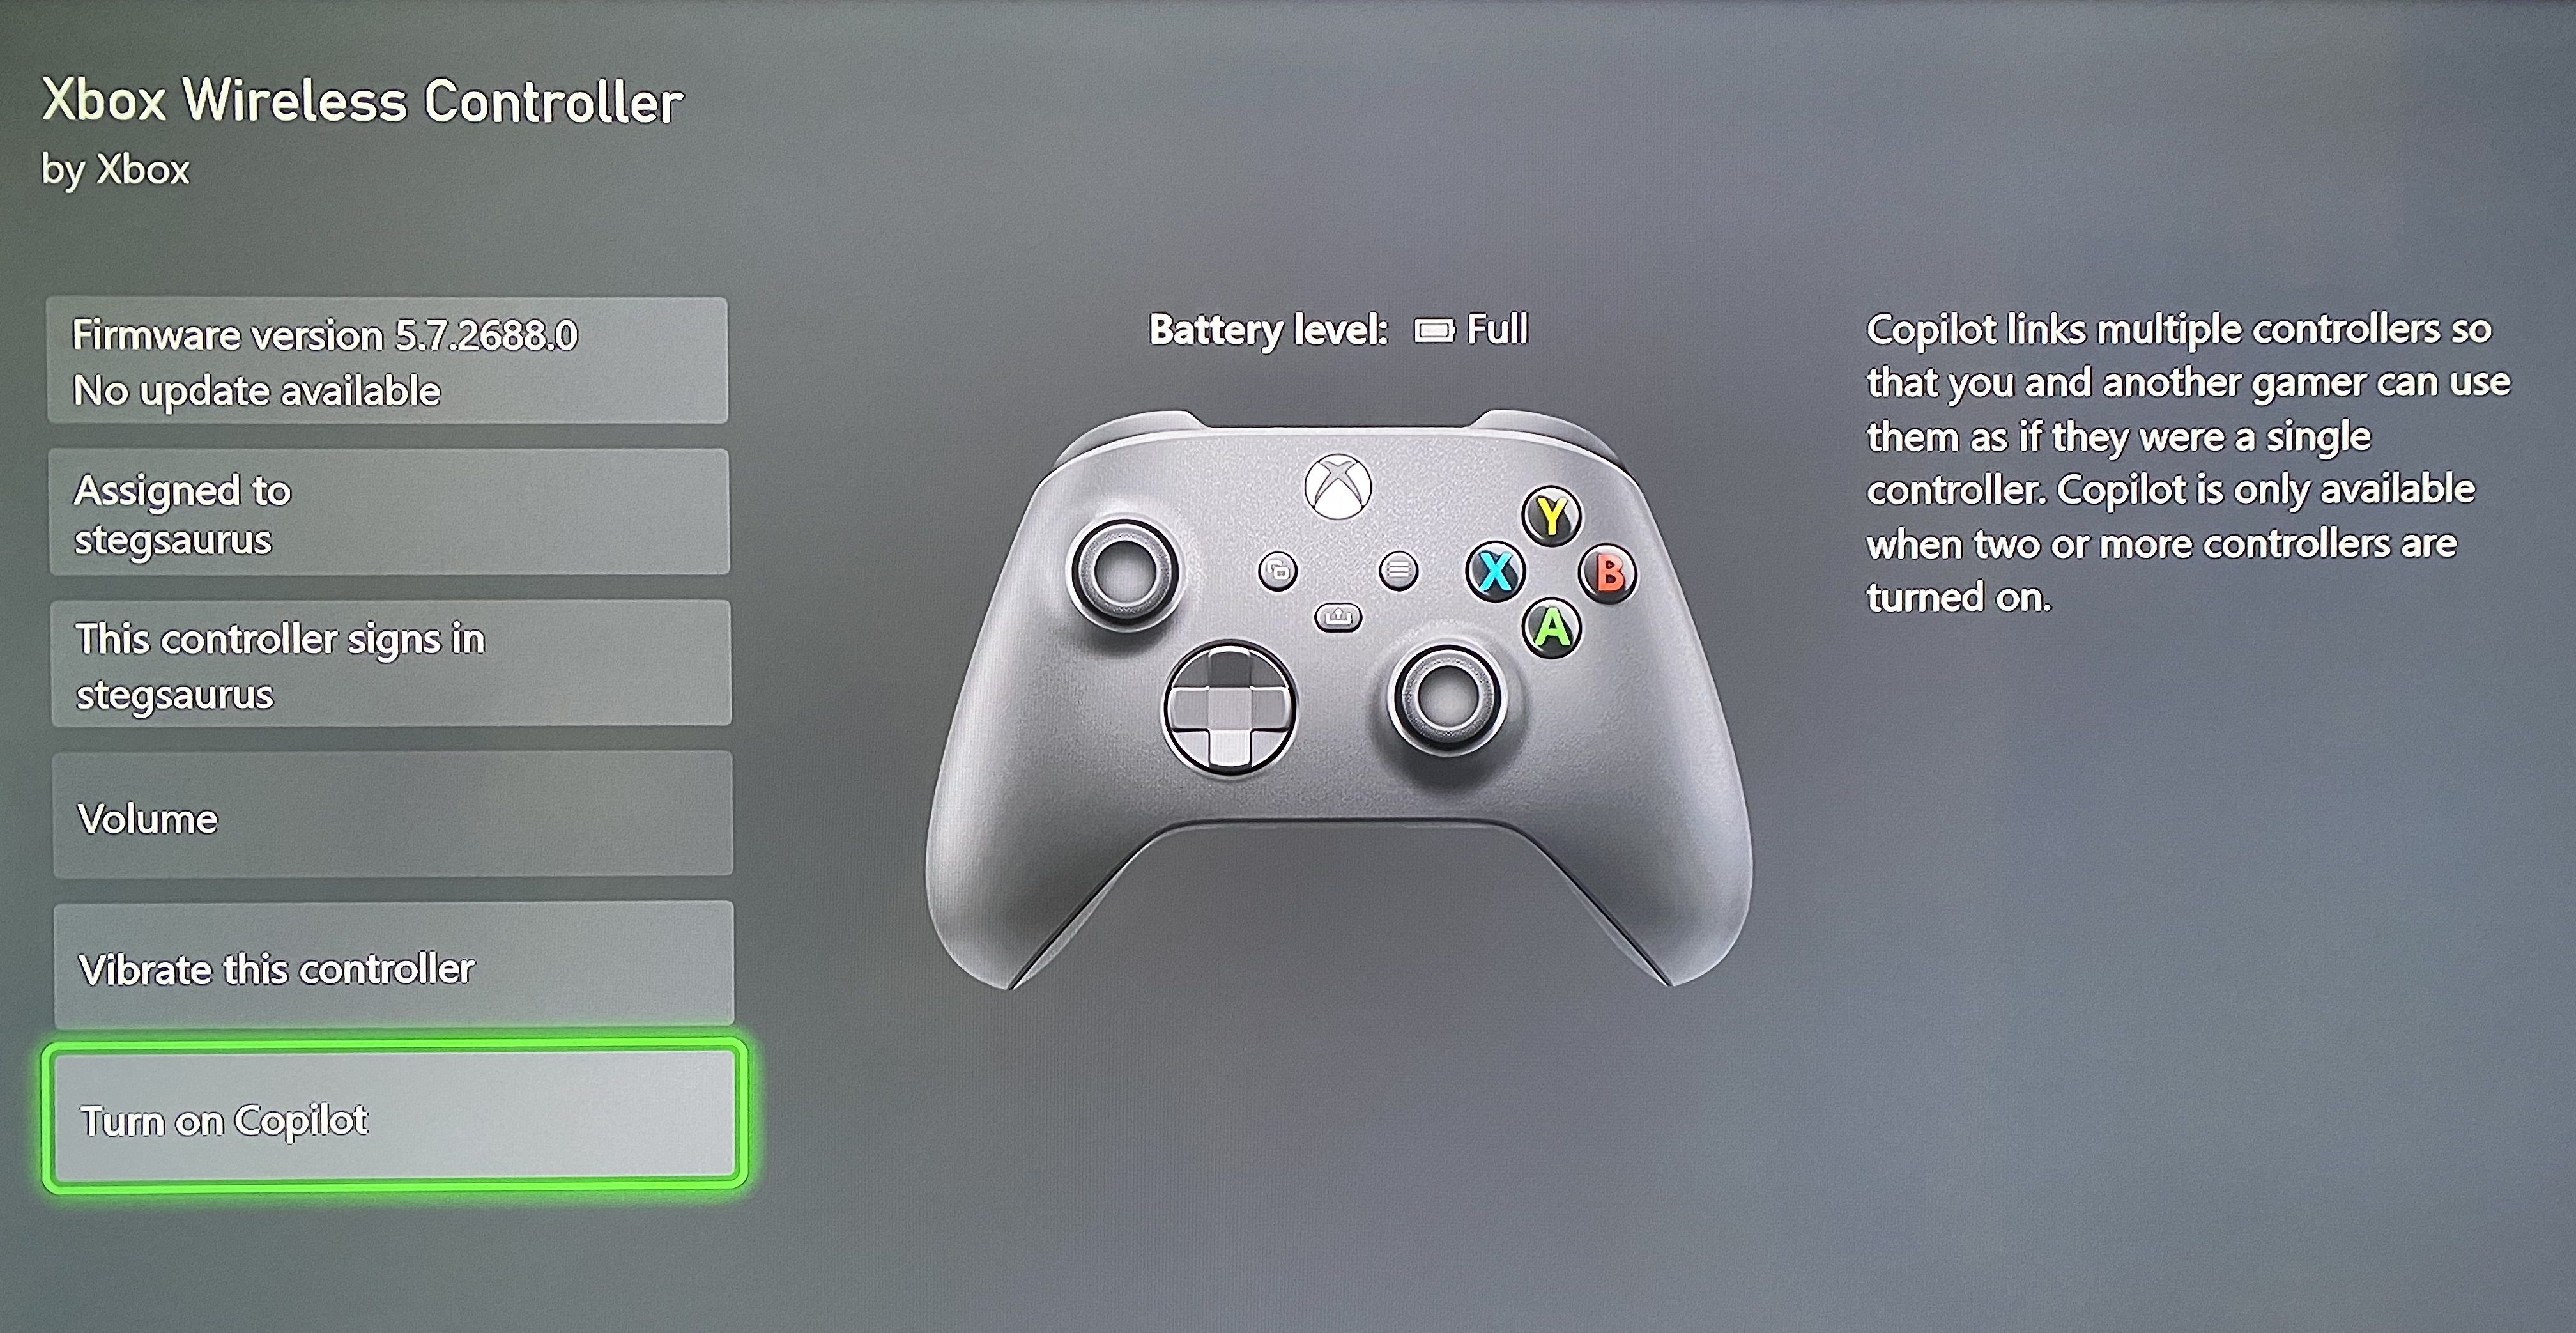
On the main Xbox Accessories page, select the three-dot menu to open some additional options. Here you can check for updates to your controller, as well as assign the controller to sign in a certain player. This is convenient if you have multiple users on your Xbox, as turning on their controller will always lead to their profile.
Turn on Copilot is an interesting function. It allows you to link a second controller, then play with someone as if only one controller was in use. Effectively, two people are able to send inputs to a one-player game.
It's a great way to help someone through a tricky part of a game, or to join your child in playing. Select this option with at least two controllers connected to get set up.
Note that since you can use Xbox One Controllers on your Series X/S, you can do all of the above for any modern Xbox controller.
How to Configure an Xbox Controller on Windows 10
If you use your Xbox controller with your PC, you can still configure it in the same way. You'll need to install the free Xbox Accessories app from the Microsoft Store to do this.
Open the app and connect your Xbox controller to your PC using a USB cable. Your controller should appear on the app's main screen. From there, it will work exactly like the Xbox interface examined above. Click Configure to create multiple controller profiles with buttons assigned as you like.
For a full guide, see how to set up your Xbox controller on Windows 10.
Use Your Xbox Controller However You Like
Now you know how to swap the buttons on your Xbox Series X/S controller to make games easier to control, plus tweak other configuration options. These are handy features, so keep them in mind if the default controls for a game ever feel awkward for you.
Image Credit: Chikena/Shutterstock


0 Comments