The iPad and iPad Pro are great devices for all sorts of creative tasks. And while they offer robust tools for jobs like video editing, you might feel left out if you're a newer editor.
As it turns out, you can use Apple's Keynote app to create basic animations. With a bit of patience and know-how, these can look great and crank your first videos up to the next level.
Here's a quick tutorial on how to make a few simple animations in Keynote to get you started.
1. How to Make Title Cards in Keynote
Title cards are a great way to up your video quality from amateur video maker to budding professional. They make your videos look better while also giving the viewer a nice transition if you have multiple segments.
The first step is to create a new presentation in Keynote. Make sure you go with a blank presentation; otherwise, you will have to delete all the boxes and images. Next, change the background to a bright green color. The exact hue doesn't matter, as long as it is vaguely a "green screen."
Click the Plus icon and drag a text box from the options onto the presentation canvas. Make the font, size, and color whatever you need, then drag the text box where you want it to end up.
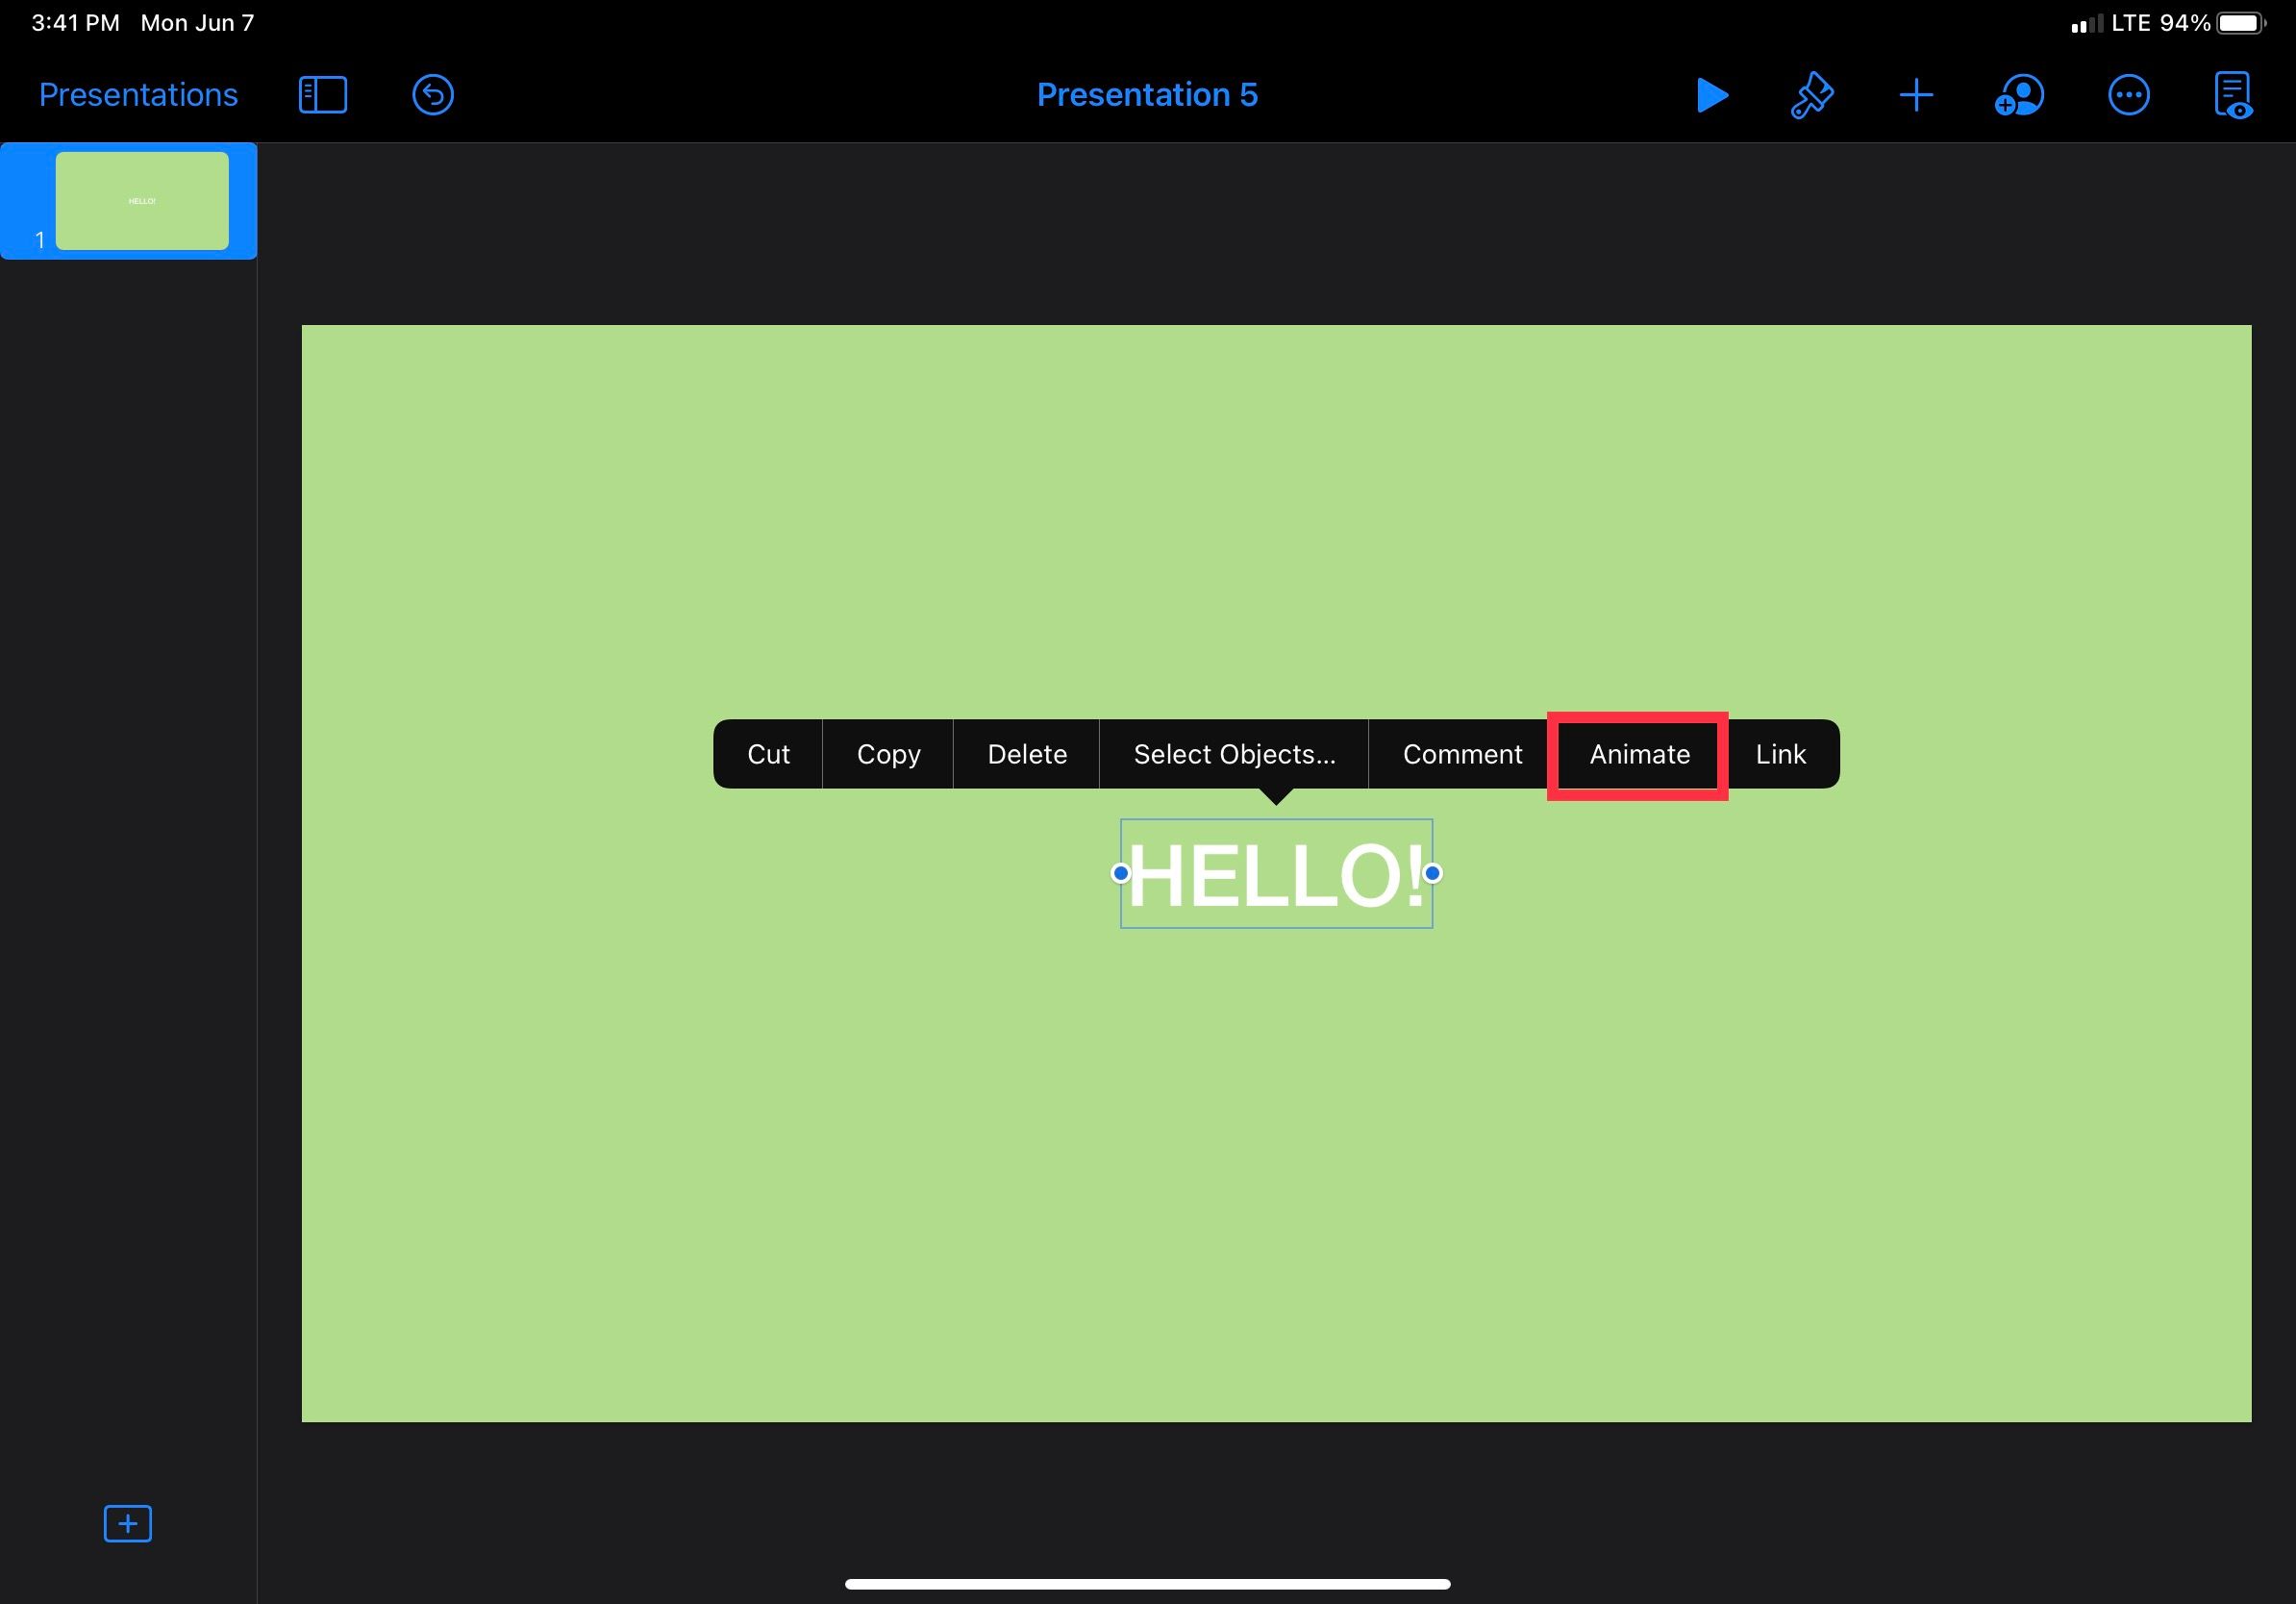
Next, tap the text box, and a list of options will pop up. Choose Animate from this list.
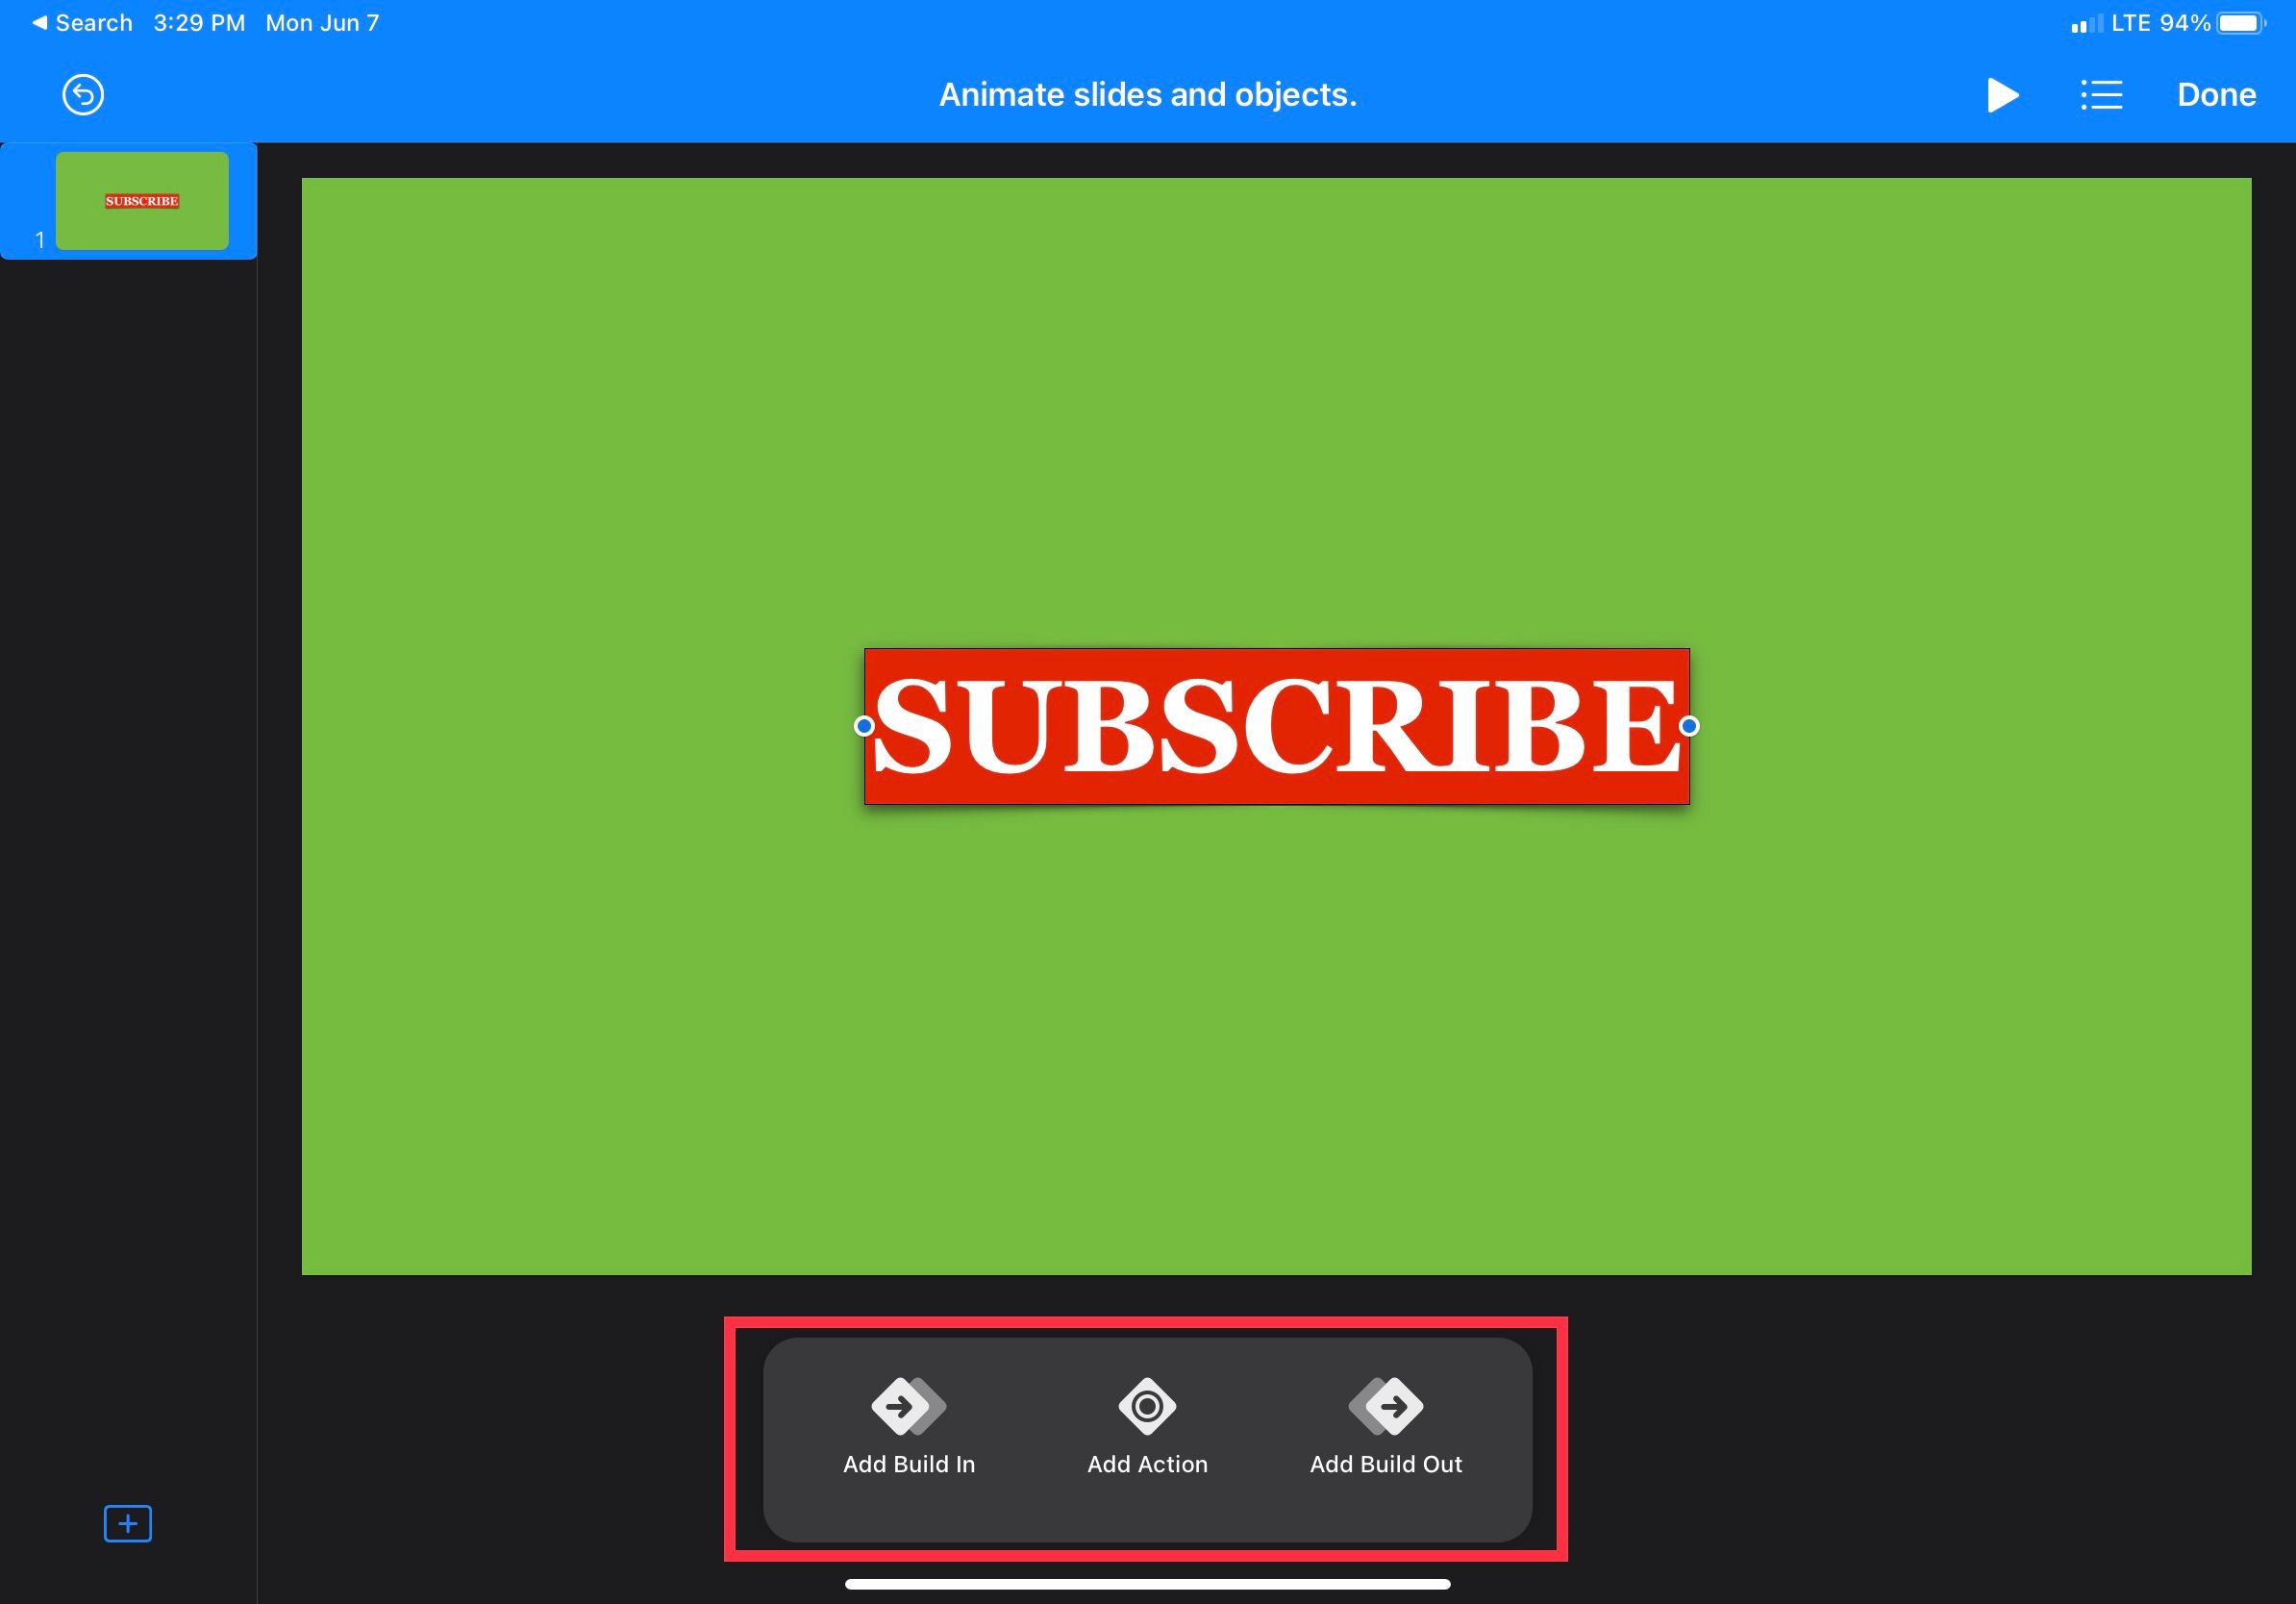
A box will appear at the bottom with three options: Build In, Action, and Build Out. For this animation, you need to tap Build In.
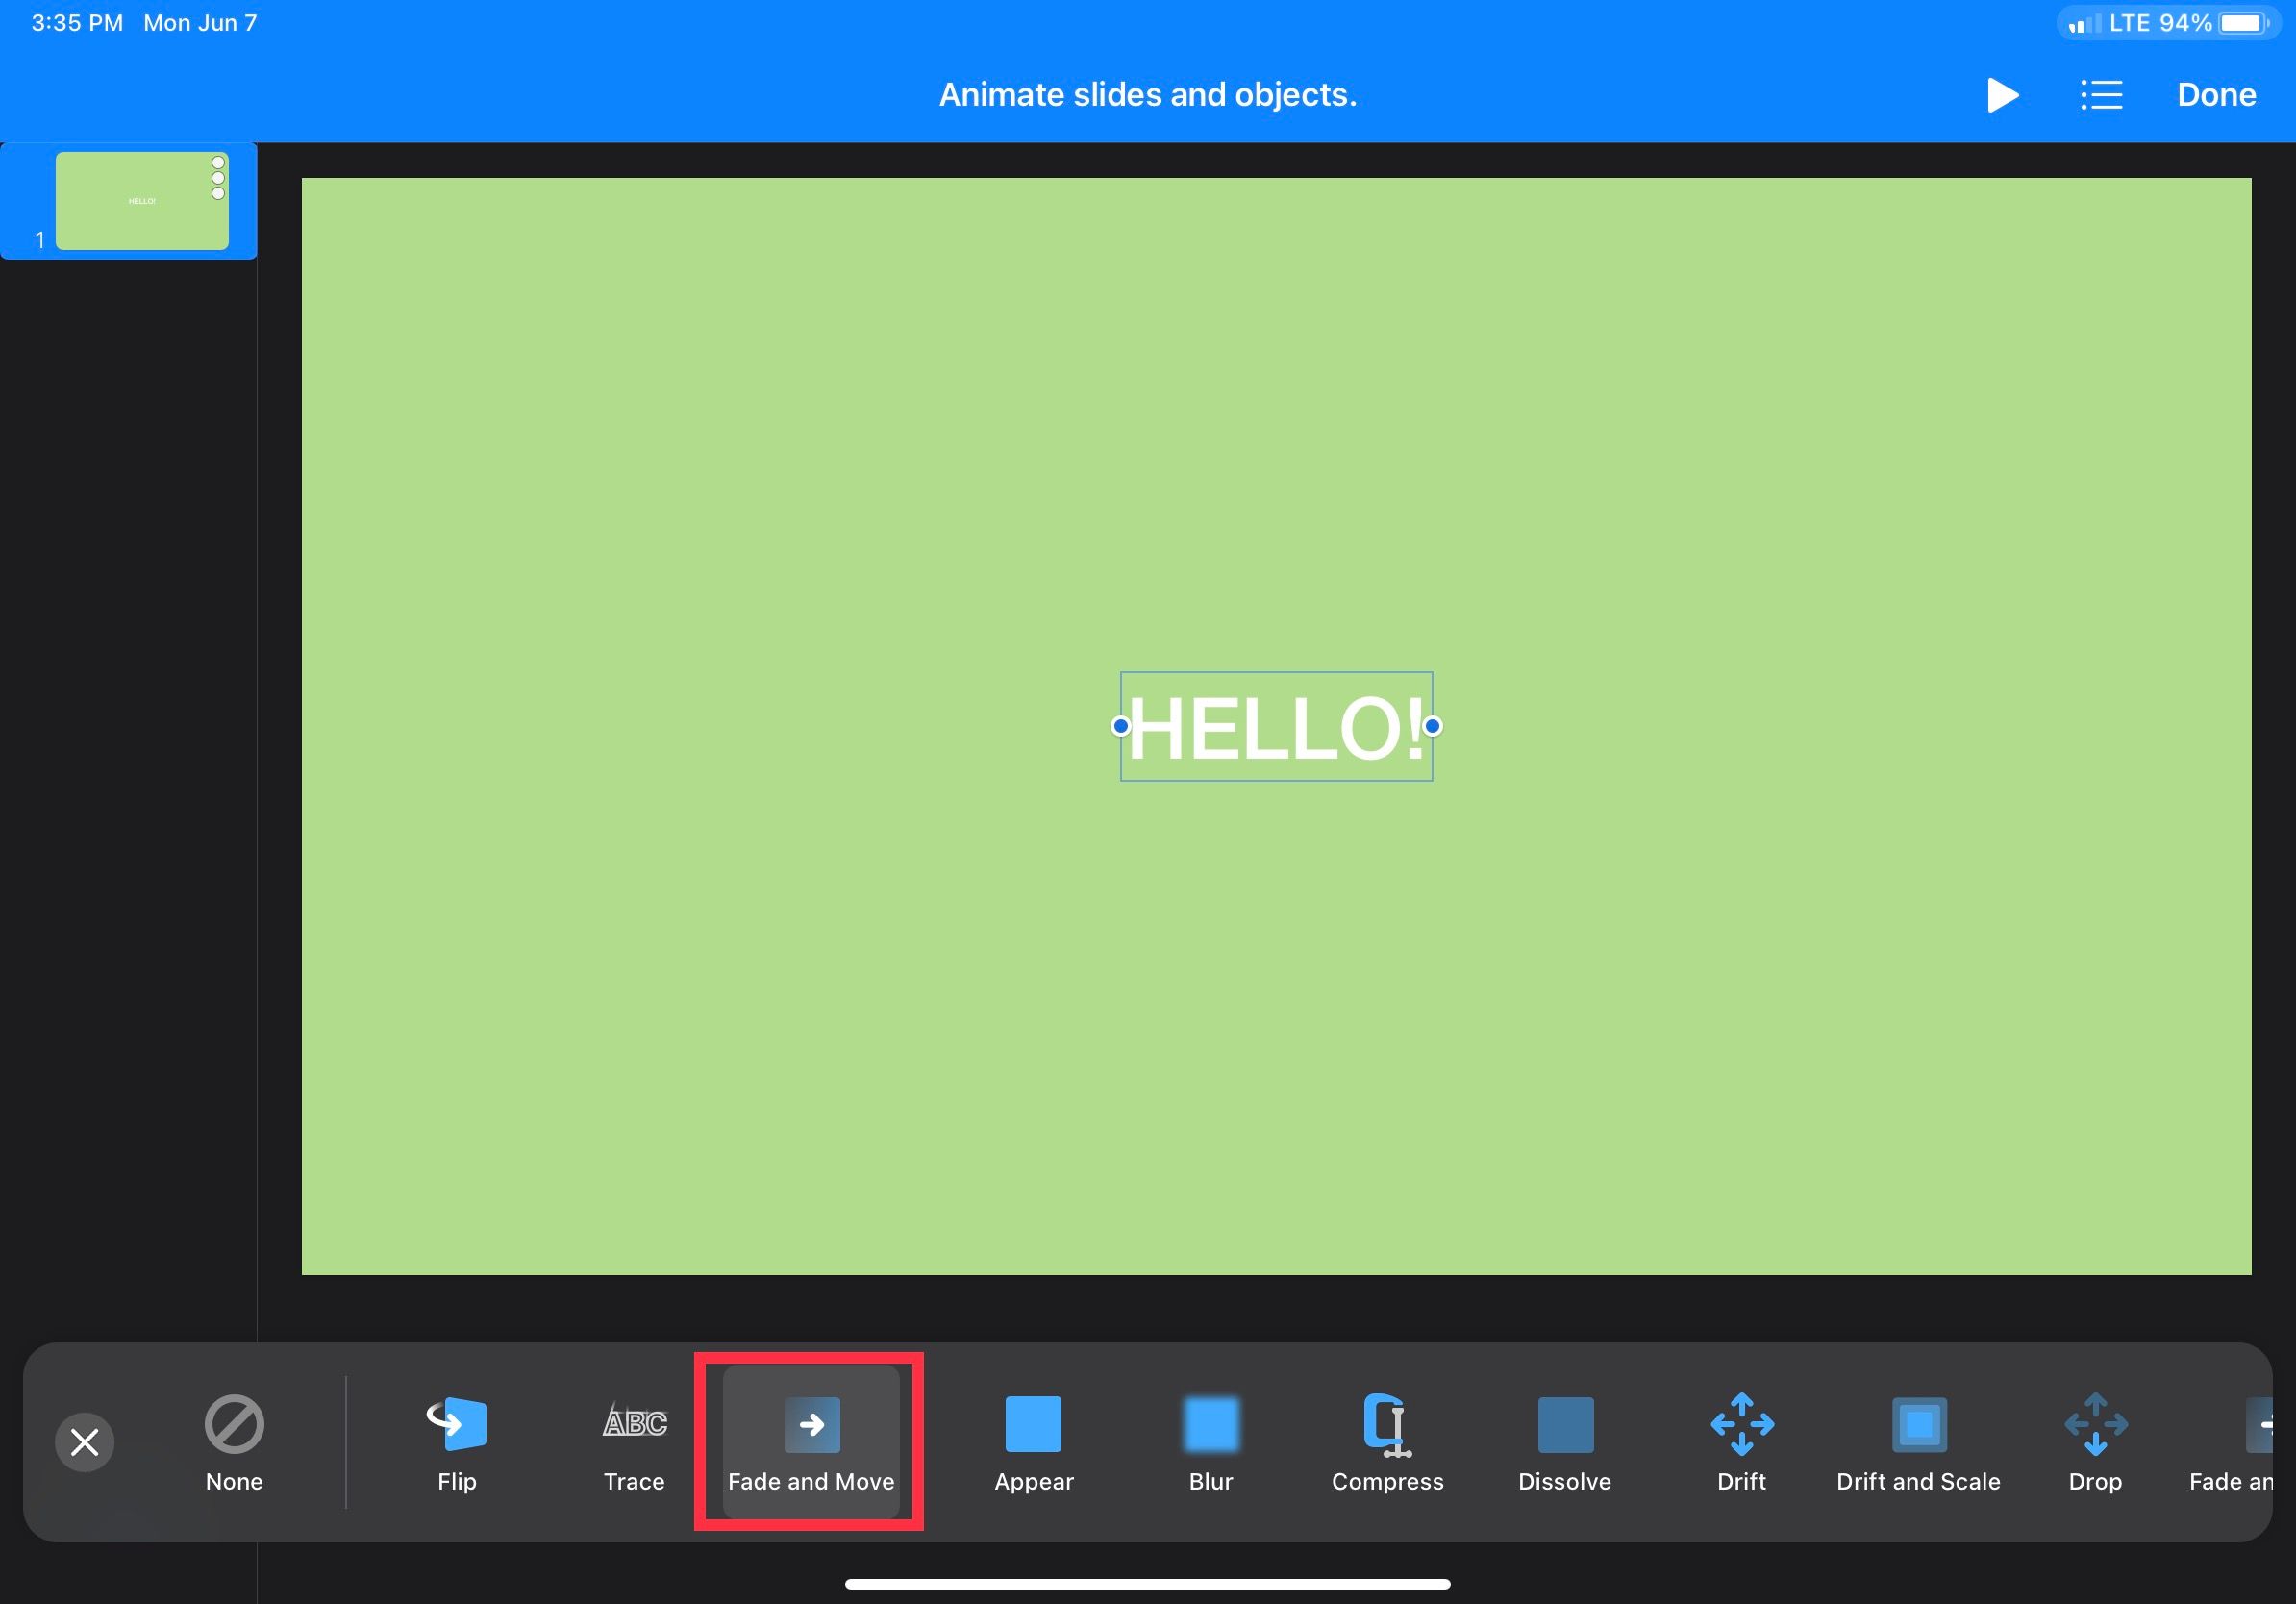
You will see multiple animation presets along the bottom, each with its own visual style and movement pattern. Fade and Move is an excellent option for beginners. Tap on it to apply the animation to your text box.
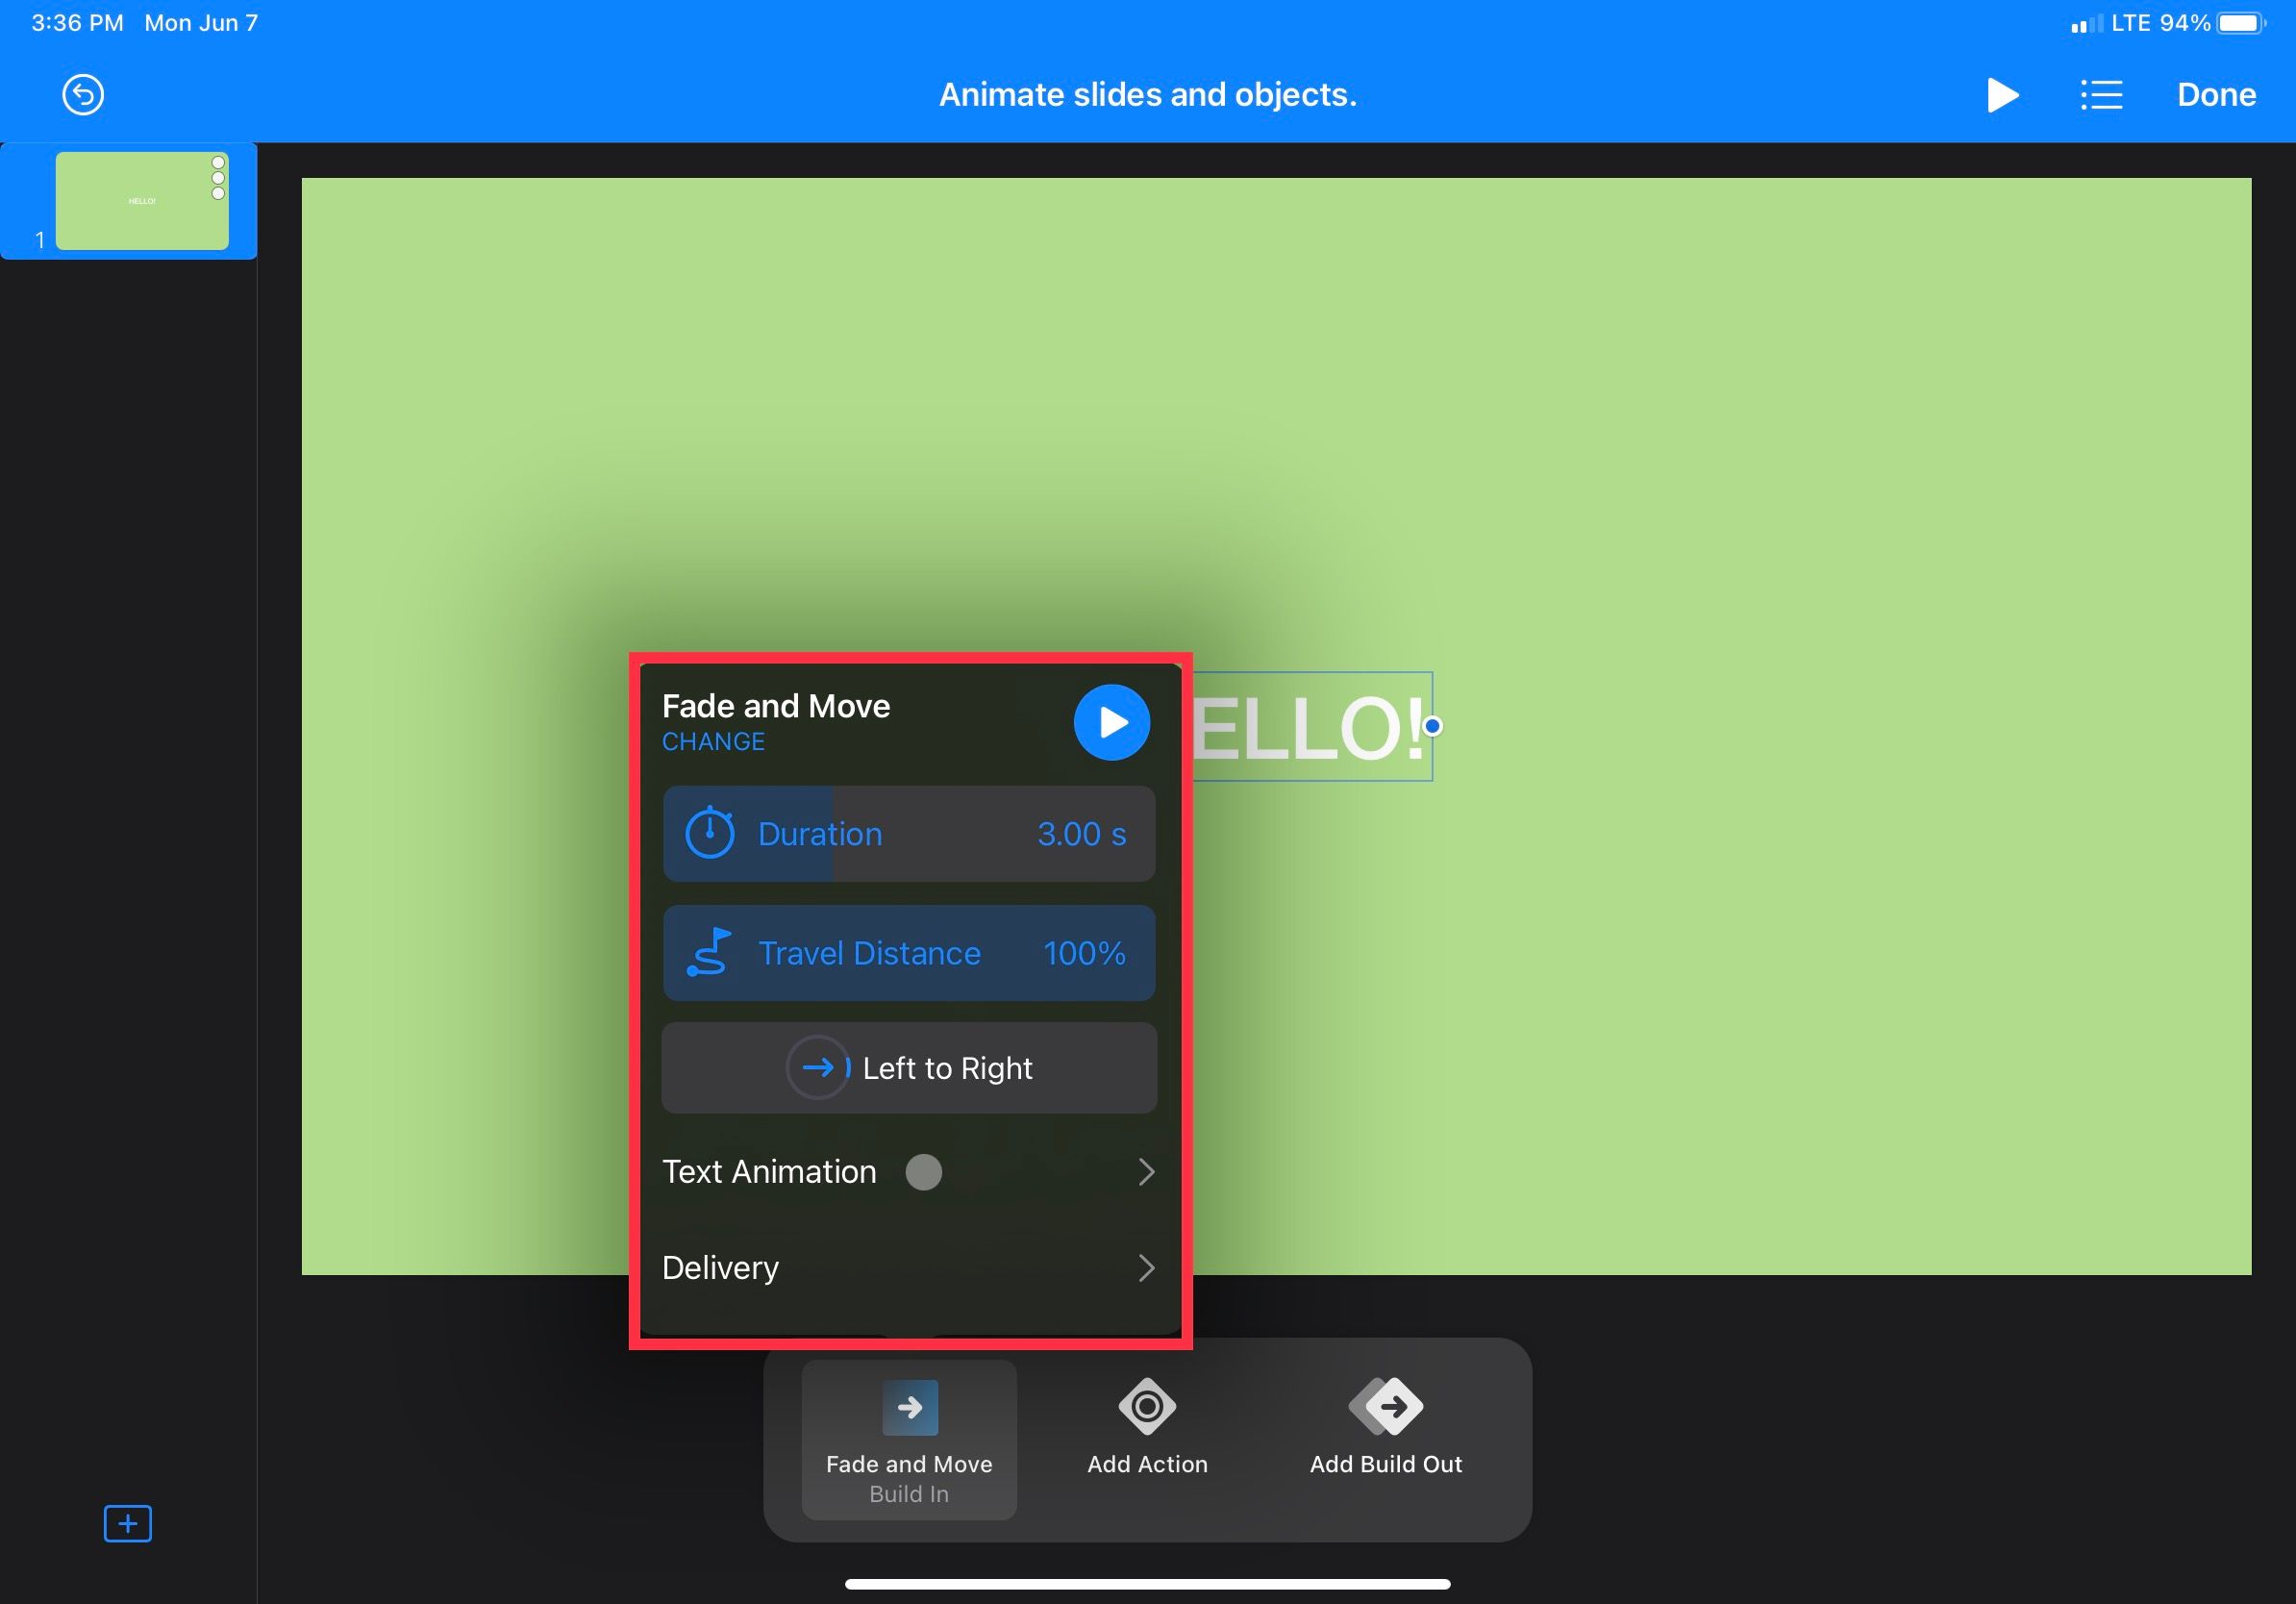
Exit out of the menu, and you will see Fade and Move has replaced the Build In button. Tap on it again, and you can set parameters such as the direction the text comes and whether it bounces when it arrives.
That's all there is to it: you now have a simple fade-in for title cards. You can bring these to the next level by animating shapes to fade in with the text, so it has a background of its own.
2. Add a Subscribe Button
Creating a subscribe button is a must-have if you plan on starting a YouTube channel, and making a quick animation for one is super simple in Keynote. Repeat the steps from above to create a green background and a text box. Make sure this text box is large and has a red background and white font (to match the YouTube aesthetic).
Then, select it and tap Animate. For this one, you'll need to add a build-in, an action, and a build-out. For the build-in, scroll to the far right side and select the Trace effect. This will give you a cool and complex-looking fade-in of your subscribe button. It's the perfect aesthetic for tech channels and the like.
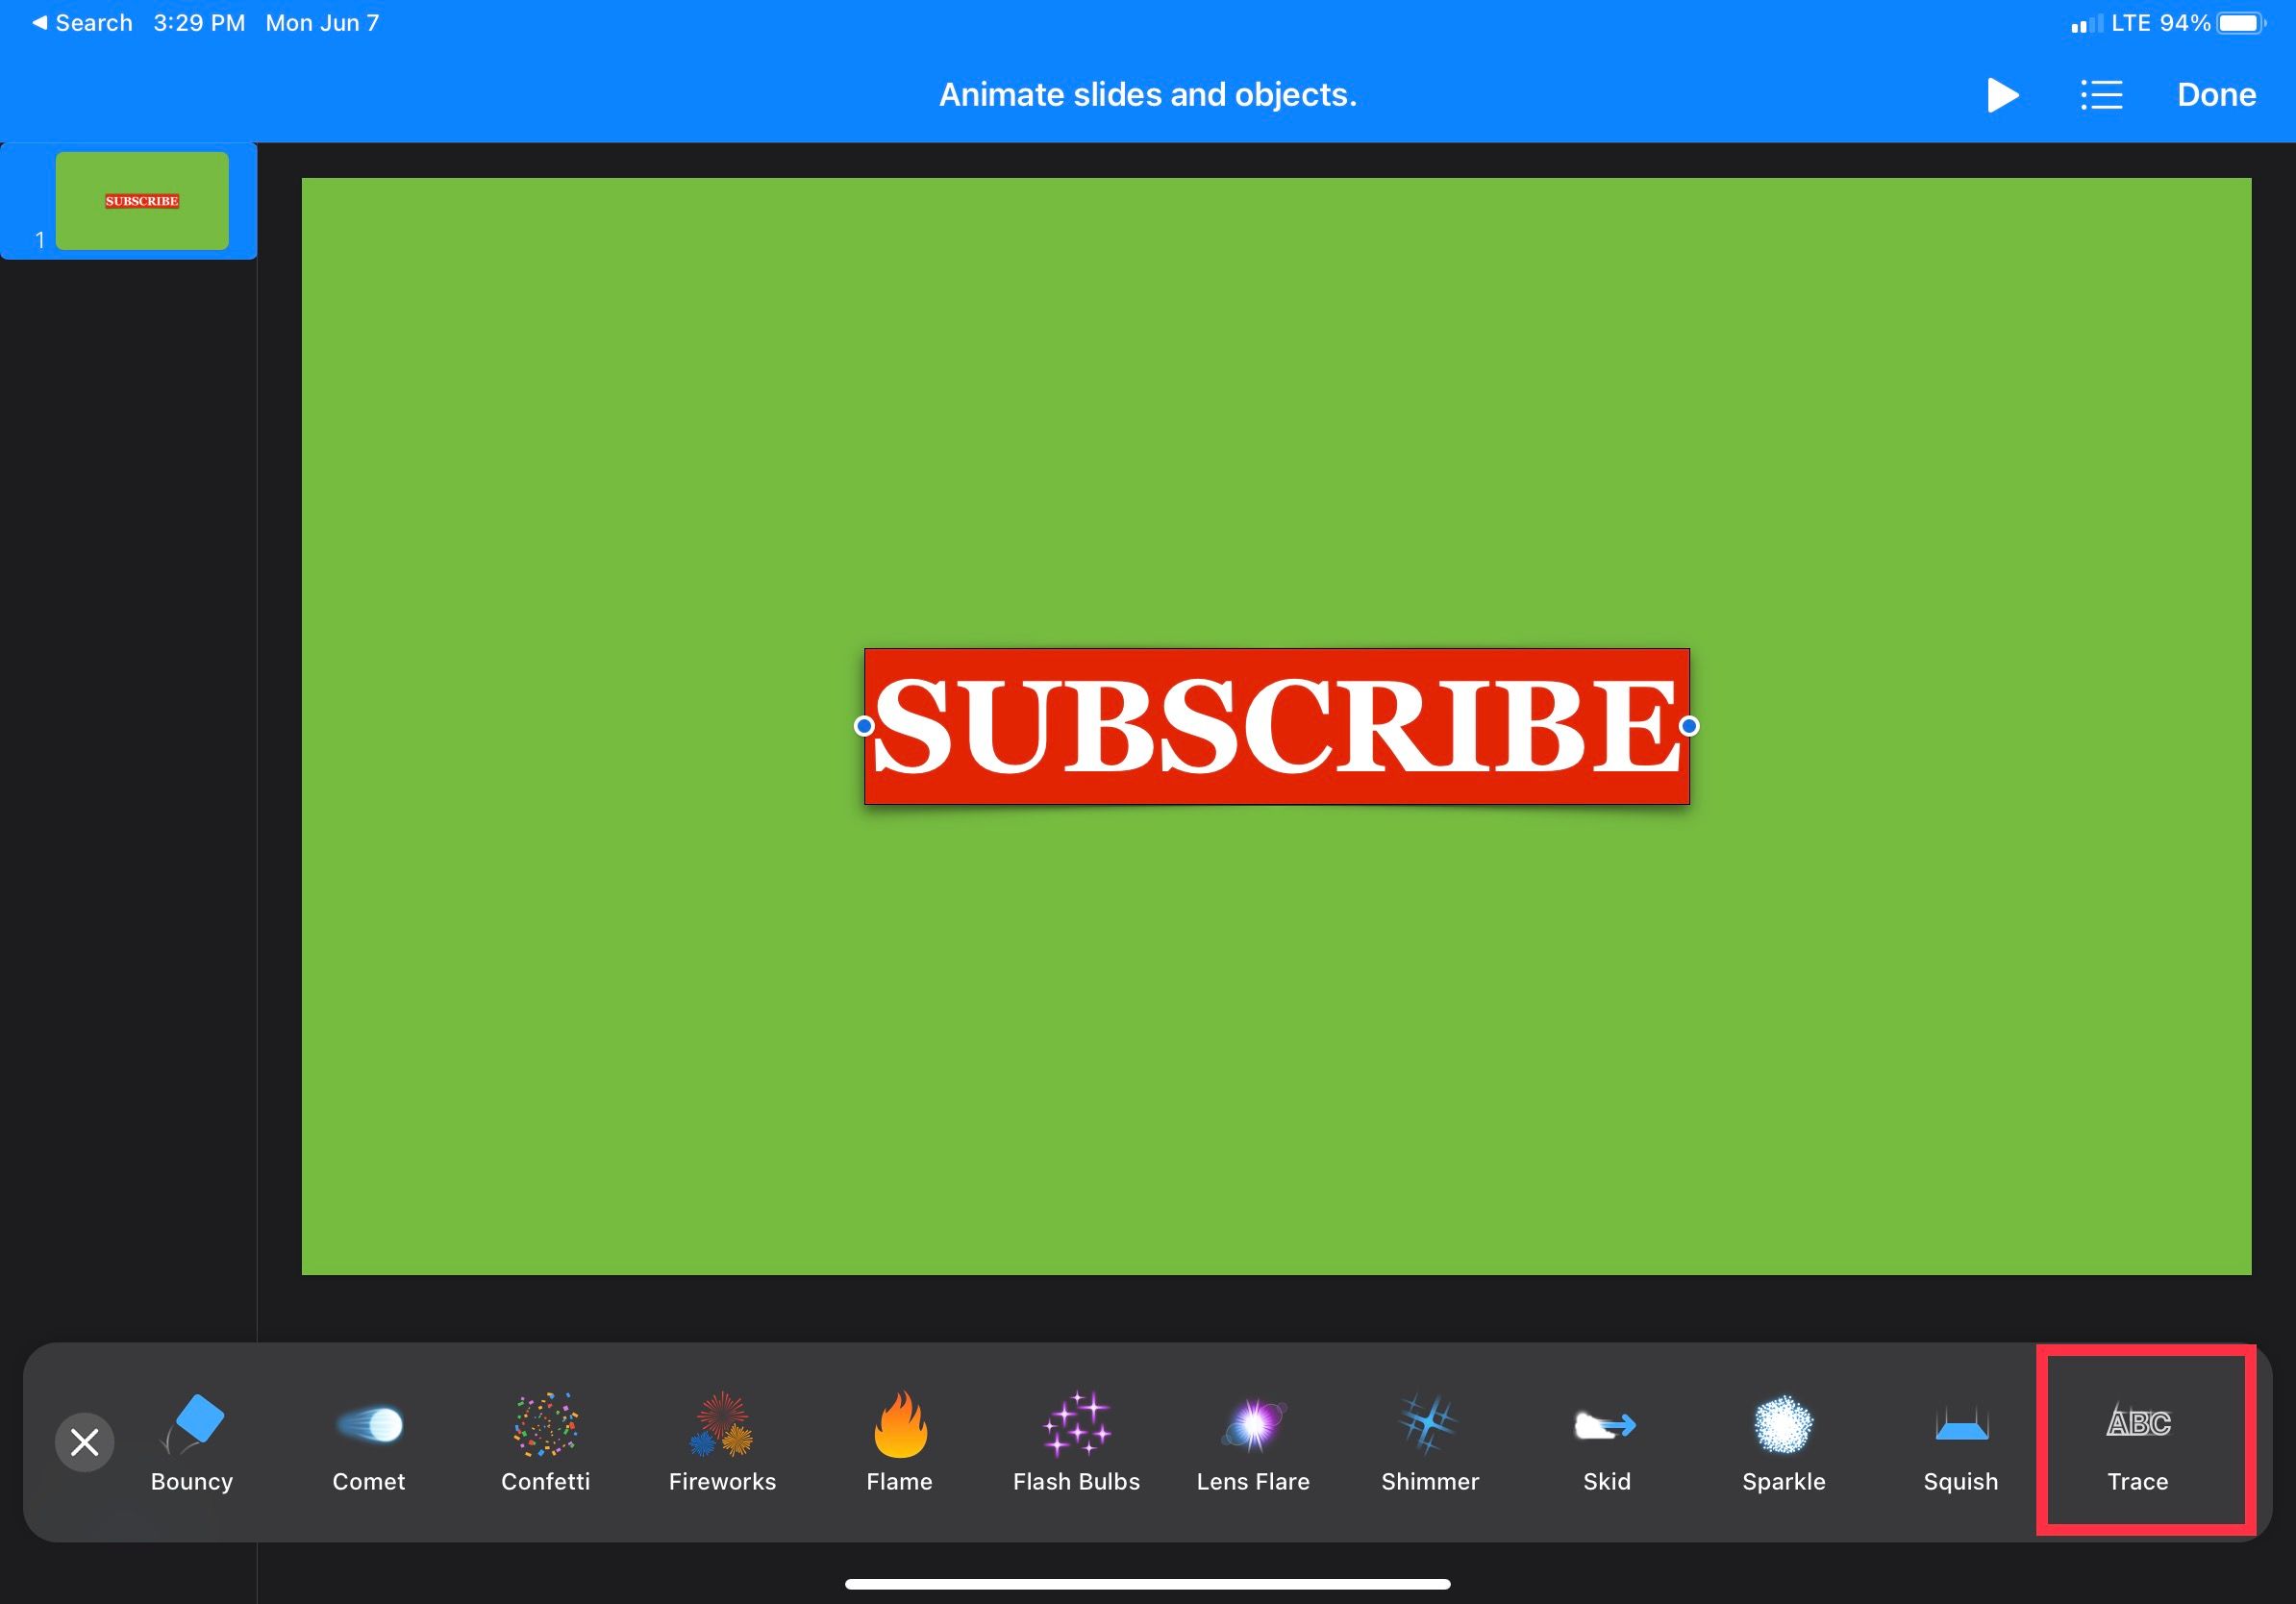
After the build-in, hit the Action icon. From here, choose between Pop or Pulse, depending on how many "button presses" you want. After selecting, you can hit the X and change the parameters for the duration and scale to your liking.
Finally, it's time to add the build-out. For this animation, select Trace again so that the visual language is consistent. If you don't like the Trace animation, choose from some of the other great options. Just make sure the build-in and build-out are the same, so it's uniform.
You're done! In just a few minutes, you've made yourself a stylish and straightforward subscribe button.
How to Add Your Keynote Animations to Your Video Editor
Now that you have these animations in Keynote, how do you actually use them in your video? You'll need to export them from Keynote once you're satisfied with them.
To do this, hit the three-dot button at the top-right and select Export. Next, choose to export the presentation as a movie. In the following menu, you can decide the resolution, the FPS (frames per second), and the delay for translations and taps, if you didn't determine those during the animation.
From there, save the video to your files or send it directly to your iPad video editor app. For this example, let's see how to load the file into LumaFusion and get it running. When exporting, select the Send to LumaFusion option to have it the appear in the LumaFusion editor automatically.
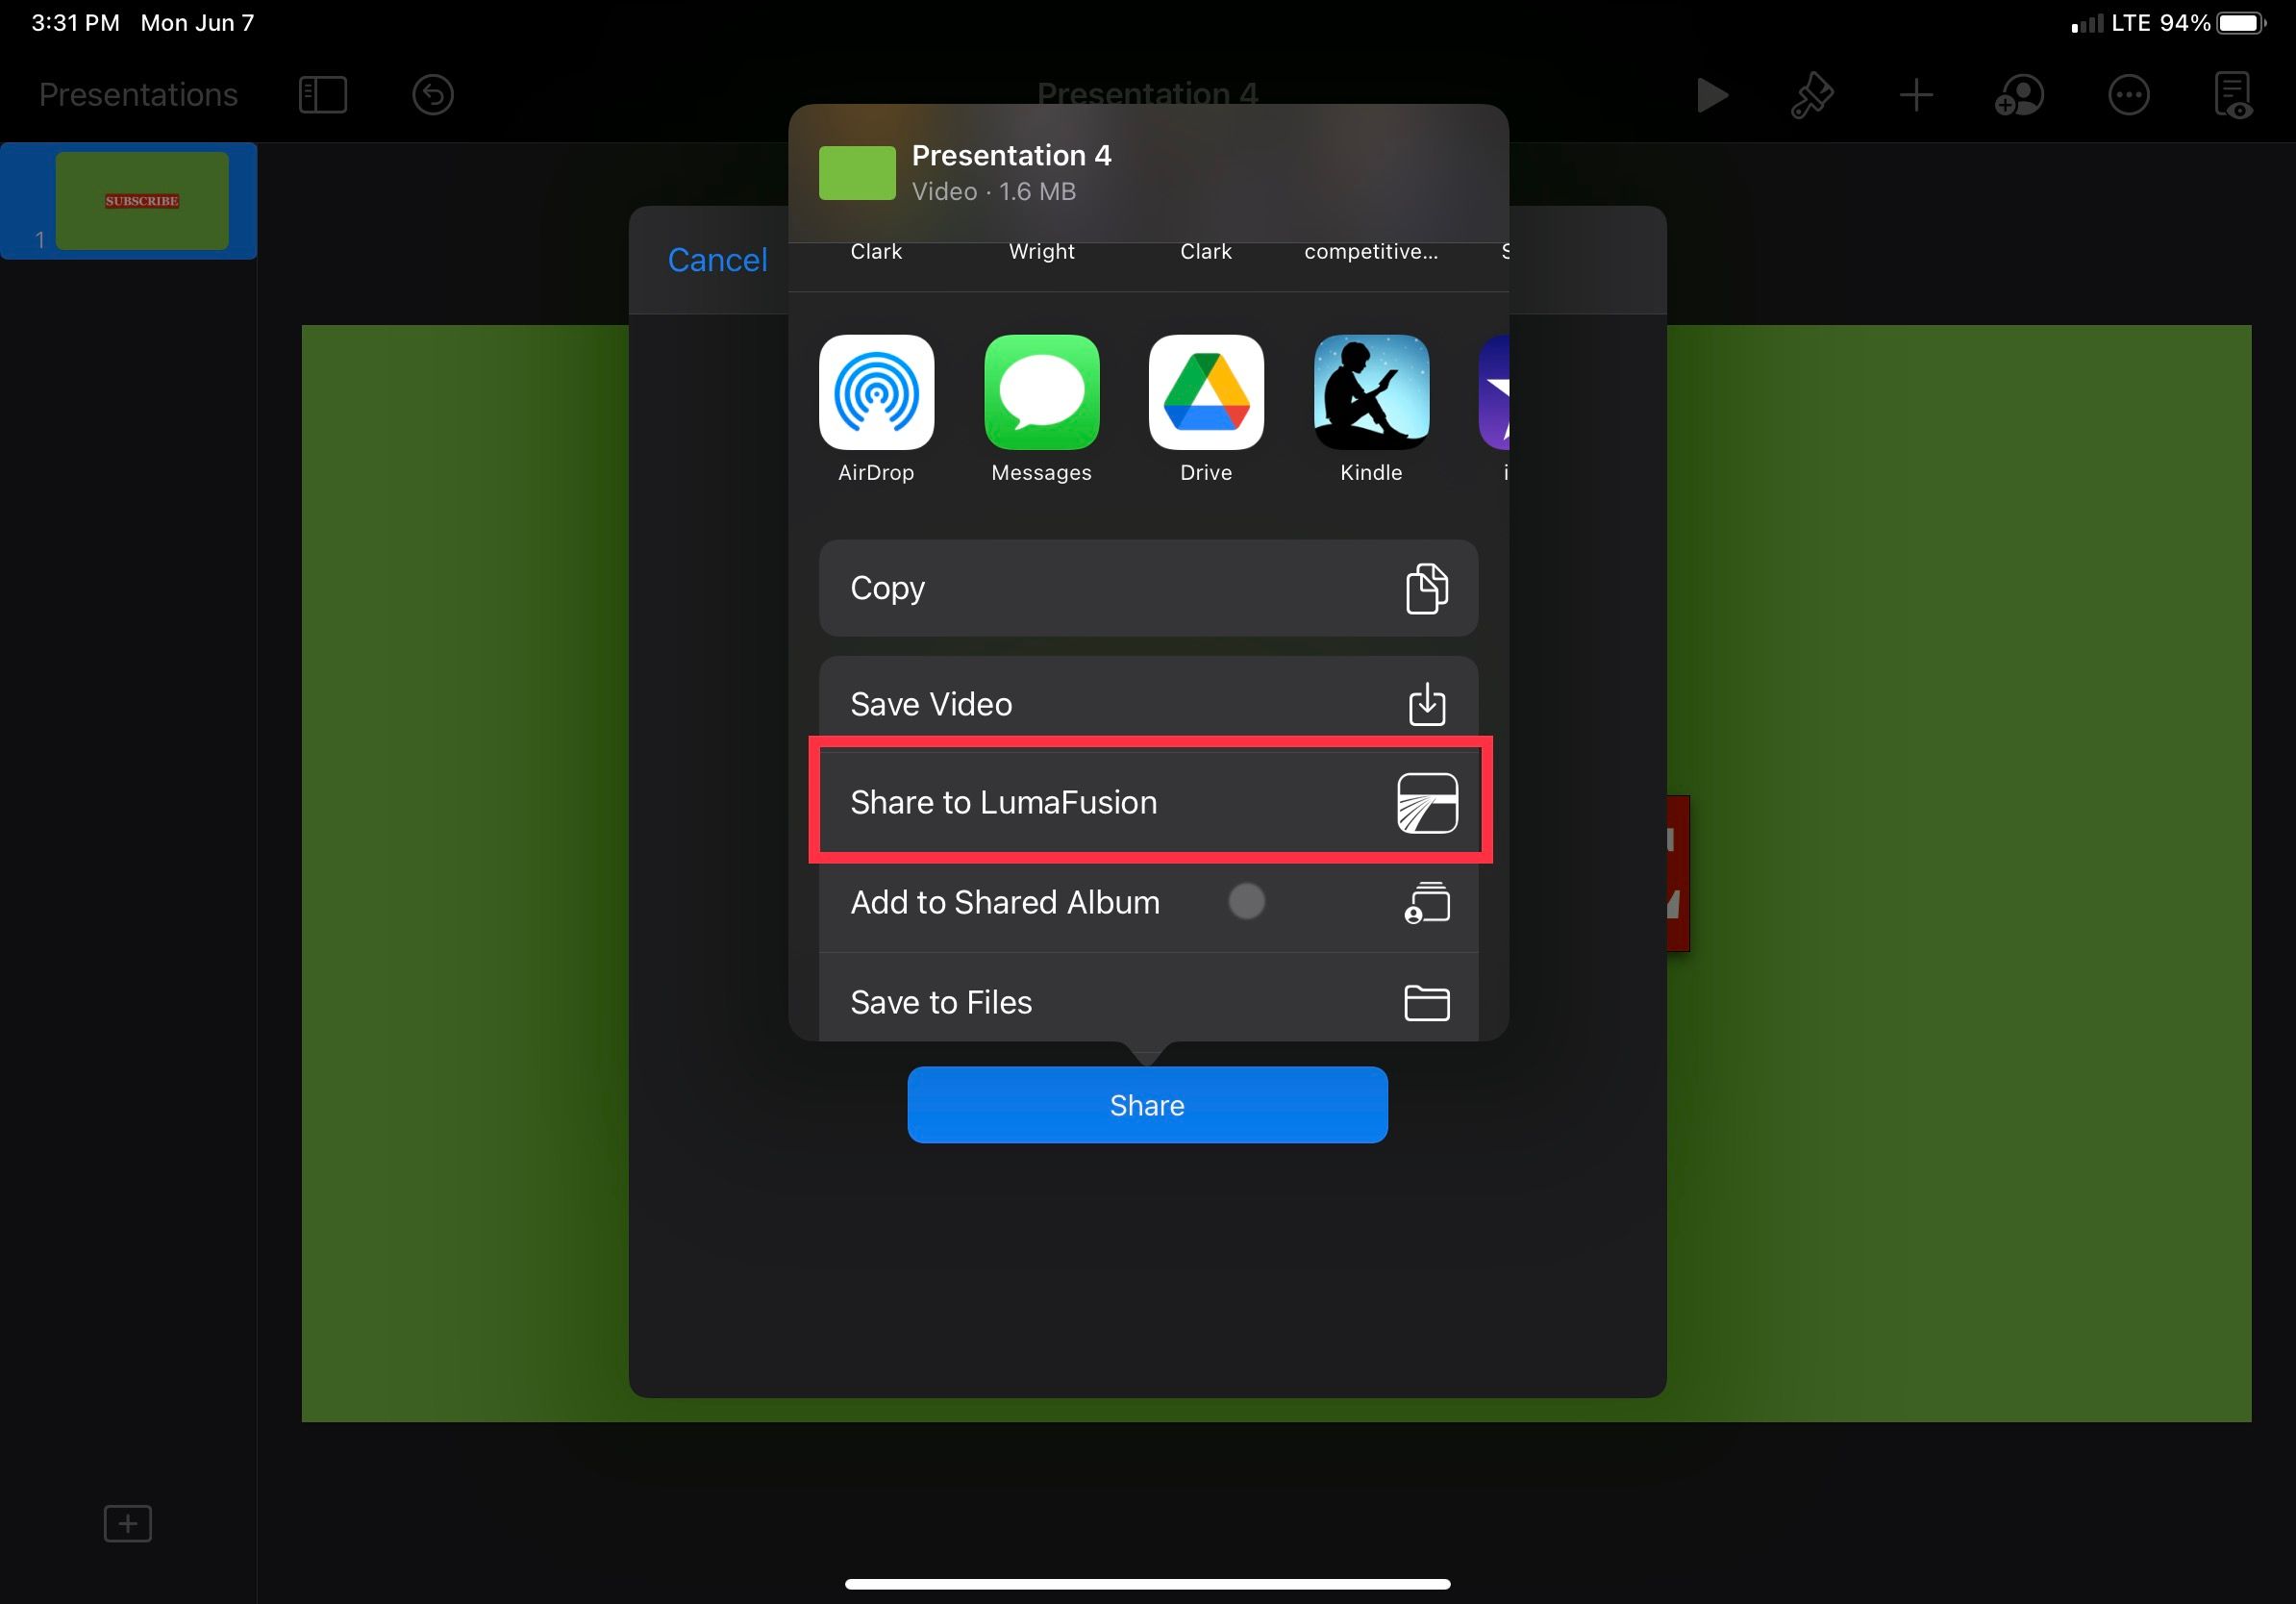
Next, open LumaFusion and then add the animation video to the timeline. With the video still selected in the timeline, tap on the pencil icon at the bottom of the screen. This will take you into the effects menu.
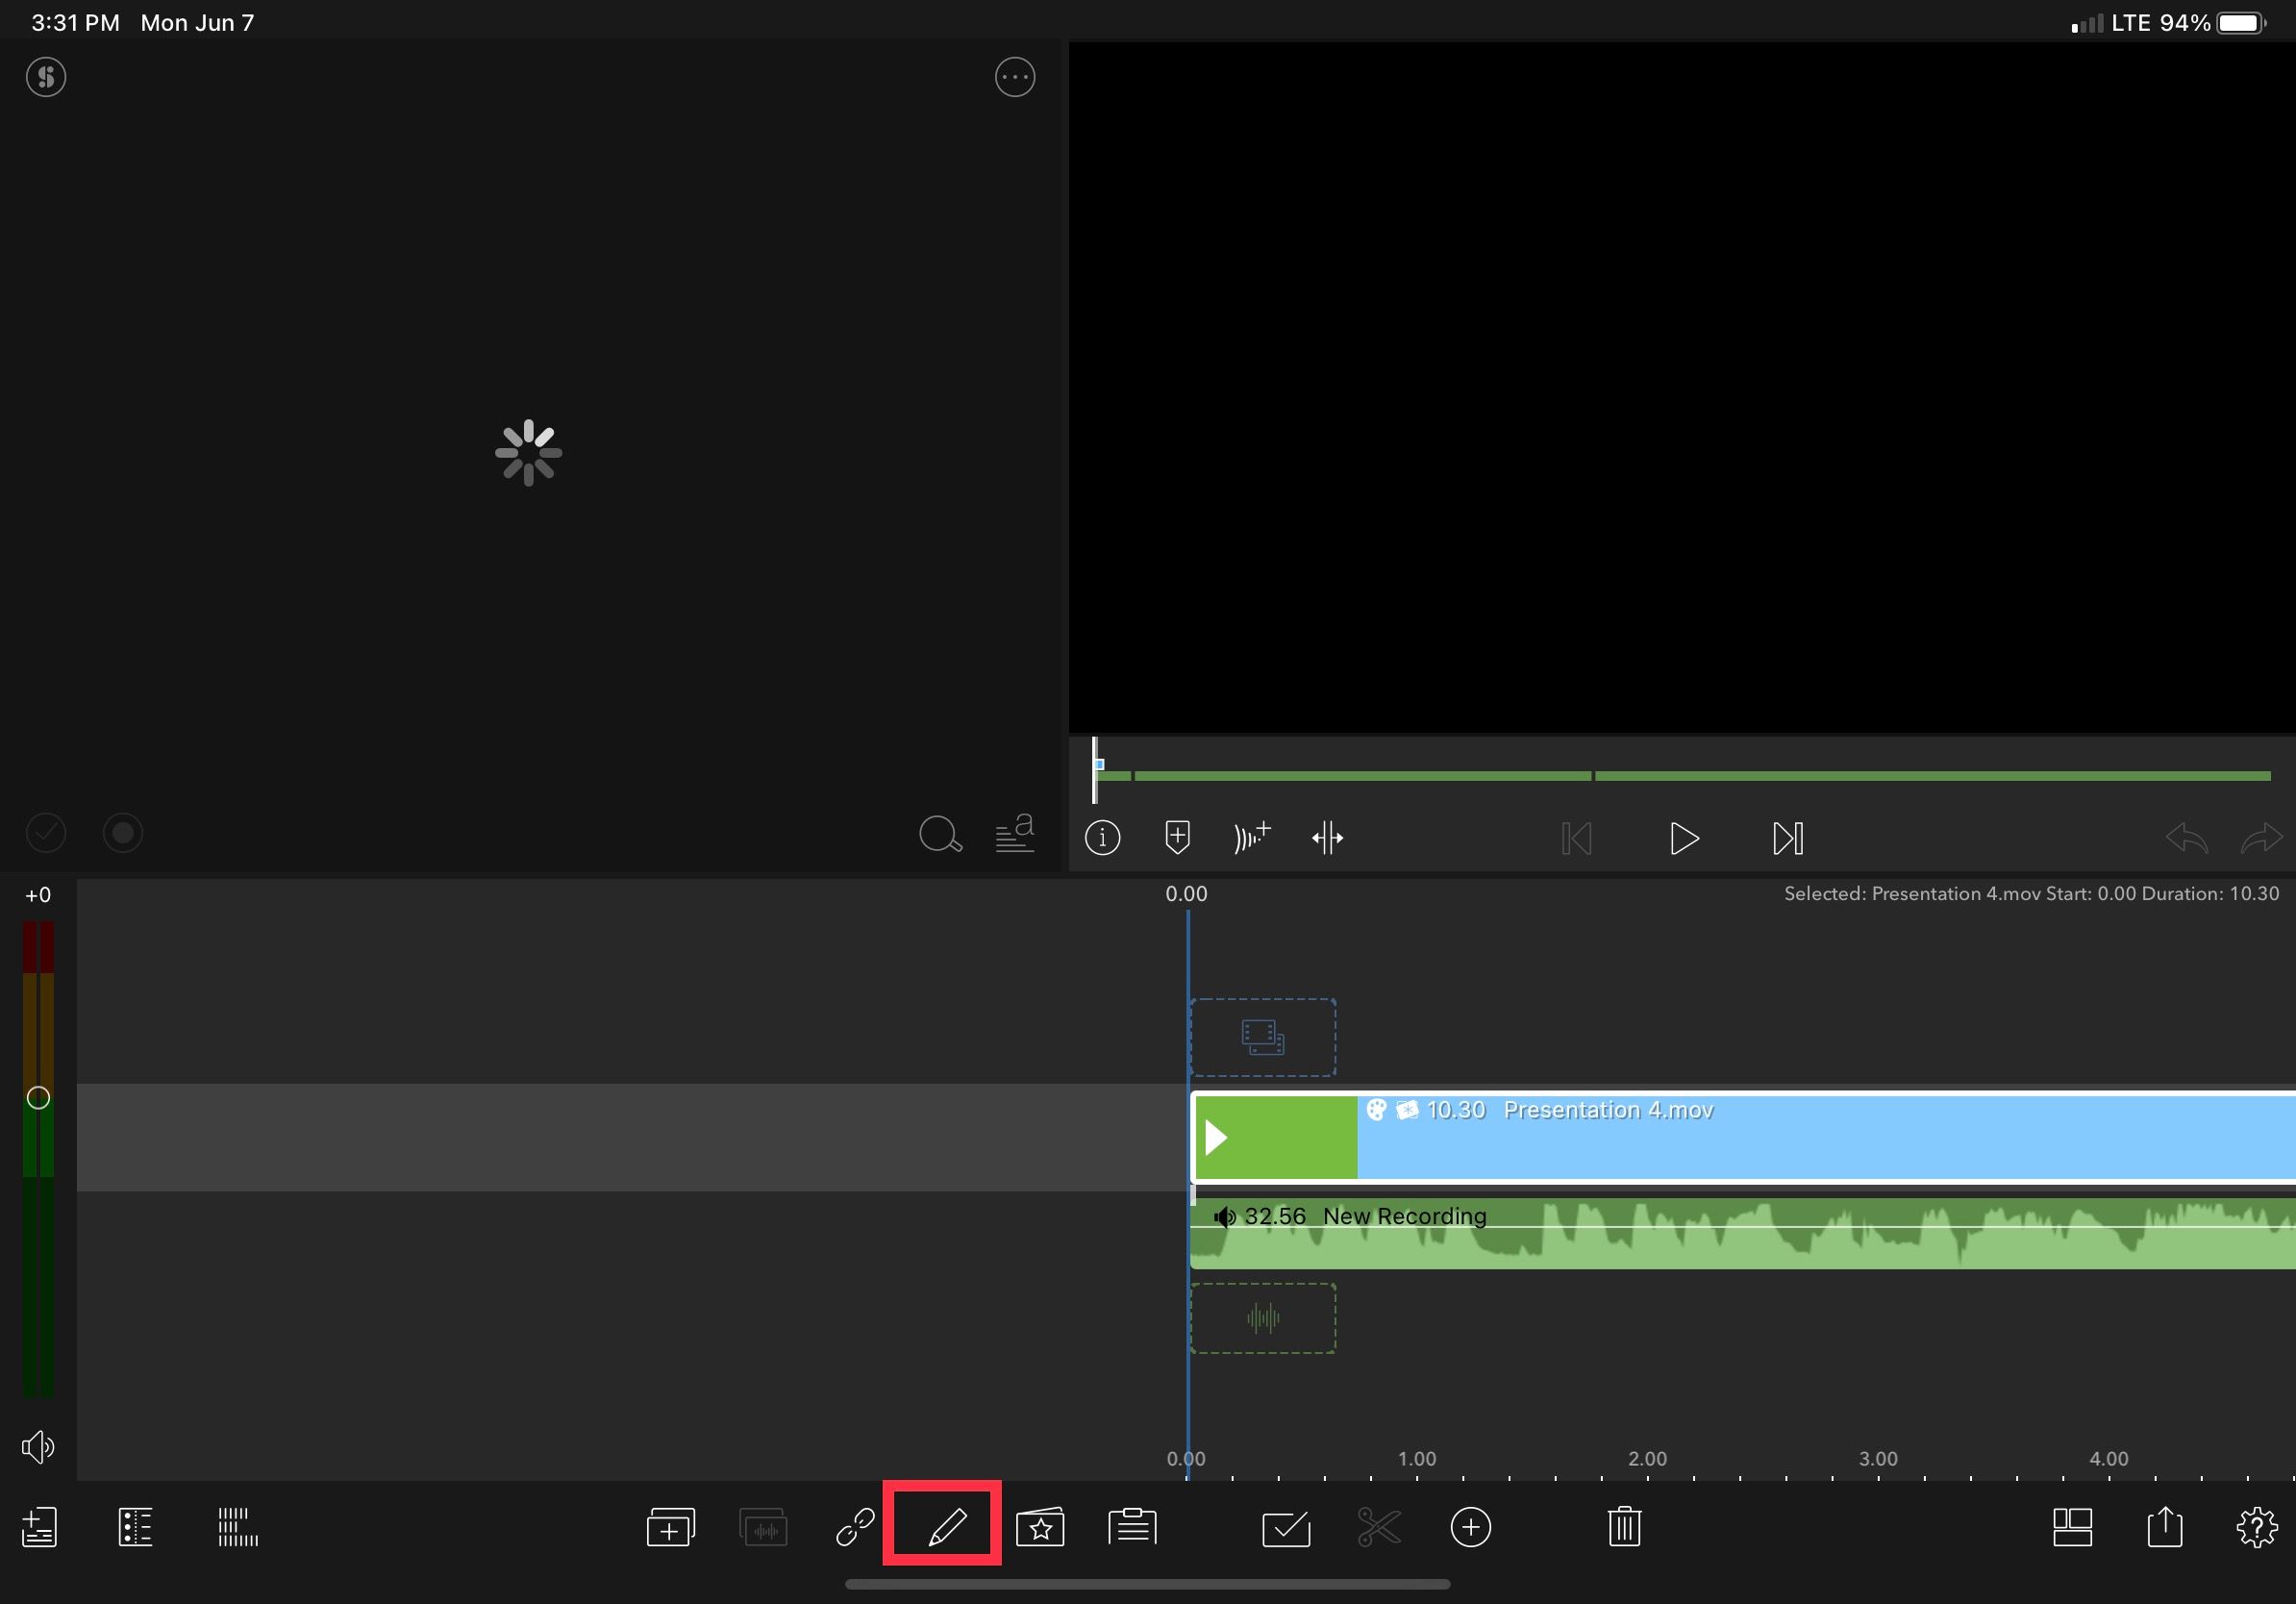
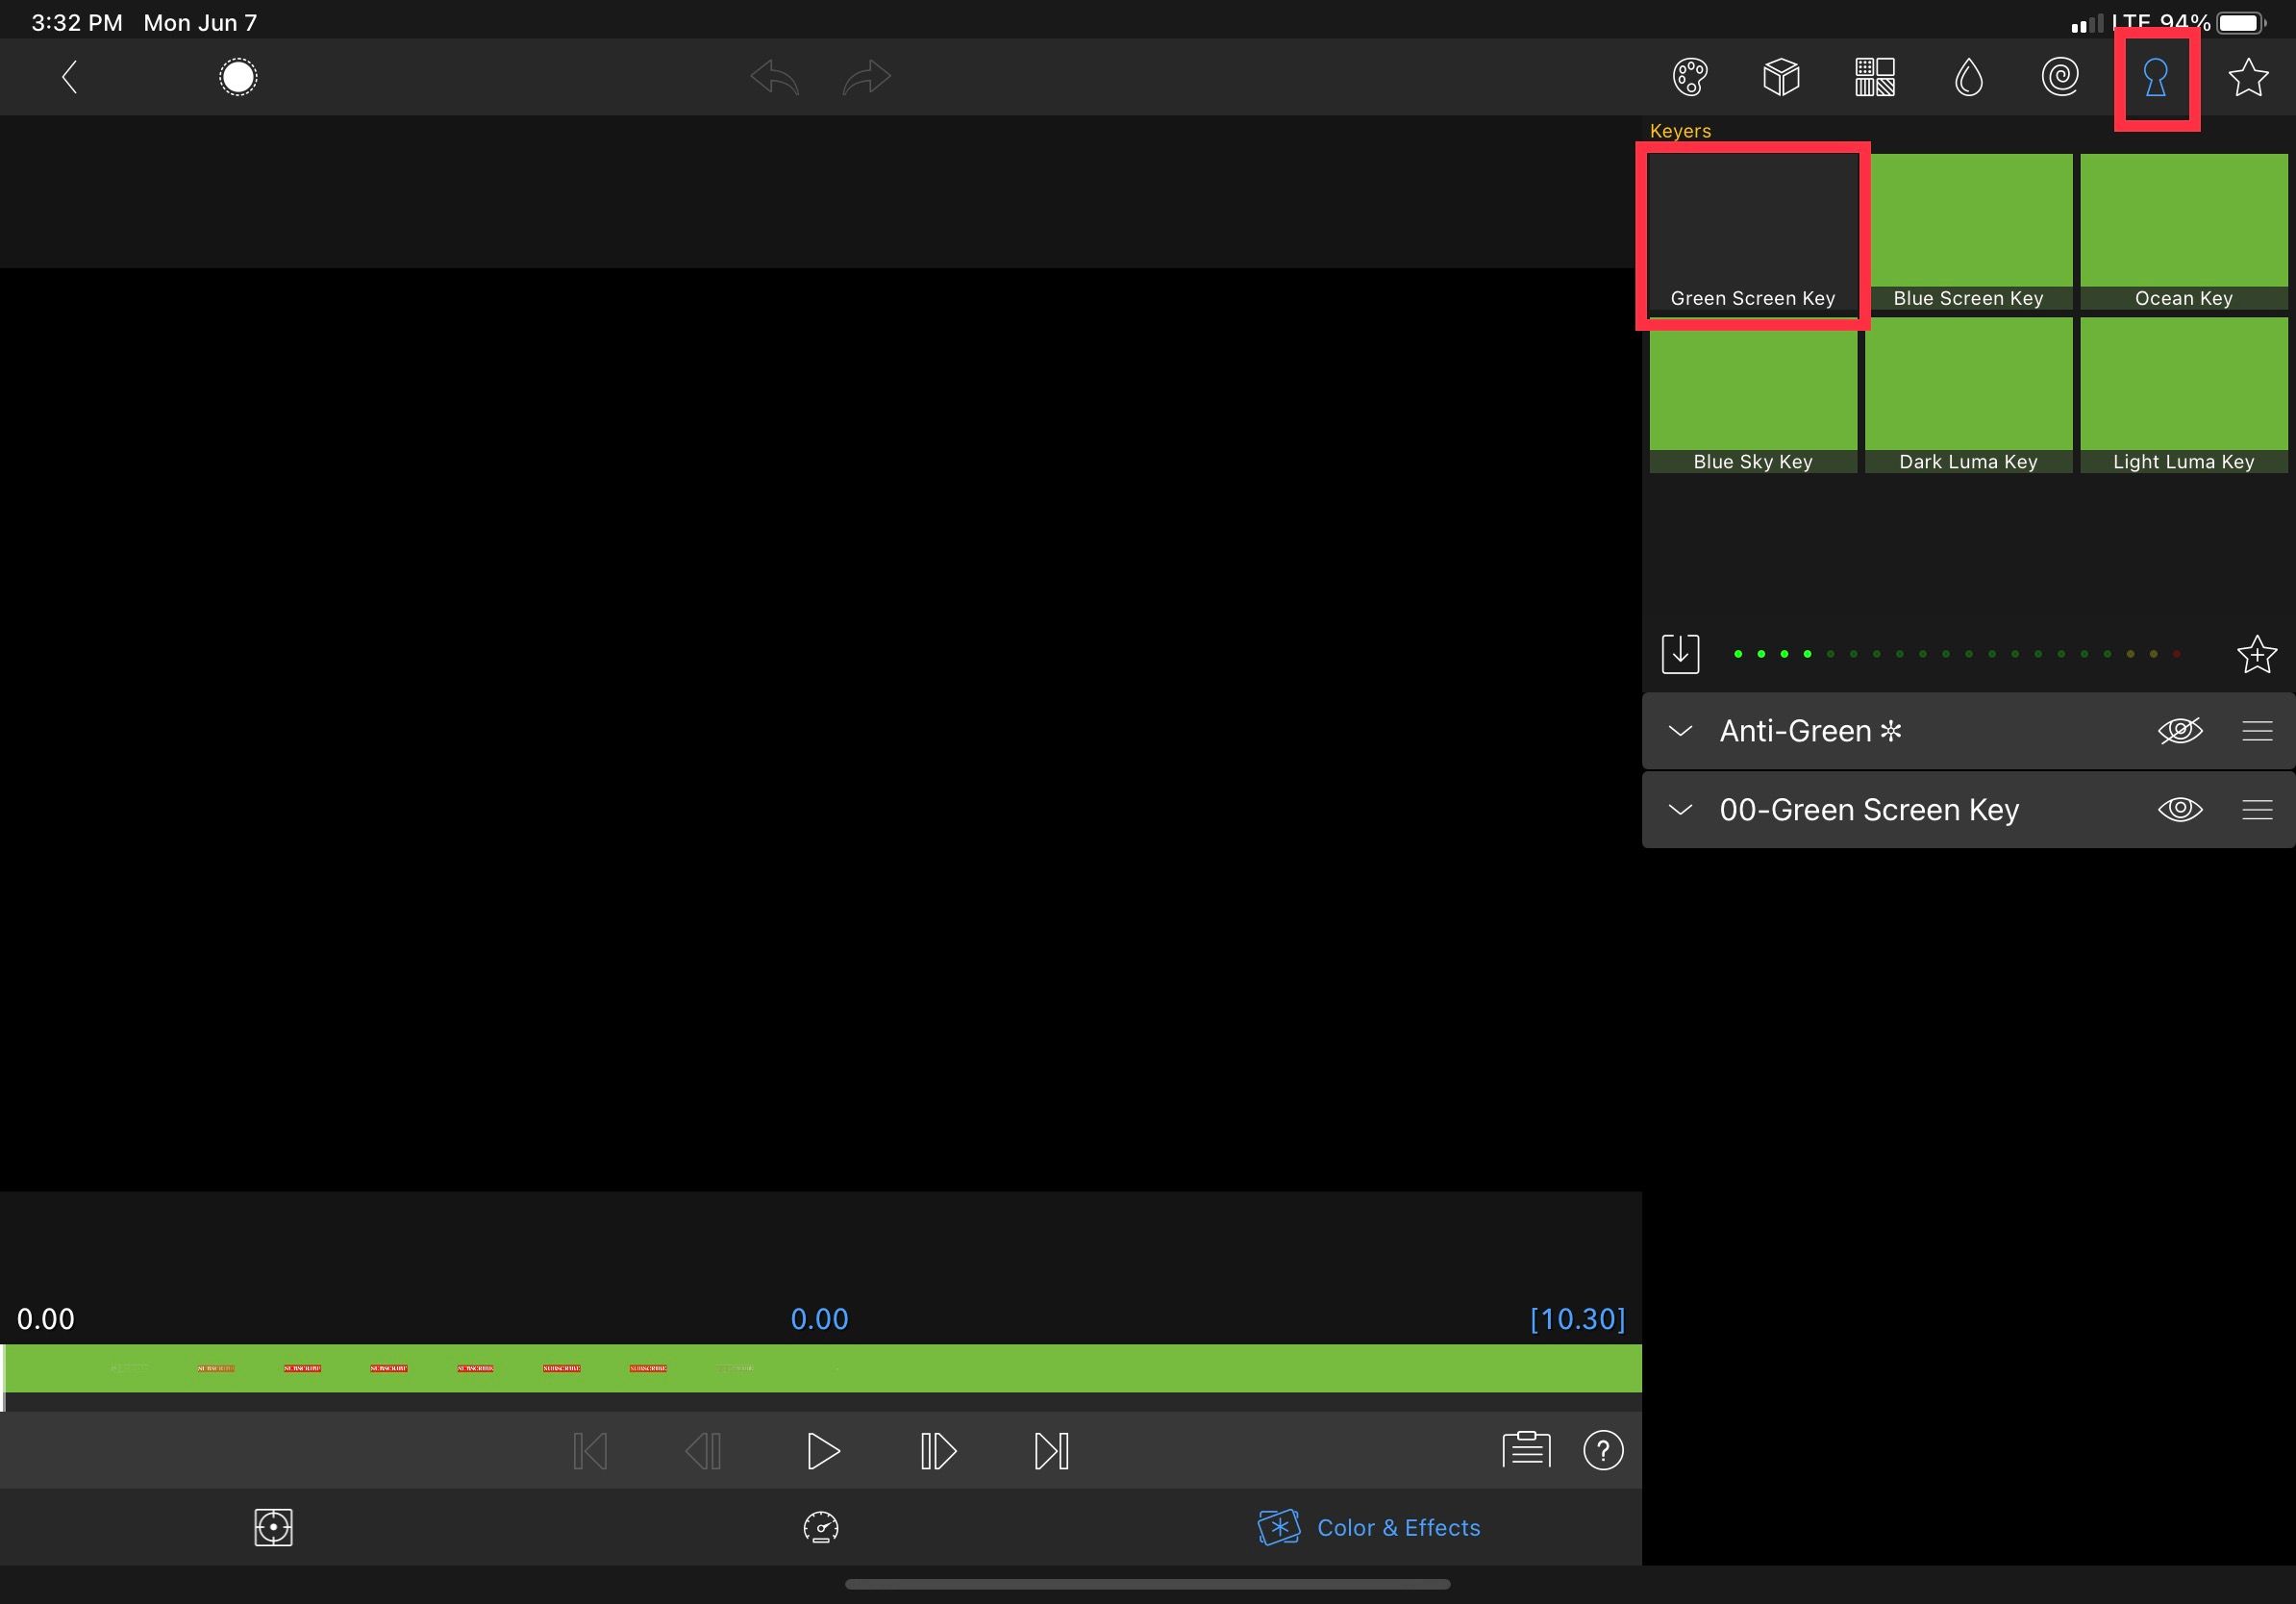
At the top-right of the screen, you'll see several icons. These open different menus for the various types of effects LumaFusion can overlay onto your video files.
Select the second from the far-right, which looks like a keyhole. The first effect is called Green Screen Key. Tap on this, and it will automatically remove the green background on your animation. This is why it was important to add the green screen earlier; without this, it would be more difficult to separate the animation from the background.
Just like that, you're all set up with a fancy animation for your videos. It only took you a few minutes to do it, wasn't overwhelming, and looks great.
Animation Made Easy With Keynote on iPad
Animation doesn't have to be scary for new video makers, especially if you're working on an iPad. Keynote will let you build simple animations with a green background quickly and effectively. Then you can easily export those animations to your favorite video editor. Using its built-in green screen key effects to remove the background, it's easy to give your videos a professional look with little effort.
There are a lot of possibilities using Keynote, so don't be afraid to experiment and see what cool visuals you can come up with. As you gain experience, you'll be able to add complex graphs and even build entire animated videos within the app.

0 Comments