Windows 10 has a great way to display important alerts: notification banners. While they might be a bit annoying at certain times, you might still need them, so you don’t miss out on messages from coworkers or appointments from your calendar.
So, here's how you fix Windows 10 when your notification banners stop working.
1. Turn On the Notification Banner
Maybe a third-party app disabled notifications or you changed it so you can focus better and forgot about it. Turning it back on doesn’t take a lot of time if you follow these steps:
- Click Start > Settings. Or you can use the Windows key + I keyboard shortcut to access the Settings menu.
- Select System.
- From the left-hand menu, click Notifications & actions.
- Turn on the toggle below Get notifications from apps and other senders.
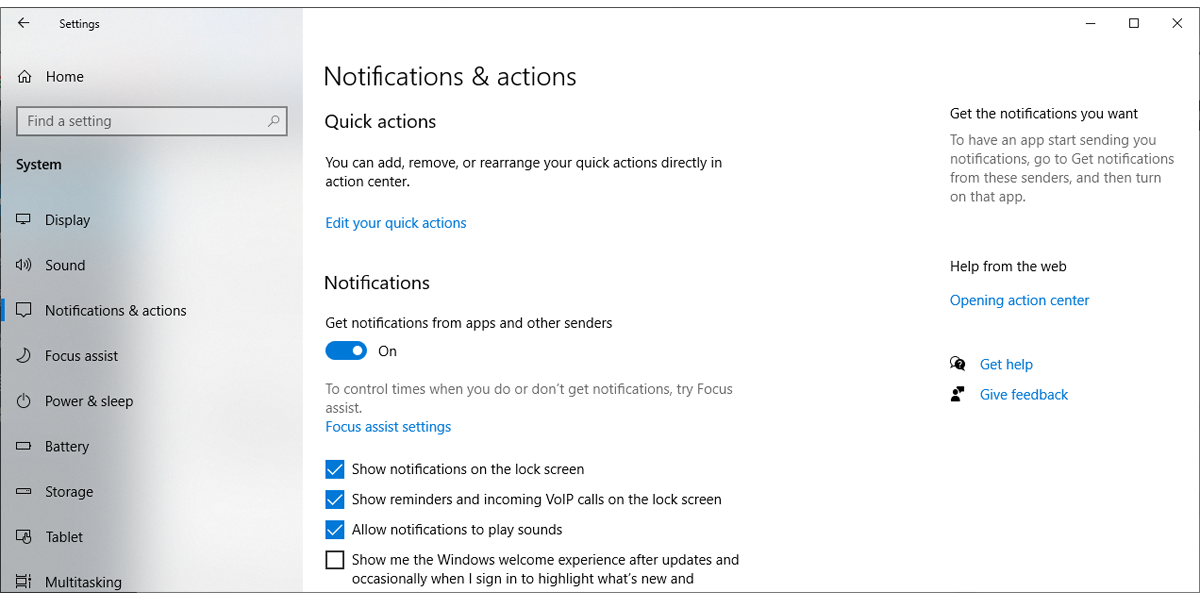
If you still don’t receive notification banners from the most important apps, you will have to check their settings individually. Here is how you can do it:
- Follow steps 1-3 from the first section to access the Notification & actions menu.
- Scroll down to Get notifications from these senders.
- Turn on the toggle next to the app that you want to receive notifications from.
- Check if the On: Banners message appears under the app’s name.
- If the message is missing, click the app and check Show notification banners.
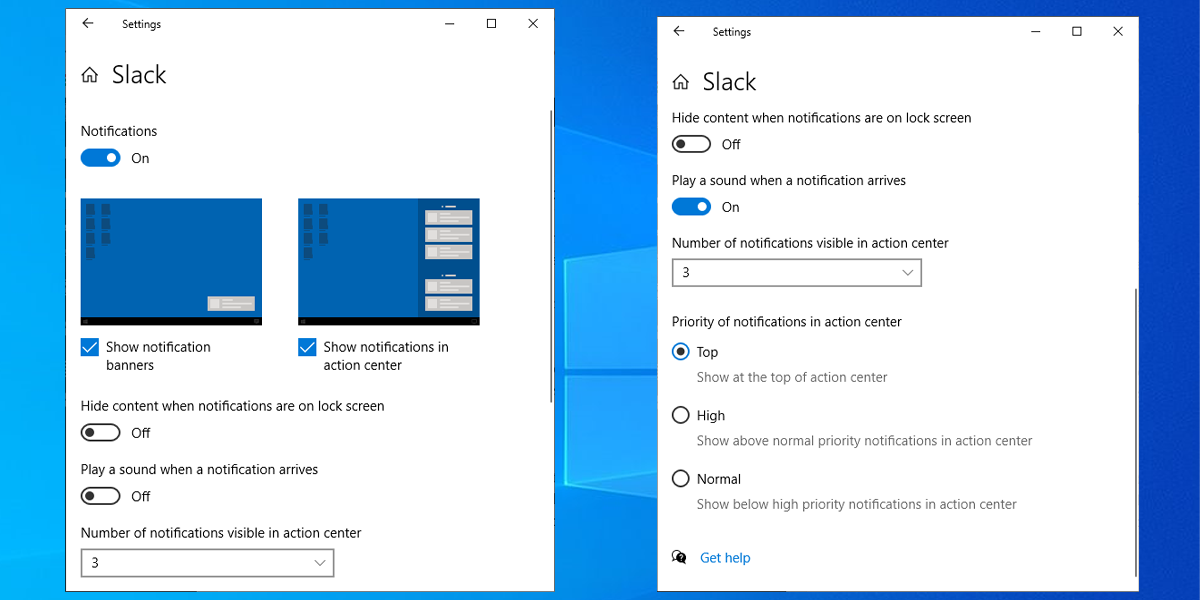
If you want notifications from a certain app to really stand out:
- Check Show notifications in action center.
- Turn on the toggle for Play a sound when a notification arrives.
- Select High below Priority of notifications in action center.
2. Turn Off Focus Assist
Focus Assist is a Windows 10 feature that turns off notifications on your device. If you have turned it on, you will not get any notifications, except for alarms. Here is how you can check its current status:
- Click Start, then head to Settings > System.
- From the left pane, select Focus Assist.
- Make sure the Off option is selected, so you get all notifications.
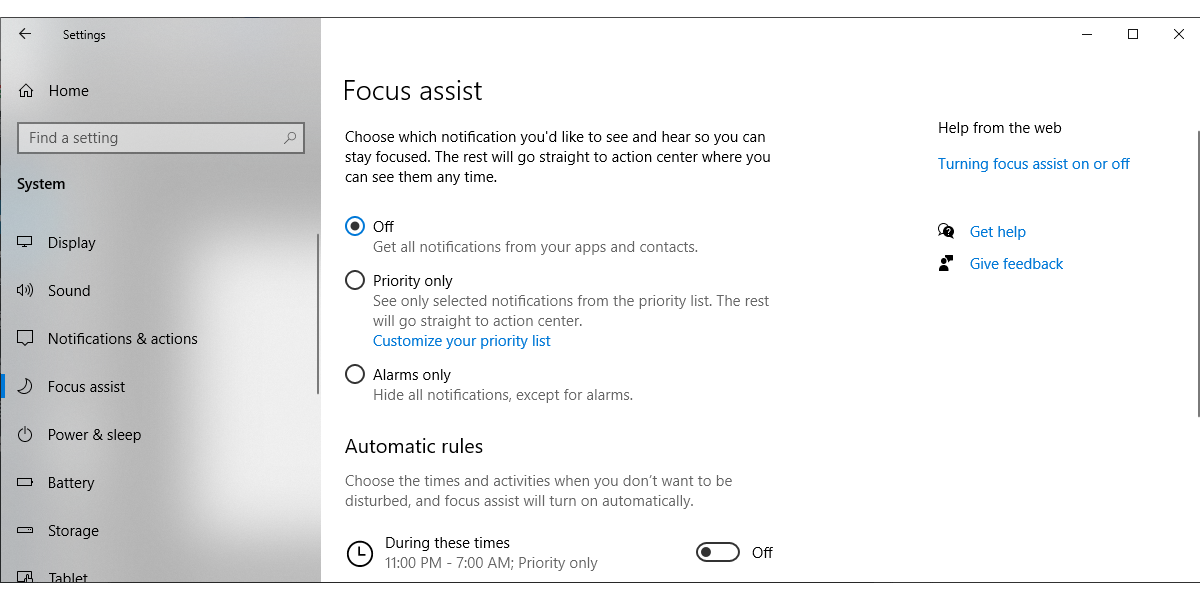
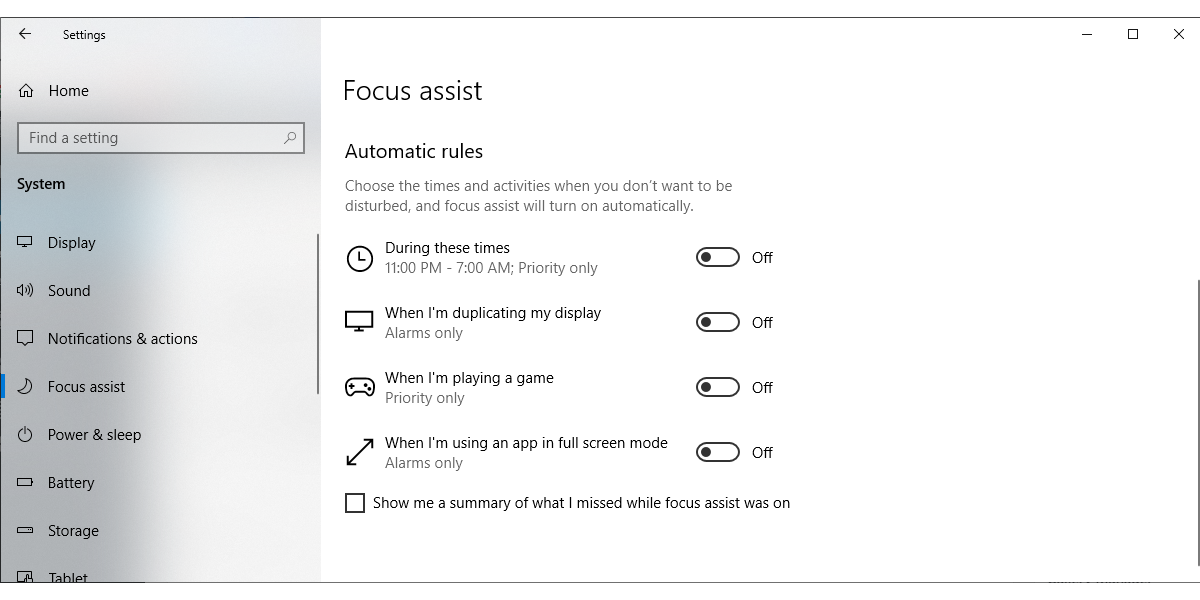
Check the Automatic rules section to make sure Focus Assist doesn’t turn back on by itself. You can turn it off for all options.
You can also check Focus Assist’s status by opening the Action Center.
3. Allow Apps to Run in the Background
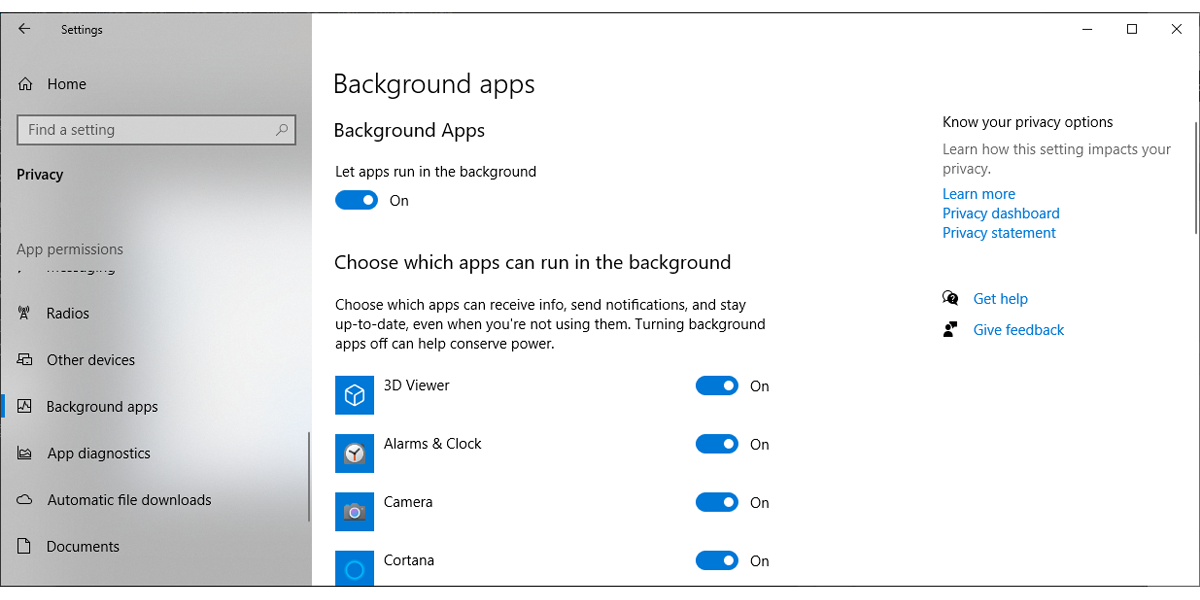
Windows 10 can’t display notification banners from an app if that app isn’t allowed to run in the background. Here is how you can check if you are using the right settings:
- Click Start, then head to Settings > Privacy.
- From the left pane, select Background apps.
- Turn on the toggle below Let apps run in the background. If it’s already enabled, turn it off and turn it back on.
- Now, scroll down to Choose which apps can run in the background and turn on the toggle next to the app that should display notification banners.
4. Check Battery Settings
Windows 10 Battery saver mode might be the reason you are not getting any notification banners. When it turns on, it limits notifications and background activity. Here is how you can check its settings:
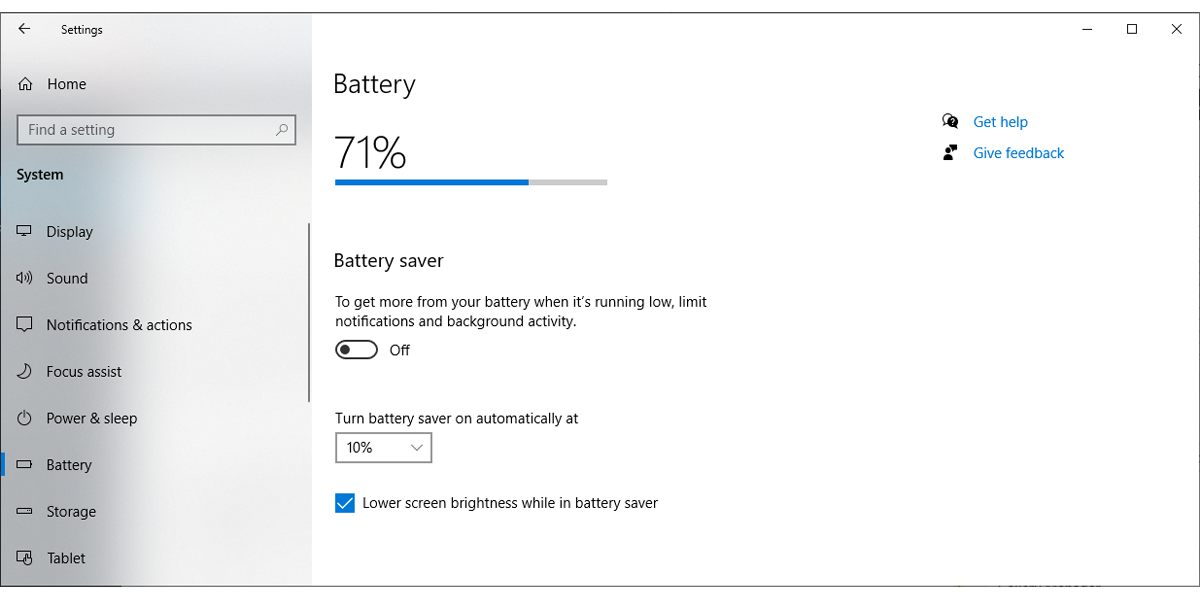
- Click Start, then head to Settings > System.
- From the left pane menu, click Battery.
- Turn off the toggle below Battery saver.
- Restart your PC or laptop and check if Windows 10 displays notification banners after this change.
5. Check Notifications Settings in Ease of Access
There is a chance everything works as it should be, but you might just miss the notifications banners. This could happen if Windows 10 displays them only for a few seconds and you are focusing on something else.
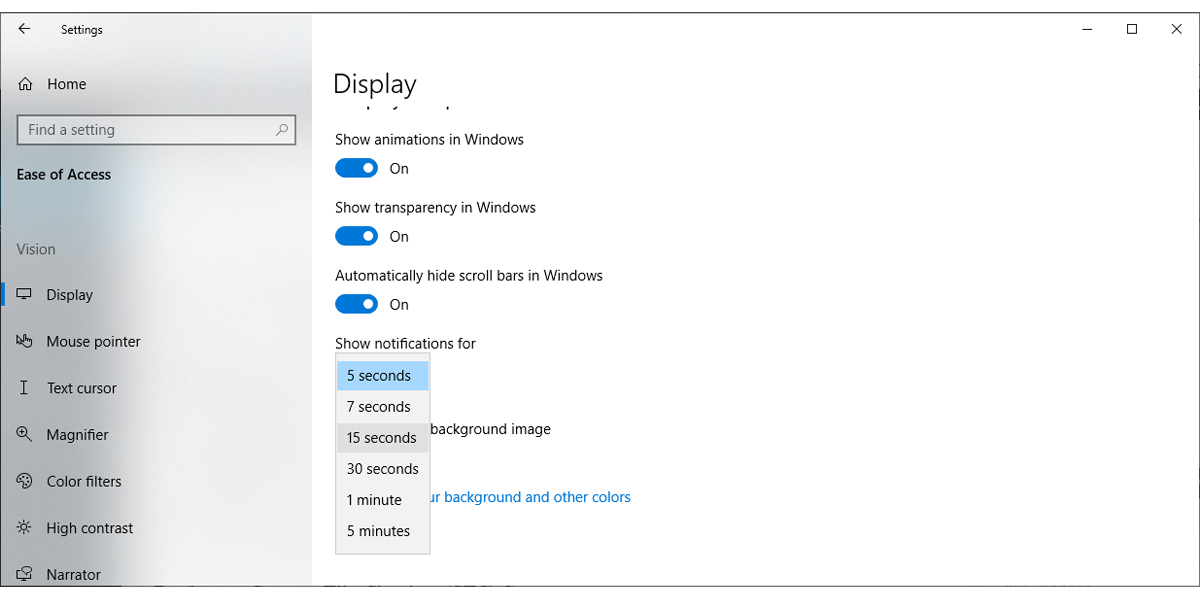
Here is how you can make Windows 10 display notifications for a longer period:
- Click Start, then head to Settings > Ease of access.
- From the left pane menu, select Display.
- Scroll down to Simplify and personalize Windows.
- Use the drop-down menu below Show notifications for to select for how long Windows 10 displays notifications.
6. Perform a System File Checker (SFC) Scan
There is a chance Windows 10 doesn’t display notification banners because of a corrupt file. System File Check scans and fixes any corrupt files on your system. But before running SFC, it is best to run the DISM command to ensure the system image the System File Check uses for comparison isn't corrupt.
Follow these steps to search and fix corrupt files on your device:
- In the Start menu search bar, search for command prompt and select Run as administrator.
- Within the Command Prompt window, input Dism /Online /Cleanup-Image /RestoreHealth.
- Wait for the scan to complete and fix any issues. Then input sfc/scannow.
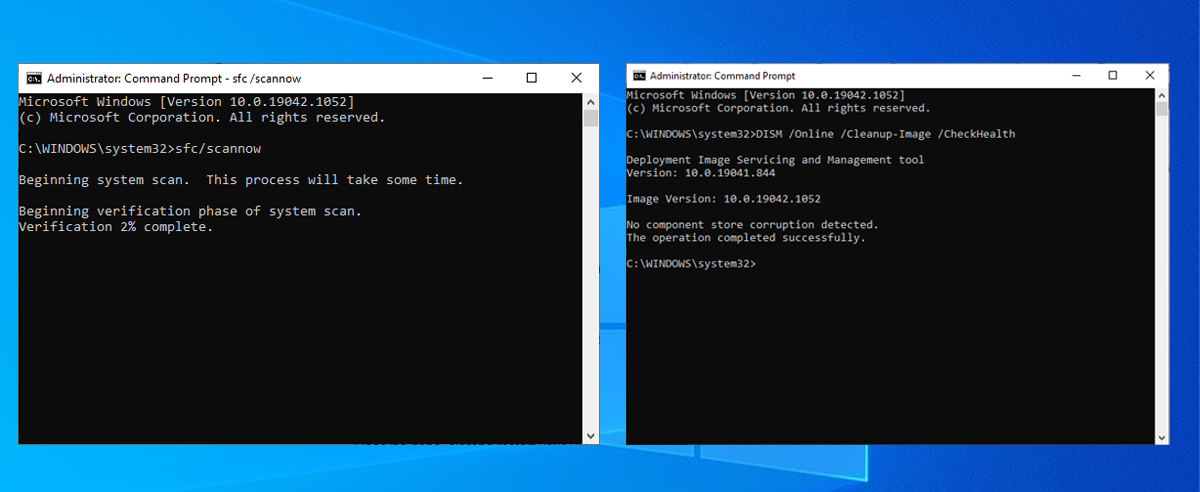
The process might take a while, but it will find and replace any corrupt files. Once it’s done, close Command Prompt and restart your PC.
7. Restart Windows Explorer
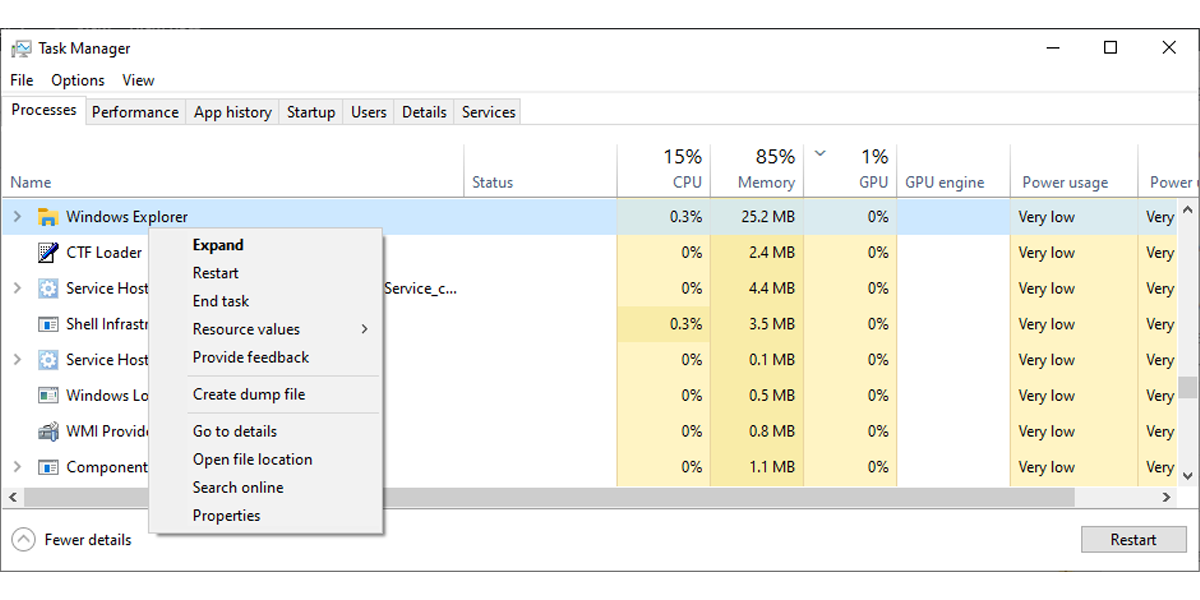
Sometimes, notification banners might not work because of a glitch within Windows Explorer. However, you can restart it using these steps:
- In the Start menu search bar, search for run and select the Best Match.
- Type taskmgr and click OK to access Task Manager.
- Select the Processes tab.
- Right-click Windows Explorer and select Restart.
- Restart your device and check if this solution fixed the problem
8. Check Registry Editor Settings
In Windows 10, you can turn on or off notification banners using the Registry Editor. Here is how you can check its settings:
- In the Start menu search bar, search for regedit and select Run as administrator.
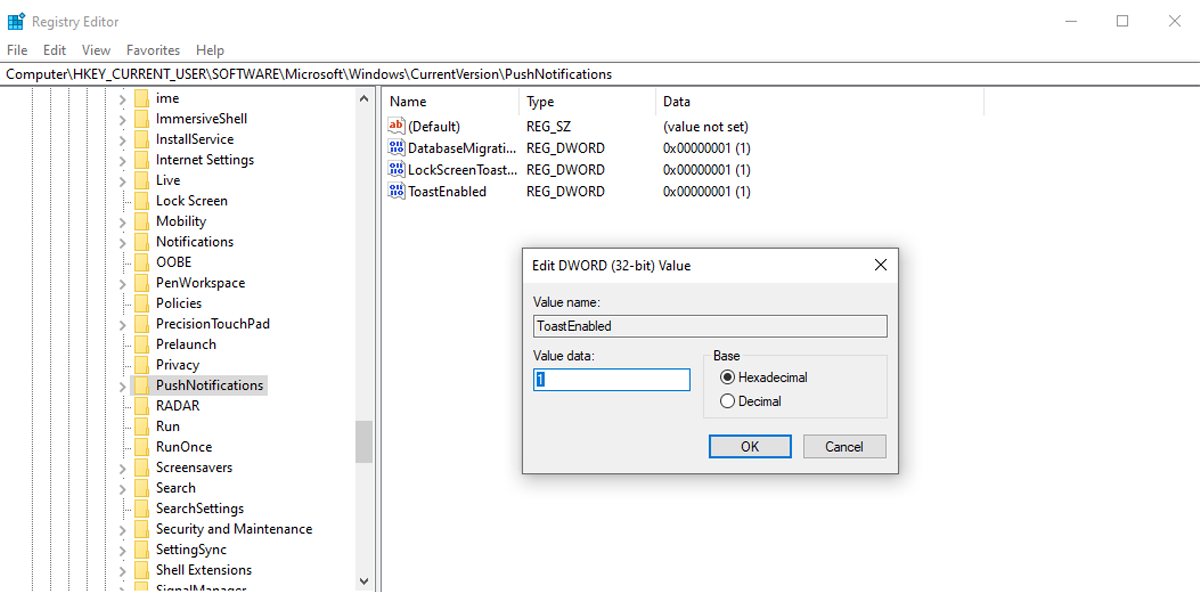
- Head to HKEY_CURRENT_USER > SOFTWARE > Microsoft > Windows > Current Version > Push Notifications.
- Open ToastEnabled.
- Set Base to Hexadecimal and Value data to 1.
- Restart your device.
By default, Windows 10 displays notification banners at the bottom of the screen. However, you can use Registry Editor to display them at the top of your screen. Here is how you can do it:
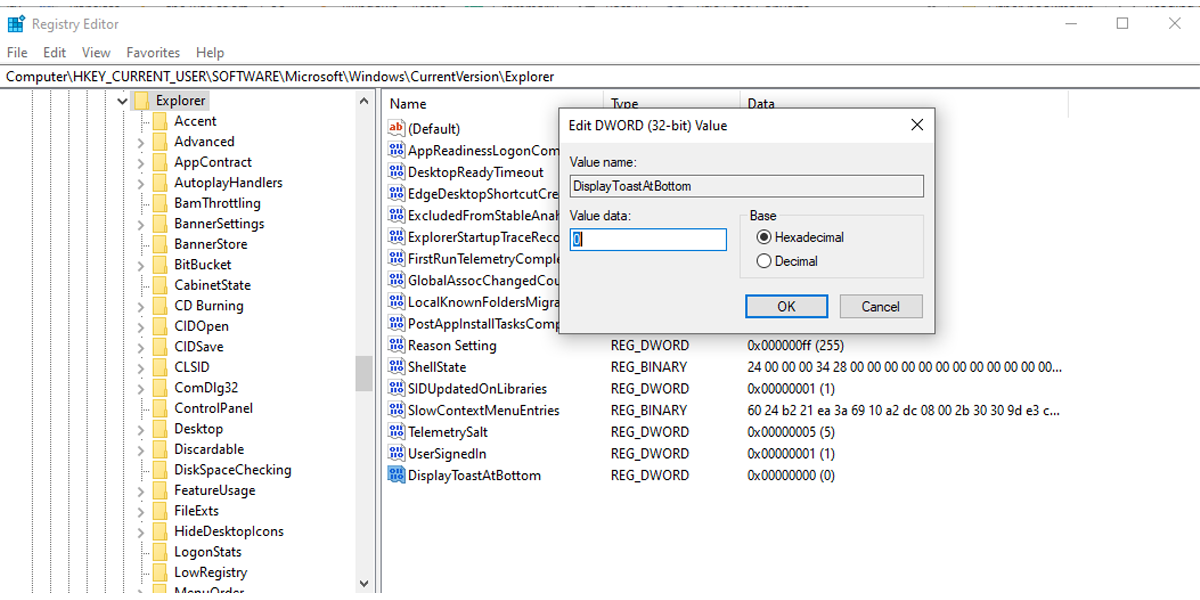
- After you open Registry Editor, head to HKEY_CURRENT_USER > Software > Microsoft > Windows > CurrentVersion >Explorer.
- Right-click Explorer and create a new DWORD value by clicking New > DWORD (32-bit) Value.
- Name it DisplayToastAtBottom.
- Set Base to Hexadecimal and Value data to 0.
Get Notification Banners Working Again in Windows
There are various reasons Windows 10 stops displaying notification banners. It might be an incorrect system setting, a third-party app, or an outdated Windows 10 version. Regardless of what caused this issue, the solutions mentioned within this article will help you fix it in no time.
0 Comments