
If you want your photos to look their best, you need to think about cropping. You might do this as you're taking your pictures, lining up key elements in a way you find pleasing.
You might also crop your photos in post-production, using a photo editing app like Photoshop. But you shouldn't crop your photos without some idea of why you're doing it and what effect you hope to achieve. Otherwise, you could end up making them look worse or reducing their overall quality.
In this guide, we look at a few key ways to crop photos like a pro.
1. Use the Rule of Thirds
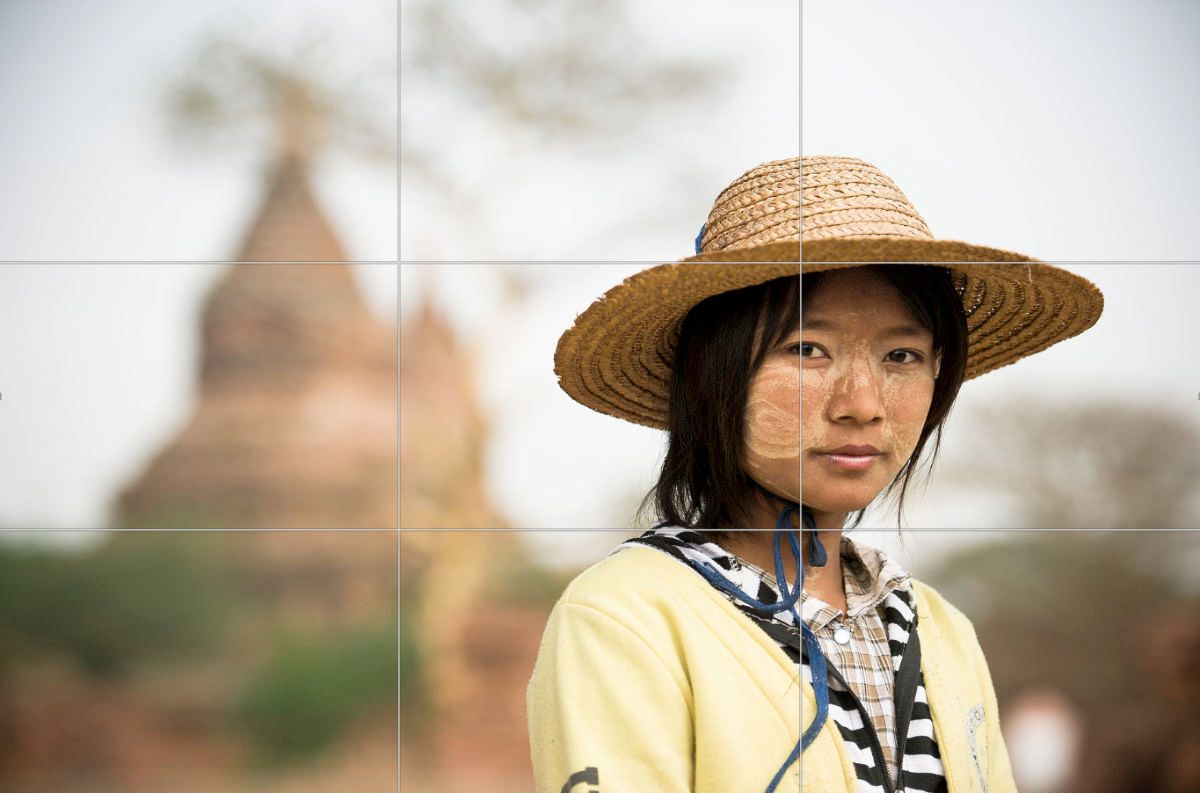
One common way of creating a good crop is to use the rule of thirds. This involves dividing your frame into three, both vertically and horizontally, creating a grid of nine. With that grid, you should aim to position the most important elements using these gridlines as a guide.
You see the rule of thirds used frequently in film and TV, where the subject appears in the left or right third of the screen. As you can see in our example, the subject occupies the right-hand side of the frame, with the other side left open. You might also want to consider using the golden ratio, also known as the golden spiral. In some cases, it can help you crop your photos even more effectively than the rule of thirds.
2. Try Cropping in Close
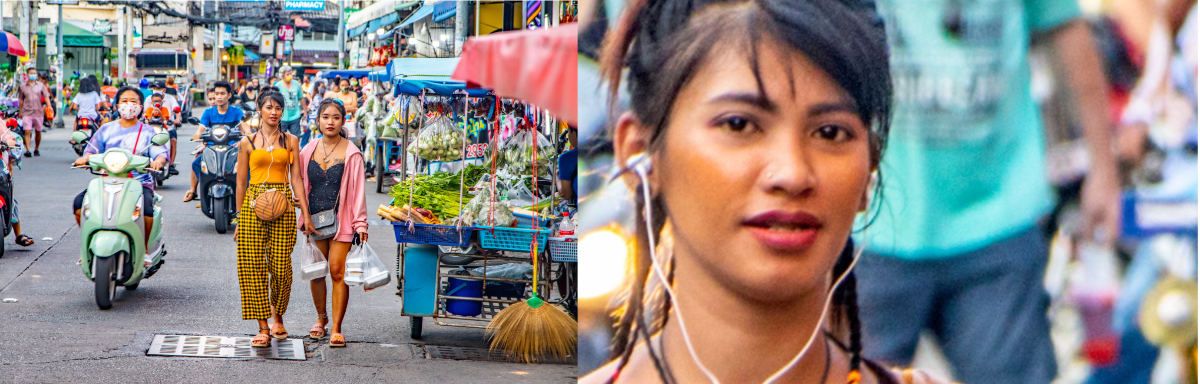
By getting right up close to your subject, you can create a sense of drama or intimacy. You can use this technique to focus on a particular person or object you want to draw attention to as well. It's better to do this with your camera than in a photo editing app, though.
That way, you won't lose so much quality when you crop in. But if you can't do that, you might be able to get away with a close crop in whatever photo editing software you're using.
3. Don't Overdo Your Cropping
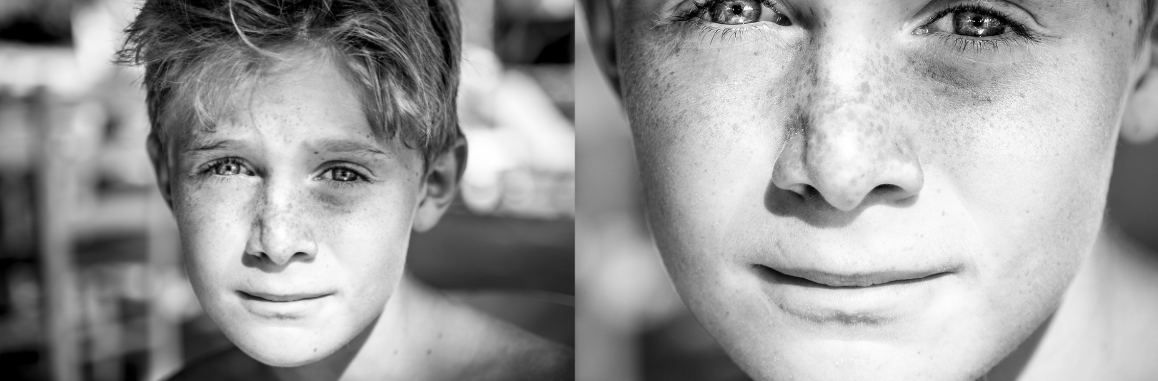
Although it can be good to get in close to your subject, you also need to know when to stop your crop. In this example, the original image already has a nice, close crop, which creates a striking, dramatic effect.
But if you overcrop it, as we've done in the second image, you'll lose the contrast with the background, and your subject can look off-balance. There are times when cropping in extremely close can work, but it should be done deliberately for effect. And you still need to think about the overall composition.
4. Keep the Resolution High
The more you crop, the more pixels you lose. Crop in too tight, and you might start to see pixelation. So it's important to take photos in high resolution and to keep your images at full size until you've finished cropping.
Once you've finished cropping your photo, you can resize it for whatever purpose you need. You might, for example, want a smaller-sized image to upload to social media. With this picture of a butterfly, the original photo size was small, so cropping in caused significant pixelation.
5. Keep the Horizon

The sky might just seem like a big old plane of nothing, but it can add a lot to your photos. Removing the skyline from a landscape photo usually makes it look worse, as you can see from this example.
Without the horizon, the image loses some sense of scale and perspective. Of course, you can use the rule of thirds to determine how much of the sky should be in your photo. Unless it's the effect you're going for, you don't want the sky to dominate too much either, so try to strike a good balance.
6. Crop With Your Camera
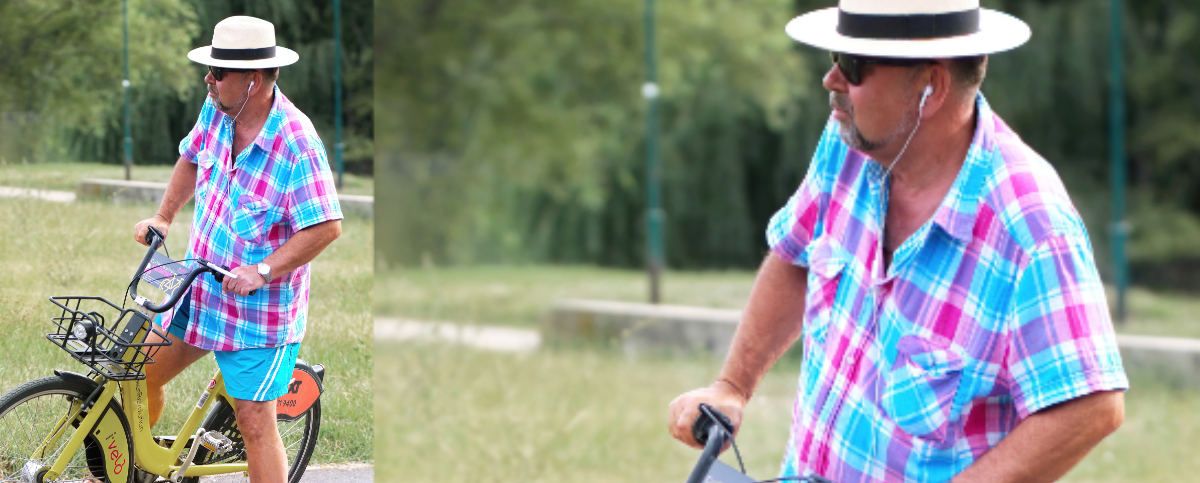
While you can crop photos in tools like Photoshop, you can save yourself a lot of work by just taking a well-composed shot in the first place. That way, you can avoid doing any cropping at all, and you're less likely to end up with blurred or pixelated photos.
If you take your photos on a smartphone, then you should avoid the habit of making them all portrait-oriented. Although portrait shots can be great in some cases, you should generally turn your phone around to landscape orientation.
If you take all your photos in portrait, you'll have less to work with later if you want a landscape image. As our example demonstrates, it's difficult to get a good landscape crop from a portrait image.
7. Use Your Software's Built-in Ratios
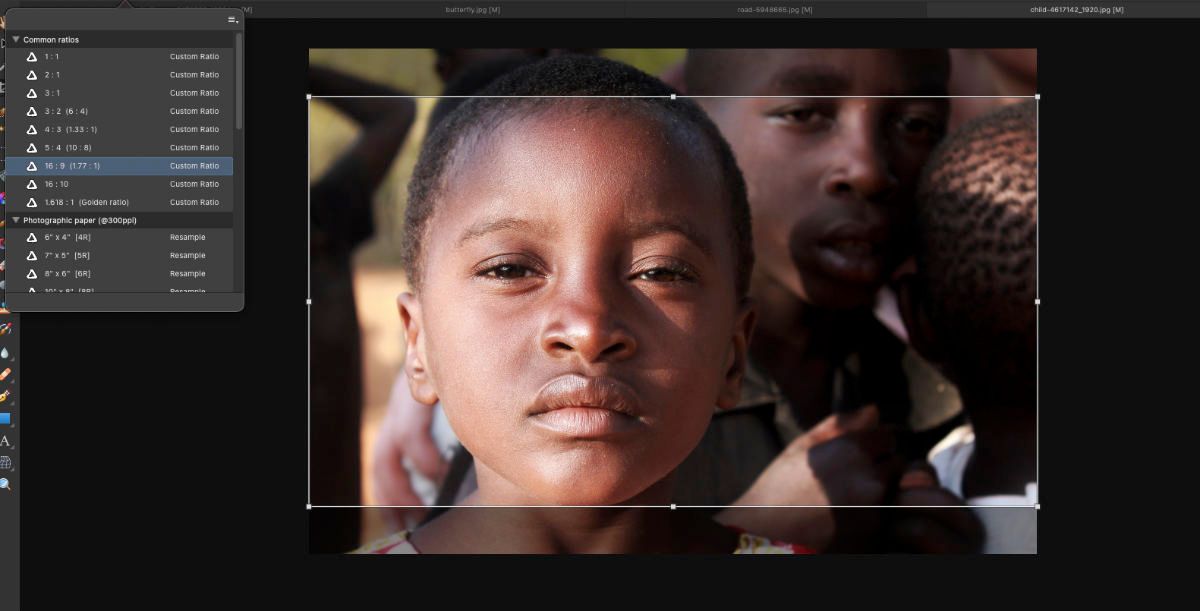
When cropping photos in image editing software, you can ensure accuracy and consistency by using the built-in crop ratios. This will enable you to select ratios like 16:9 and 4:3 because the software will limit your cropping tool to your chosen ratio.
These ratios are particularly important if you're cropping a set of photos or if you're hoping to print your images. They can also help you edit your images for particular screen types, like widescreen TVs.
8. Try Something Different
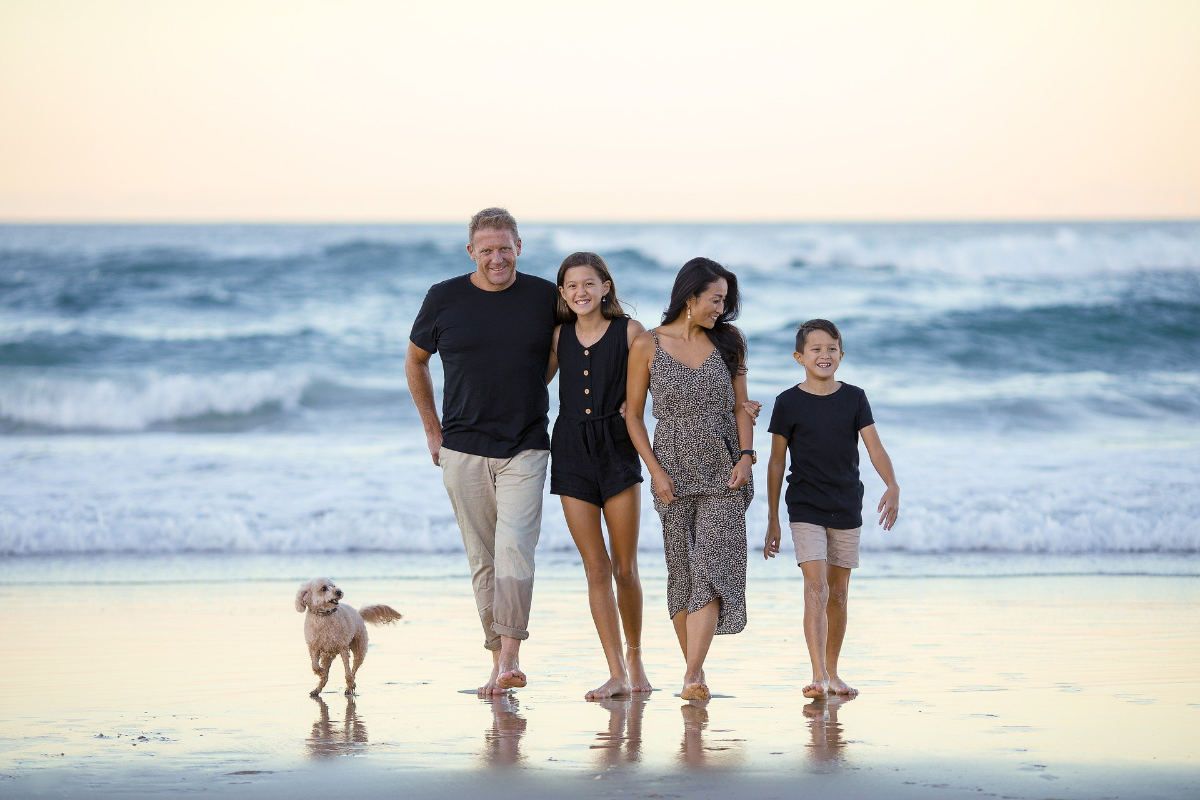
Rules are there to be broken. Although sticking to the rule of thirds, for example, is often a good idea, that doesn't mean you shouldn't try anything else. The photo here puts the subjects right in the middle of the frame, but it works just fine. And the same applies to any other "rules" of cropping.
How much you crop a photo and how you organize the elements of your image depend on what effect you're going for. A lot of it comes down to personal taste too. If you like the way your photos look, then maybe that's all that really matters.
Get Creative With Your Cropping
As well as cropping your photos to find the perfect composition, you can shake things up a bit with circular or triangle crops. Or you can use creative borders to make fun images for your social media accounts.
To get a good crop in post-production, you can use software like Adobe Photoshop, but there are lots of free tools that will do the job as well. That includes third-party software but also apps built into operating systems like Windows and macOS. Try them out, and see what you can come up with.


0 Comments