
There wasn't a lot to celebrate about Windows Vista, but one good thing that came from it was a new feature called BitLocker. This feature allows users to encrypt drives to prevent unauthorized access.
If you've encrypted your drive with BitLocker, you may have realized that it comes with a few of its own quirks. As such, here's how to disable or suspend BitLocker on Windows 10.
Why Disable BitLocker?
Let's say you've encrypted your drive using your current Windows 7 PC, and now you've purchased a sleek new PC that runs Windows 10. You want to install your old, encrypted hard drive into your new computer. However, when you try to access the drive, Windows 10 asks you to turn off BitLocker or doesn't recognize your password.
BitLocker also doesn't behave well with other programs and doesn't allow dual-booting, especially if you've encrypted the C: drive. So while the encryption can be a nice touch, Bitlocker can sometimes be more of a curse than a blessing.
If these annoyances have compelled you into reconsidering the use of BitLocker, we're going to walk you through how to disable it on Windows 10. Although, this doesn't mean you need to compromise on security. There are several Syskey encryption alternatives you may want to consider.
How to Disable BitLocker From the Control Panel
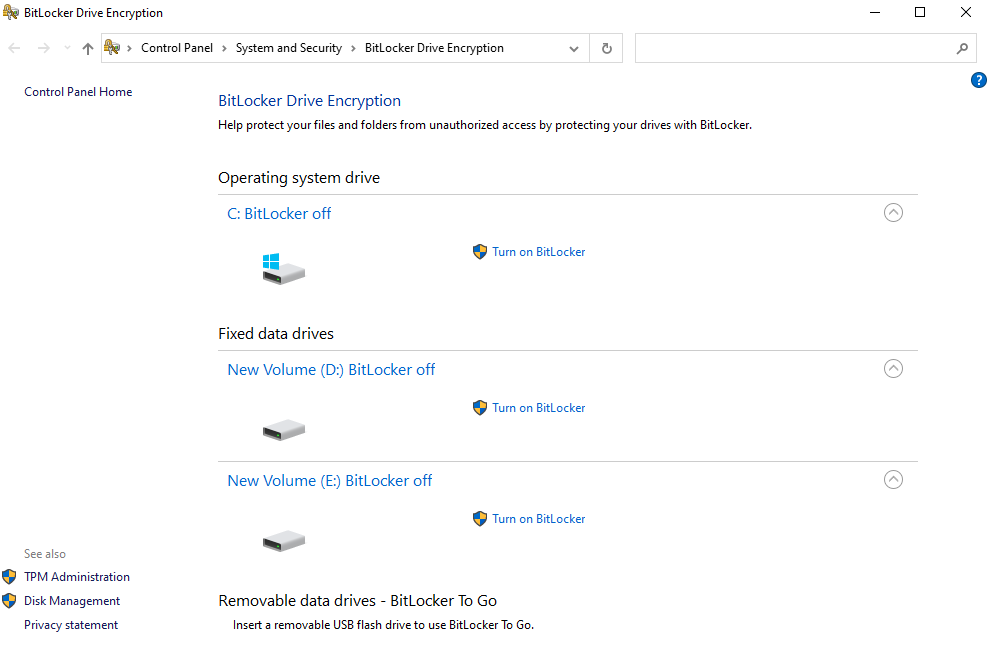
This is the simplest way to disable BitLocker. First, search for manage bitlocker in the Start Menu and launch the best match in the search results. This will open the BitLocker Drive Encryption window, where you'll see all your drives listed. Next to the drive, you'll see an option to Turn off BitLocker. Click on it and continue following the wizard's instructions.
How to Disable BitLocker From the Local Group Policy Editor
Windows 10 Professional and Enterprise versions have a more comprehensive console to modify Windows settings called the Local Group Policy Editor. Press Win + R, type gpedit.msc, and press Enter to launch the Group Policy Editor.
From the left pane, navigate to Computer Configuration > Administrative Templates > Windows Components > BitLocker Drive Encryption > Fixed Data Drives.
Switch to the right pane and double-click on Deny write access to fixed drives not protected by BitLocker to configure the setting.
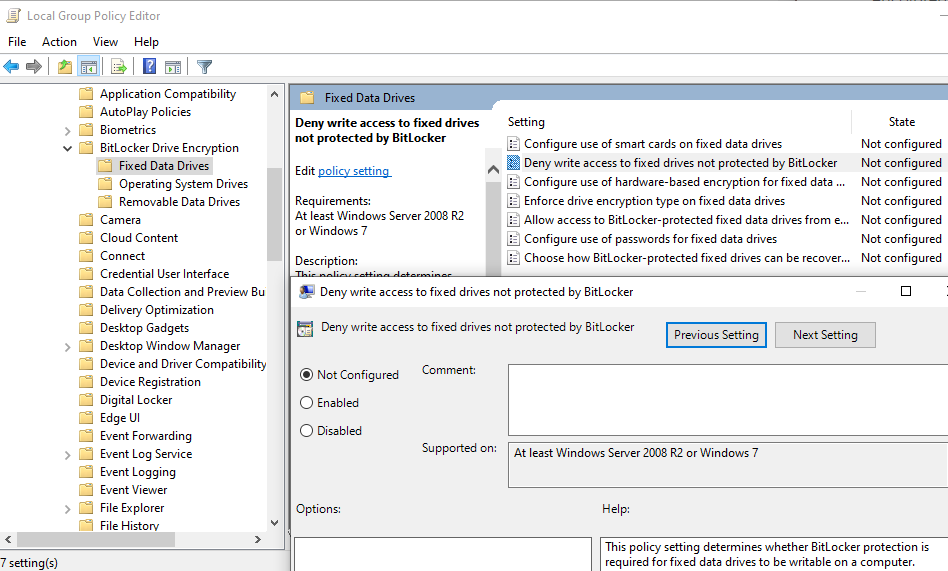
If you're using BitLocker, this setting will be in an Enabled state. Change the state to Not configured or Disabled, and press OK to save changes and exit. Restart your PC, and your drive should no longer be encrypted.
Unfortunately, if you're using Windows 10 Home, it won't have Group Policy enabled by default. However, there is a way to access the group policy on Windows 10 Home.
How to Disable BitLocker Using the Command Prompt
If you're more technically inclined and prefer to use command lines, you can use Command Prompt or PowerShell (discussed next) to disable BitLocker. Plus, it also saves you some time.
If you have BitLocker encryption turned on for multiple drives, skip to the next method to disable BitLocker for all of them at once.
Search for cmd in the Start Menu, right-click on Command Prompt, and select Run as administrator to run an elevated Command Prompt. Execute the following command:
manage -bde -off D:
Replace the letter D with the drive you want to disable BitLocker for.
How to Disable BitLocker Using PowerShell
Search for powershell in the Start Menu, right-click on PowerShell, and select Run as administrator to run PowerShell with administrative privileges. Execute the following command:
Disable-BitLocker -MountPoint "D:"
Again, replace the letter D with the drive you want to disable BitLocker for.
However, if you've turned on BitLocker encryption for multiple drives, you may want to execute the following commands:
$BLV = Get-BitLockerVolume


            Disable-BitLocker -MountPoint $BLV
The first command identifies all volumes you have encrypted using BitLocker and stores them in the $BLV variable. The next command disables BitLocker for all volumes stored in the $BLV variable.
How to Disable BitLocker From the Services Panel
At least one of the methods we discussed so far should work. Regardless, you also have the option to turn off the BitLocker Drive Encryption Service to disable BitLocker.
Press Win + R, type services.msc, and press Enter to launch the Services panel. Look for the BitLocker Drive Encryption Service in the list.
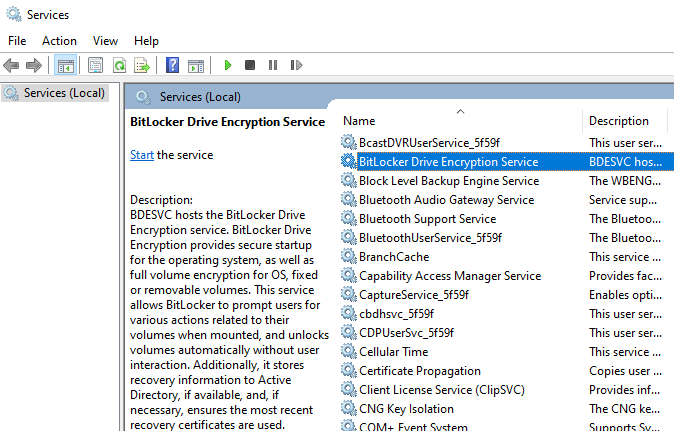
Double-click on the service and change the Startup type to Disabled. Press OK to save the changes and exit.
When Do You Not Need to Disable BitLocker?
If you're considering disabling BitLocker to perform a UEFI/BIOS update, change a hardware component, or upgrade to a newer version of Windows 10, you don't need to necessarily disable BitLocker.
While leaving BitLocker enabled can certainly give you a hard time if you're attempting one of these tasks, there's an alternative to disabling BitLocker; you can suspend it. Note that you should certainly either disable or suspend BitLocker when you're updating UEFI/BIOS. Otherwise, the update will erase all the keys stored on the TPM.
Unlike when you disable BitLocker, suspending it doesn't decrypt the data on your drives. Plus, any additional data you add to the drive during the suspension is still encrypted. So once you've completed making changes to your PC, you can go back to the Control Panel and resume encryption.
How to Suspend BitLocker From the Control Panel
Type manage bitlocker in the Start Menu and open the best match in the search results. In the BitLocker Drive Encryption, you'll see that the drives you've encrypted will have an option to Suspend protection.
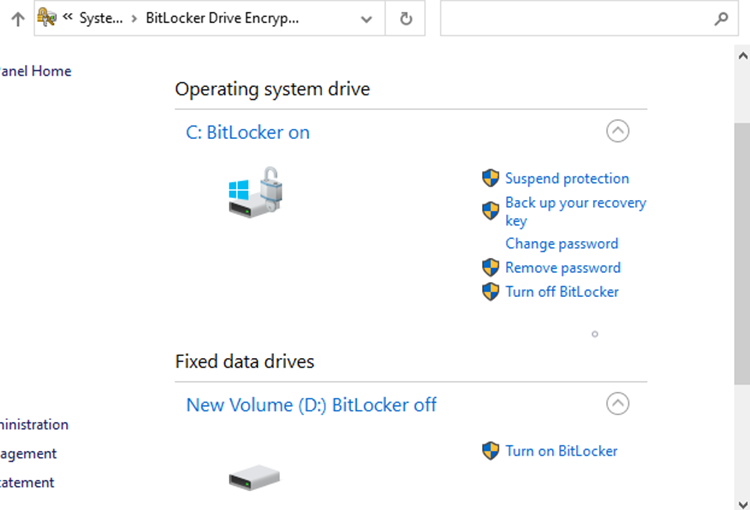
Click on Suspend protection and click Yes when the warning prompt pops up. Then, when you want to resume protection, repeat the same steps, except that you'll need to click on Resume protection instead of Suspend protection.
How to Suspend BitLocker Using the Command Prompt
Search for cmd in the Start Menu, right-click on Command Prompt, and select Run as administrator to run Command Prompt with administrative privileges. Execute the following command:
manage -bde -Protectors -Enable D:
Replace the letter D with the drive you're targeting.
How to Suspend BitLocker Using PowerShell
Search for powershell in the Start Menu, right-click on PowerShell, and select Run as administrator to run an elevated PowerShell. Execute the following command:
Resume-BitLocker -MountPoint "D:"
Of course, change the letter D with the letter of your target drive.
Break Free From BitLocker
BitLocker is undeniably one of the most useful security features on Windows. However, sometimes you may need to disable it or put it on hold while performing some critical operations. It really isn't difficult to disable or suspend BitLocker, as long as you have your BitLocker key.


0 Comments