
Source patching is one common way of working in Premiere Pro. Instead of messing around with dragging and dropping clips manually, you're able to show the program exactly where you want each piece of footage to go.
But how do you do this? This is one question that plagues beginners everywhere. We need some way of communicating what we want Premiere to do on the fly. Source patching, and, by extension, track targeting, are our ways of doing that.
What Is Source Patching?
When most of us first start using Premiere Pro, our approach tends to be a bit primitive. We see it, we want it, we grab it, and dump it right in with the rest. When editing projects for fun, or working on something small, most competent editors will be able to get the job done in this way, with no problem at all.
When orchestrating something more complicated, though, the ability to work quickly and neatly is indispensable. In a nutshell, source patching is your way of telling Premiere which tracks should be populated when you use any of the transitive controls associated with the Source Monitor, such as when overwriting or inserting.
Without this system in place, we would have no way of specifying what goes where when using these tools. They allow us to work in layers, which can be useful if your project will be built from the bottom up.
Documentary work is one good example of why this is useful; you lay the foundation of the sound bed and then add B-Roll on top, each category of material confined to one or several dedicated tracks.
The anatomy of video projects will vary, but the logic of source patching can be applied to pretty much anything that you need to build as an editor. This includes projects that feature many composited elements, as well as pieces that are set to music and have no other soundtrack at all.
How Does Source Patching Work?
You may have noticed that you have the ability to enable or disable tracks as you work. By doing so selectively, you signify your desired destination for every clip that you choose to incorporate into the sequence when you use an Insert or Overwrite, or when you copy and paste something.
In the below screenshot, however, you'll notice that there are actually two columns of highlighted track selections in blue.
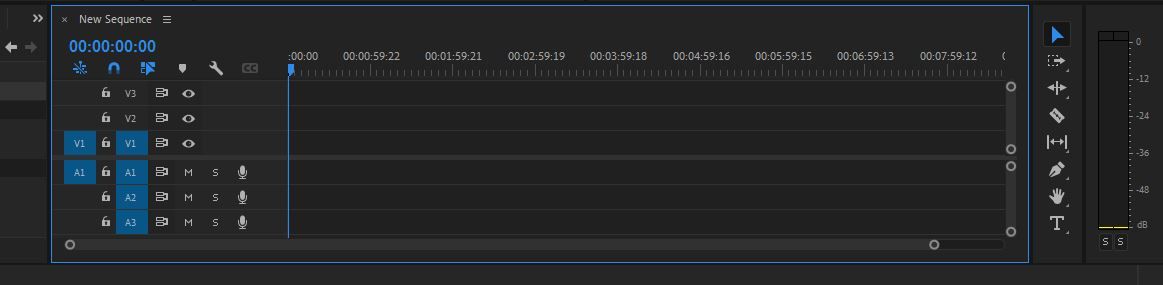
The second column includes the names of each track, V1, V2, V3, A1, A2, and A3. The first, however, only includes two: V1 and A1.
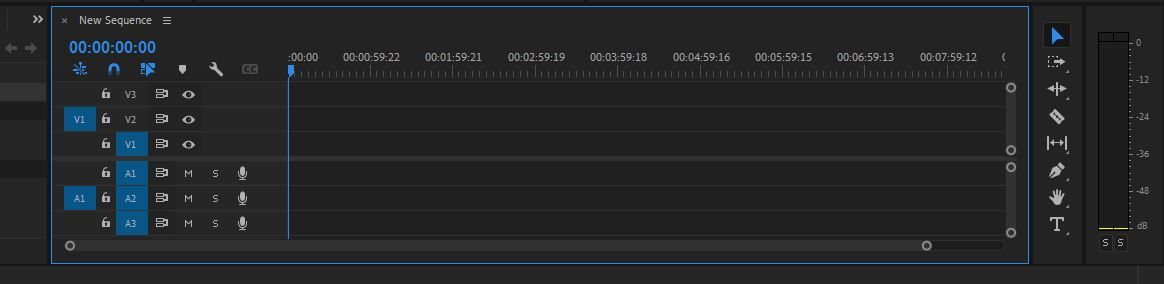
You can see, however, that when we select V2 and A2 in the first column, the label does not change. They are still denoted as V1 and A1, despite the fact that the tracks that these monikers actually apply to are still below and above, respectively.
What's the Difference?
This first column will be your go-to for hard source patching, which will apply while working hands-free as you insert and overwrite from the Source Monitor. You can choose only one audio and one video track at a time, and you may also choose to disable one or both entirely.
The second column simply toggles tracks on and off. These toggles are used to target tracks, covering any type of automated media movement that does not involve the Source Monitor at all. Anything that you have copied to your clipboard, for example, will be sent to the tracks that you have selected here.
When dragging and dropping, it doesn't really matter which tracks you have selected in the source patching column—all that matters is that you have both your audio and video source patch enabled if you would like both audio and video to be included.
Track targeting will be even more irrelevant if you're one to hunt and peck manually; if you literally do nothing but drag and drop, with no copying or pasting at all, they may as well not even be there.
For the sake of the future of your career (and your sanity), we definitely recommend taking some time to at least internalize how both of these tools work.
How to Use Source Patching in Premiere Pro
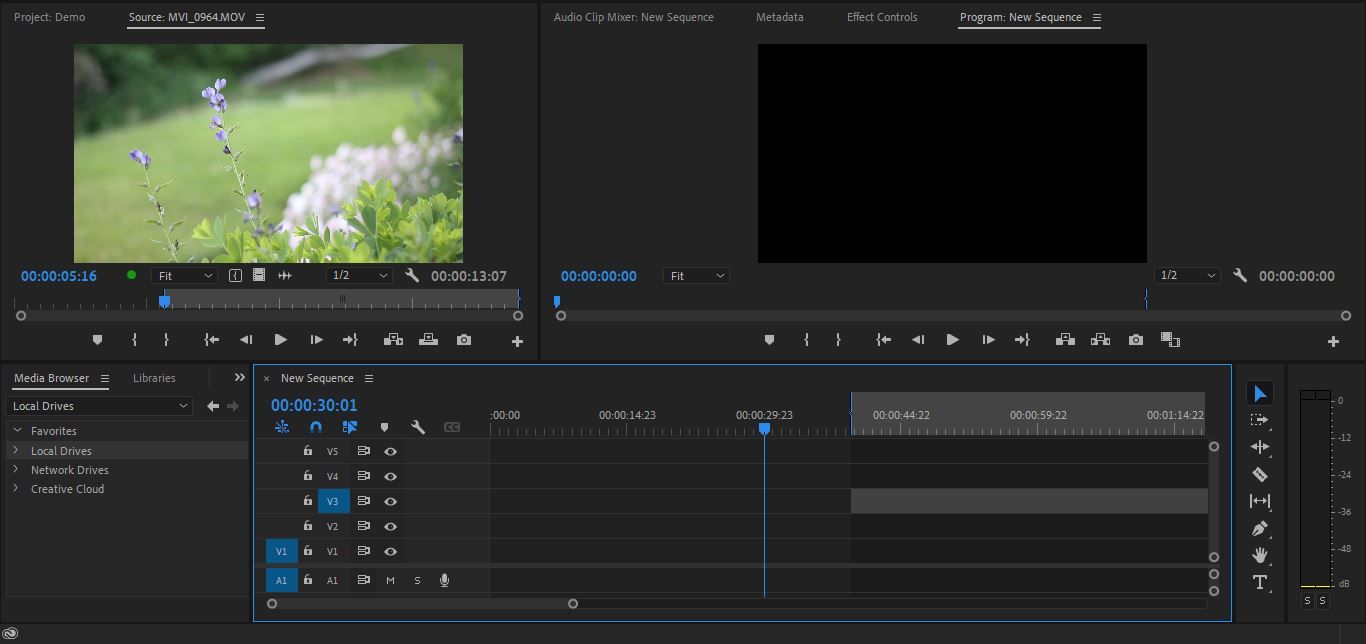
Source patching is likely something that you already do. Any time you have Ins and Outs in both your Source Monitor and your timeline, source patching will be what bridges the gap between both sides.
We've got an In and an Out in the Source Monitor, and an In point in the timeline. Our source patching indicates that we would like our footage to end up in tracks V1 and A1. V3, however, is the only track that is targeted.
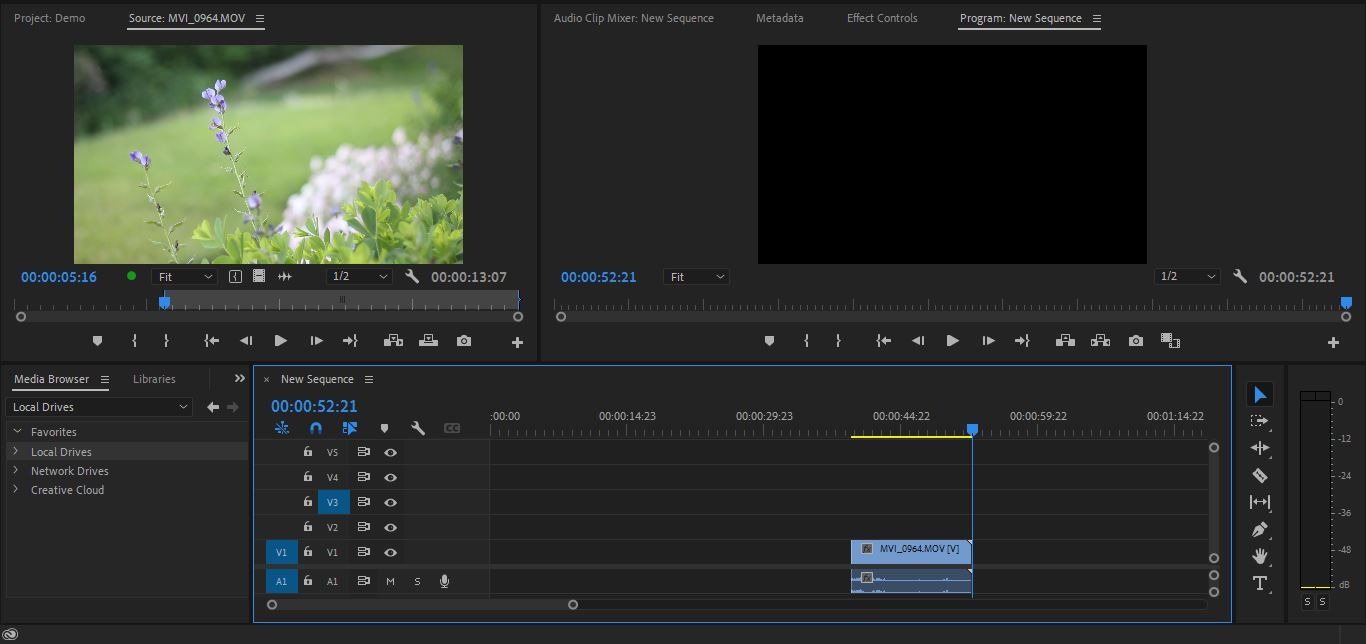
To insert your selection from the Source Monitor, press the on-screen button or hit the comma (,) key.
As you can see, the fact that we only had V3 selected has not influenced our net result in any way. When source patching, only the first column of toggles matters. In fact, when source patching exclusively, you don't even need to have any tracks targeted at all.
If we were to do the same thing with V1 disabled in our source patching, however, only the portion of audio selected in the Source Monitor would be brought into the timeline. The video portion would be left behind.

The same goes for the opposite. If you're editing dialogue only or building a visual montage, this is one efficient way of only grabbing what you need.
How to Target Tracks in Premiere Pro
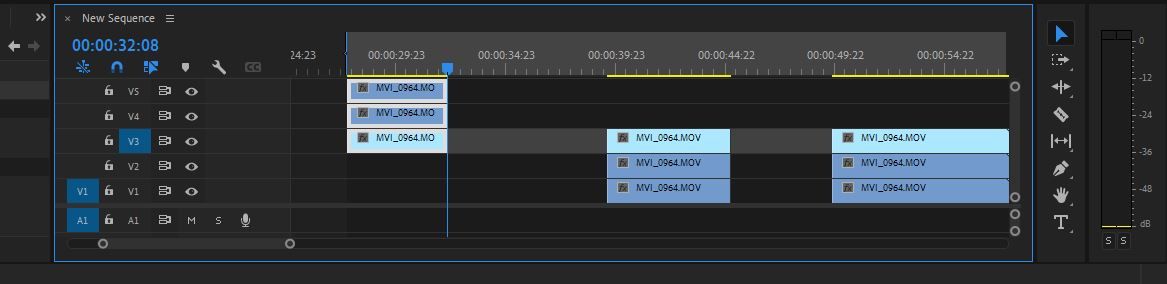
In this example, we have three clips stacked on top of one another, already in the timeline. We've got an In and an Out in place and tracks V1, V2, and V3 targeted. Hit the Lift button, or use the default shortcut, the semi-colon key (;), to continue.
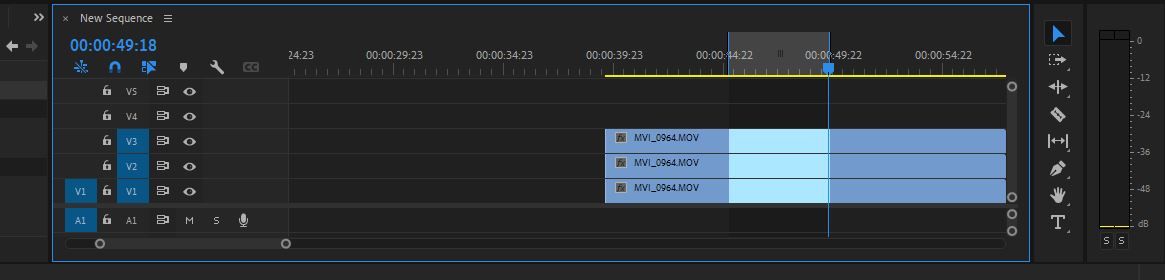
That section will vanish without a trace, along with both our In and Out points.
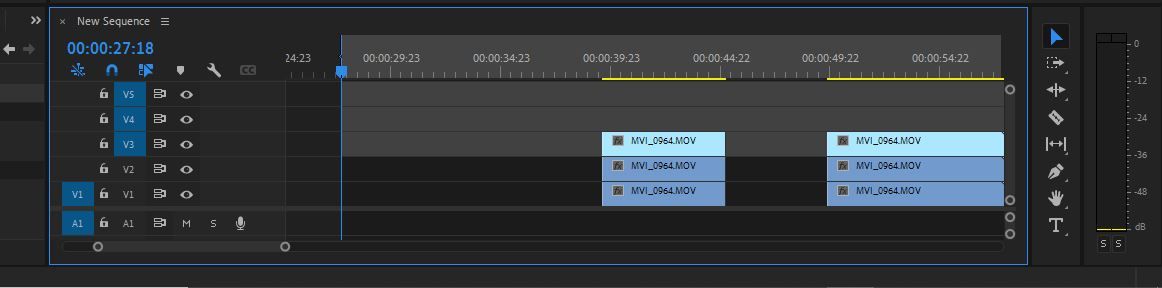
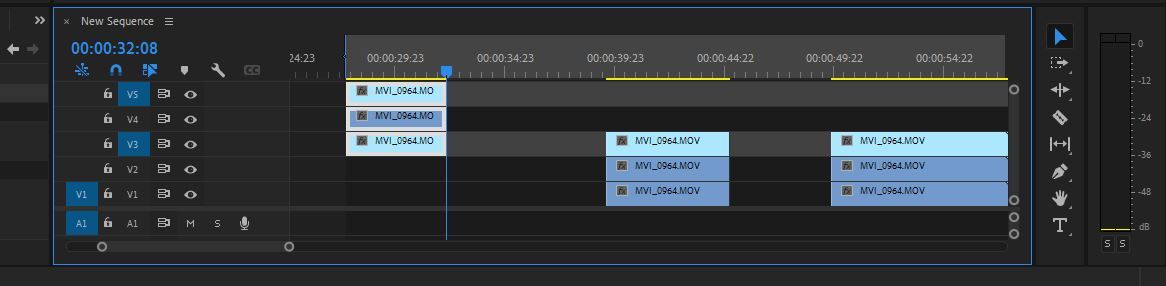
Drop a new In or Out elsewhere. We're going to perform an approximation of a traditional three-point edit, sending this wedge of media to tracks V3, V4, and V5, instead of the three tracks that we found it in originally. Toggle tracks V1 and V2 off, and enable V4 and V5.
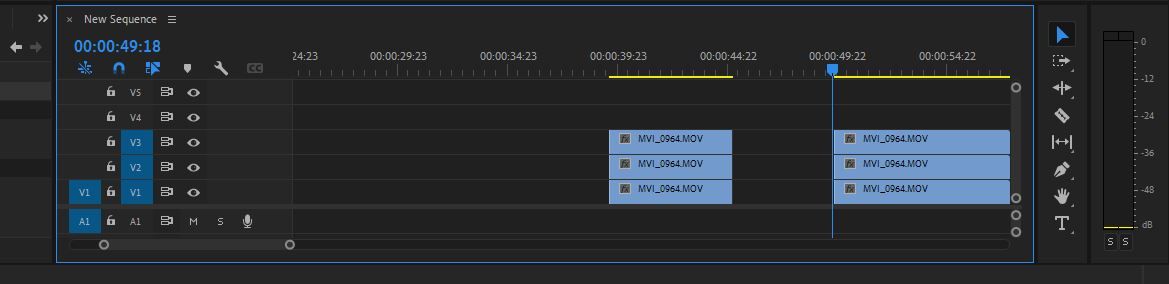
Pressing Ctrl + V will paste exactly what we just Lifted behind or in front of our new In or Out points on the tracks that we have targeted.
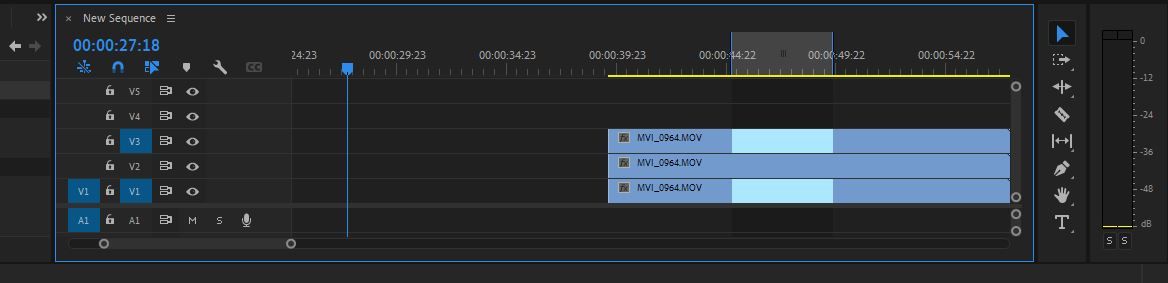
If we walk back a couple of steps and instead target only V3, Premiere will use this single targeted track as the base level track that the whole stack will be re-added to.
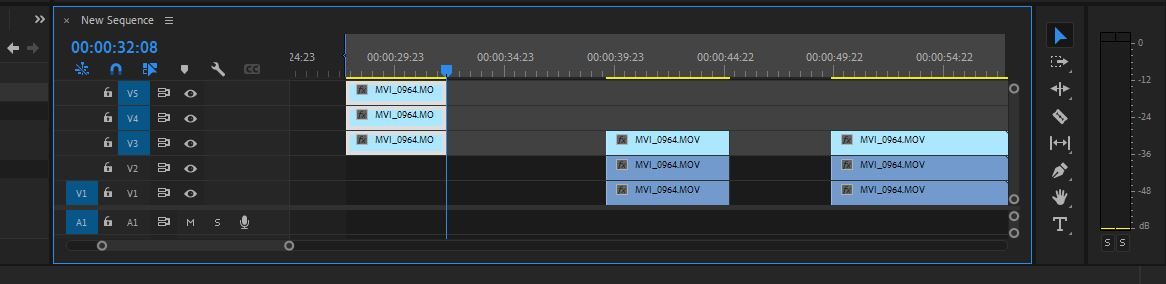
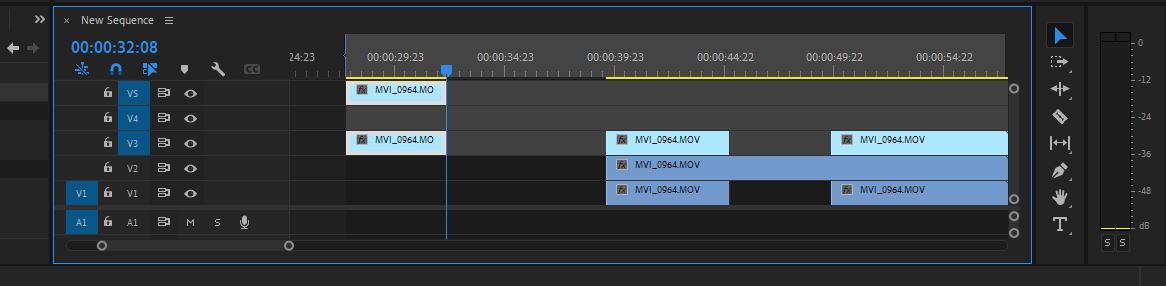
Now, let's try targeting only the top track and the bottom track included in our selected stack.
Despite the fact that the track in between has not been enabled, the entire wedge has been copied over regardless.
This illustrates one important thing to remember about track targeting: you really cannot modify the chunks of material that you Lift, Extract, or copy. Track targeting is used to move things around without changing what was picked up initially.
If you wanted to, for instance, Lift the pieces of footage on tracks V1 and V3 only, you should first disable track V2 before Lifting at all.
This way, no matter what you have targeted as your destination, only what you need has been Lifted. Therefore, only what you need will be carried through.
Again, Premiere does not require you to select only the two tracks that these two clips occupy together, accounting for the gap track in between. You only need to select the bottom-most track; the Lifted or Extracted section will be copied over in all of its original glory, as long as there are enough tracks above the one that you selected to accommodate all of them.
Level Up Your Premiere Pro Workflow
Before you know what you're getting into, track targeting and source patching can be a frustrating game to play. If you've ever spent the afternoon unable to get your footage to cooperate, just know that a viable solution is never far out of reach.


0 Comments