
If you're new to the world of video editing, you've probably come across the mention of keyframes and wondered what they are. Every comprehensive video editing software or app features keyframes. It's an essential, universal tool for any edit that includes movement, animation, or transitions.
In this article, we're going to give an extensive overview of what keyframes are and their relation to each other. Once you understand how keyframes work and how to manipulate them in your editor, you'll have a lot more options for motion editing at your disposal.
What Are Keyframes?
Keyframes are markers (or anchor points) that let the editing program know when an animation starts and ends. Before digital editing, each keyframe had to be drawn by hand. Now, the program will fill in the transition between two or more keyframe points. Animations can include a wide variety of effects, such as:
- Zooming in and out.
- Rotating the footage.
- Panning left, right, up, down, or diagonally.
- Changing the position of the clip.
- Moving 2D or 3D objects.
- Changing the opacity.
- Changing the intensity of filters.
- Changing velocity values.
Typically, two or more keyframes are placed on a clip timeline—and the editor will perform animation edits on each point. This creates a change in the state of the clip between the first and following keyframes.
For example, if you want to zoom in on one clip to create a flow into the next, you'd put a keyframe where you want the zoom to start, and another one at the end of the clip. On the second keyframe, you'll increase the zoom. During playback, you'll see it zoom in in real-time between the keyframes.
Most programs offer auto-transitions between keyframes, but an editor can also customize the type of transition, dictating how the clip behaves from one keyframe to another. Keep reading to find out more about this in keyframe interpolation.
Since keyframes are displayed with visual markers and their transitions with graphs, they'll "look" different in every program, but their functions remain the same across all platforms.
What Is a Keyframe Interval?
A keyframe interval, or keyframe distance, is the length of time between two keyframes. This can be as long as the entire clip, or as short as a fraction of a second.
The keyframe interval can affect how a transition looks. For example, zooming in over a longer interval, like two seconds, can result in a slower, dragged-out transition. Meanwhile, a zoom effect on a 0.2-second interval will be quicker and look smoother.
Usually, a shorter keyframe interval means that that part of the clip will be compressed, though, this doesn't necessarily change the quality (depending on the program you use and your settings). However, a long keyframe interval can decrease the quality since the transition of the animation affects a larger portion of the clip, especially if Motion Blur is enabled.
Keyframe Interpolation in Video Editing
Keyframe interpolation describes the way your transition moves from one keyframe to another. Keyframes are simply tools that determine where a transition happens on a clip section, but the transition between keyframes is what's important since it's how the movement type is determined.
This is where the graphs come in, they're the visual demonstration of keyframe interpolation. There are three different types of keyframe interpolations, and most comprehensive video editing programs offer all of them. Let's have a look at what they are.
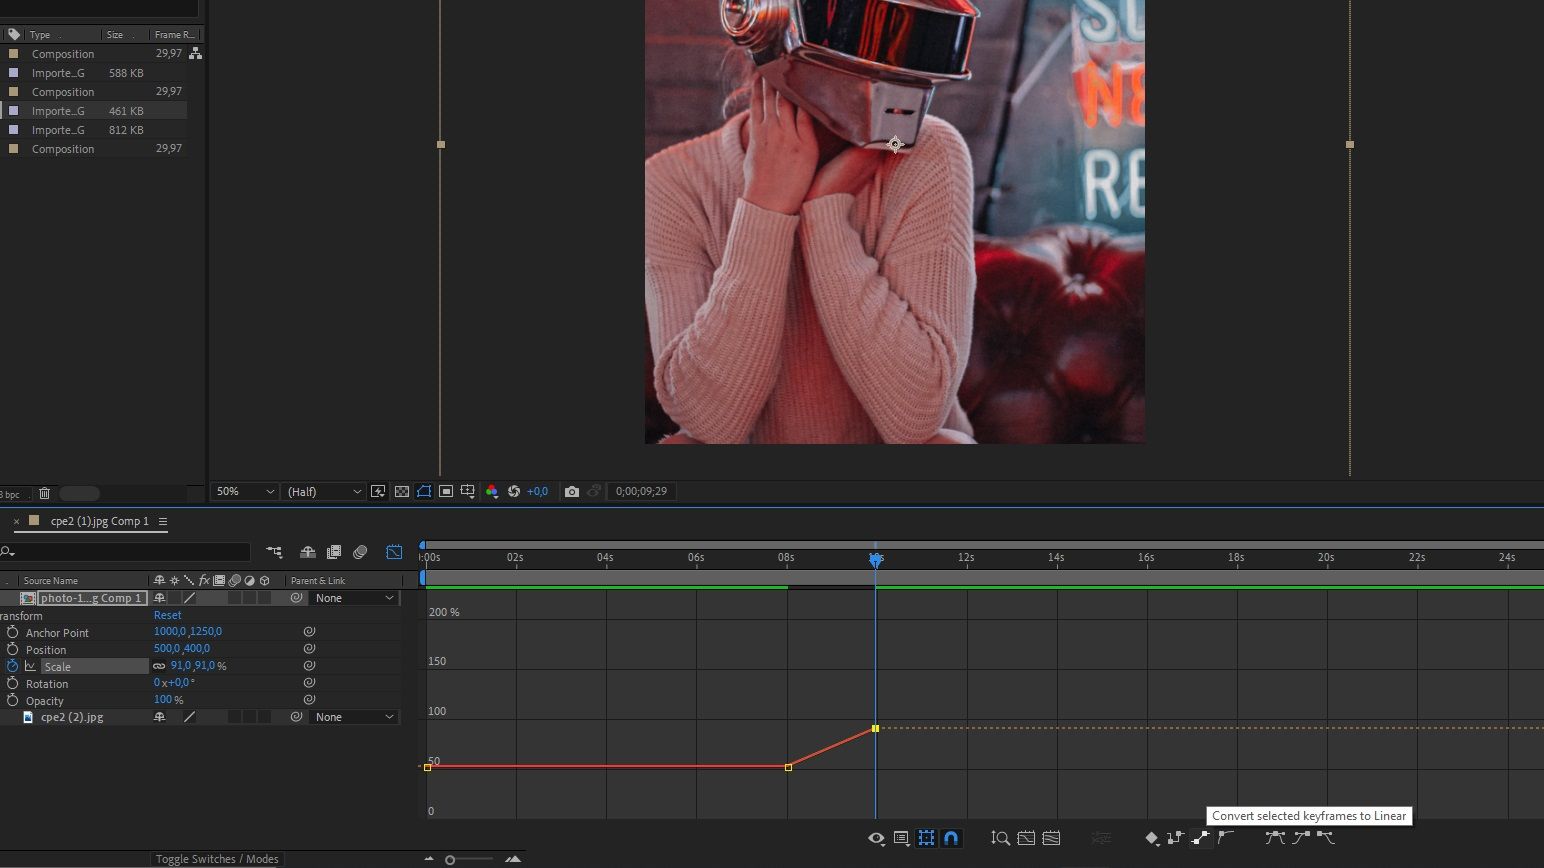
Linear Interpolation
Linear interpolation is a steady and even movement. This means that the state of your clip will move at a fixed pace from the first keyframe to the second.
For example, if you set a keyframe at the beginning of a clip, and another at the end with a zoom-in effect at a value of 50%, the footage will start zooming in from the start of the clip and keep the same velocity until it reaches the last keyframe where it's zoomed in by 50%.
Hold Interpolation
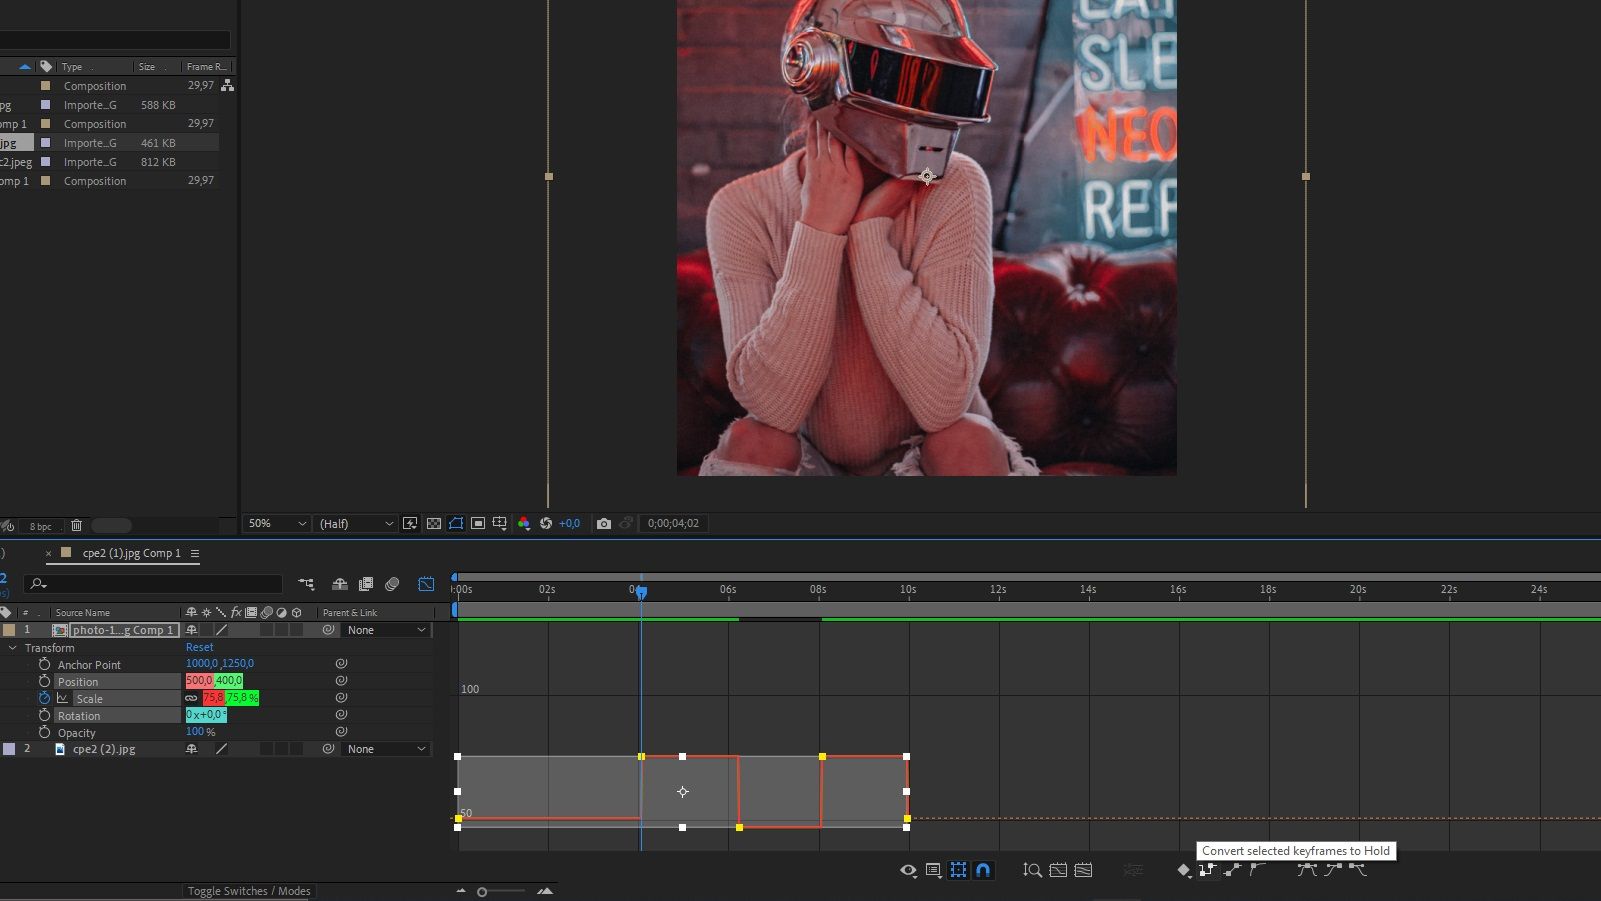
Hold interpolation holds the value of the effect on one keyframe and then suddenly changes to the value of the next keyframe. Its graph will look like a square wave (given there are more than two keyframes on the clip), and the visual results of the footage will be strobe-like.
Below is an example of a hold interpolation on the scale value of a clip in Adobe After Effects. In playback, this would look like the footage is suddenly bigger-smaller-bigger as the zoom-effect values are held and jump from one to another.
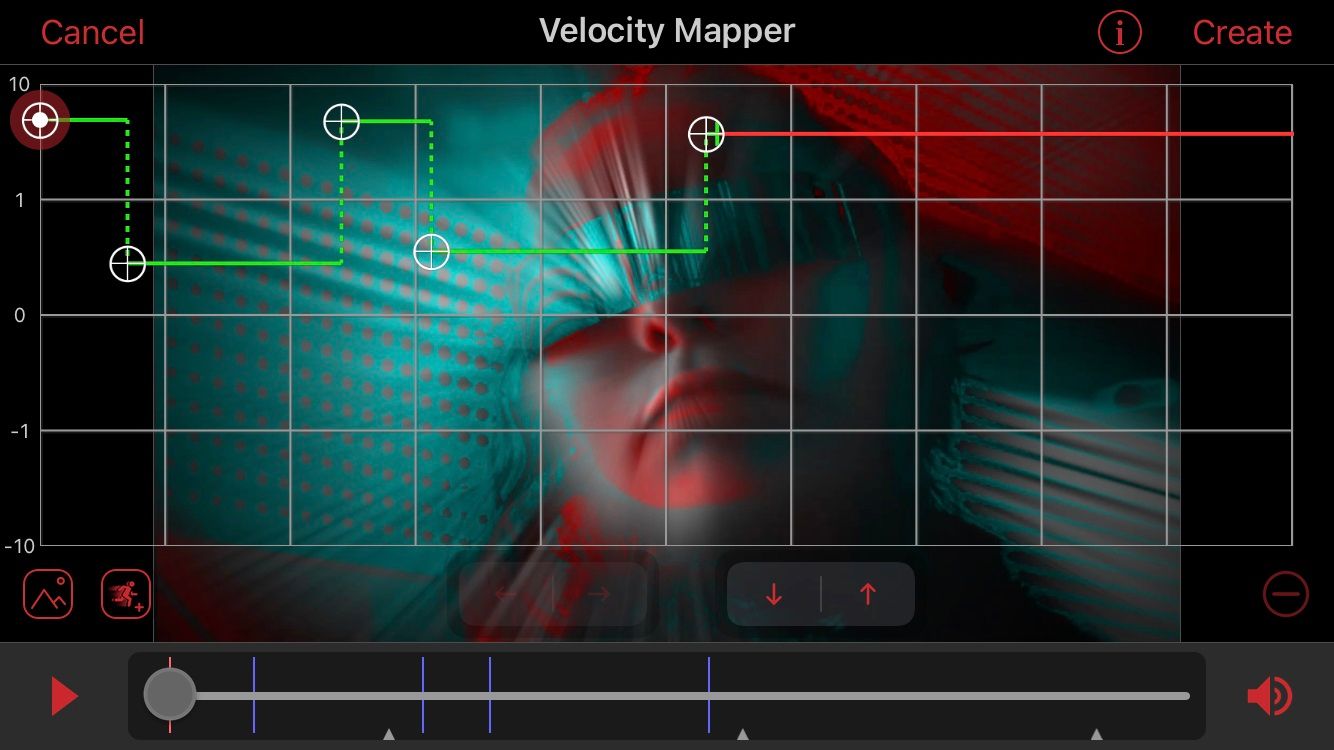
Although velocity graphs can have any type of interpolation, hold interpolation is a pretty common method to get the desired effect. Below is an example of a velocity graph on the Video Star video editing app. In playback, the footage will move fast-slow-fast-slow.
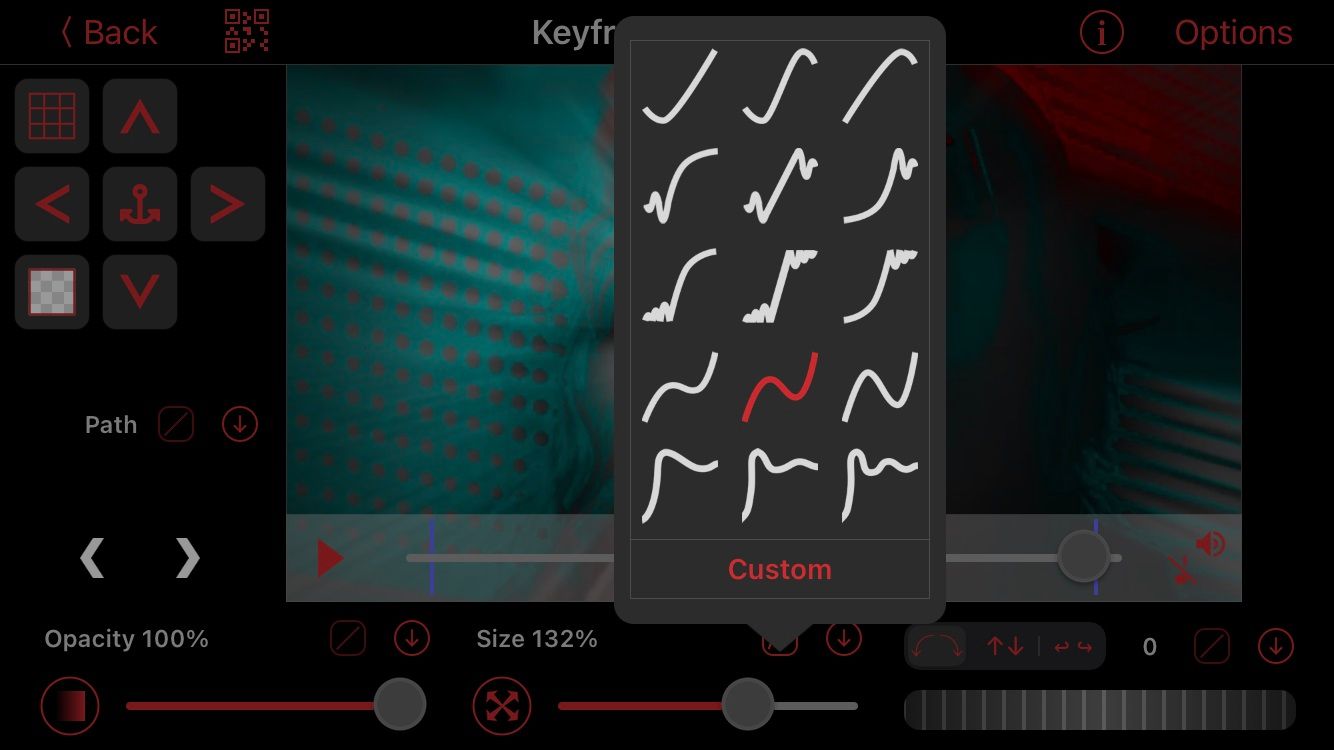
Bezier (Ease) Interpolation
Bezier interpolation combines linear and hold interpolation, and is completely customizable, so you can manually adjust the type of movement between keyframes.
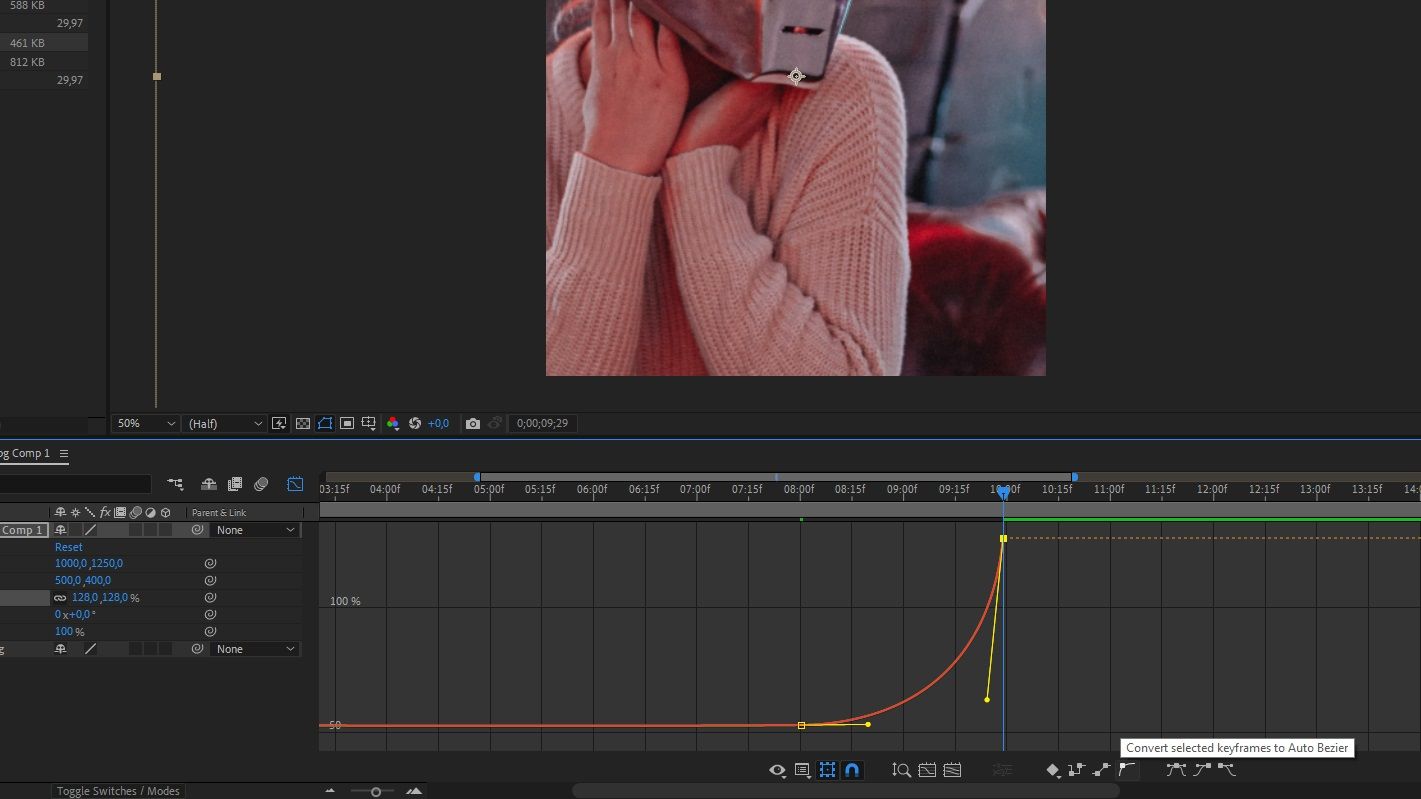
Below is a pretty standard graph of bezier interpolation on After Effects. The movement of this clip will slowly start to zoom in, and get exponentially faster as it reaches the value of the next keyframe. This creates a smoother, more natural effect compared to the robotic movement of linear and hold effects.
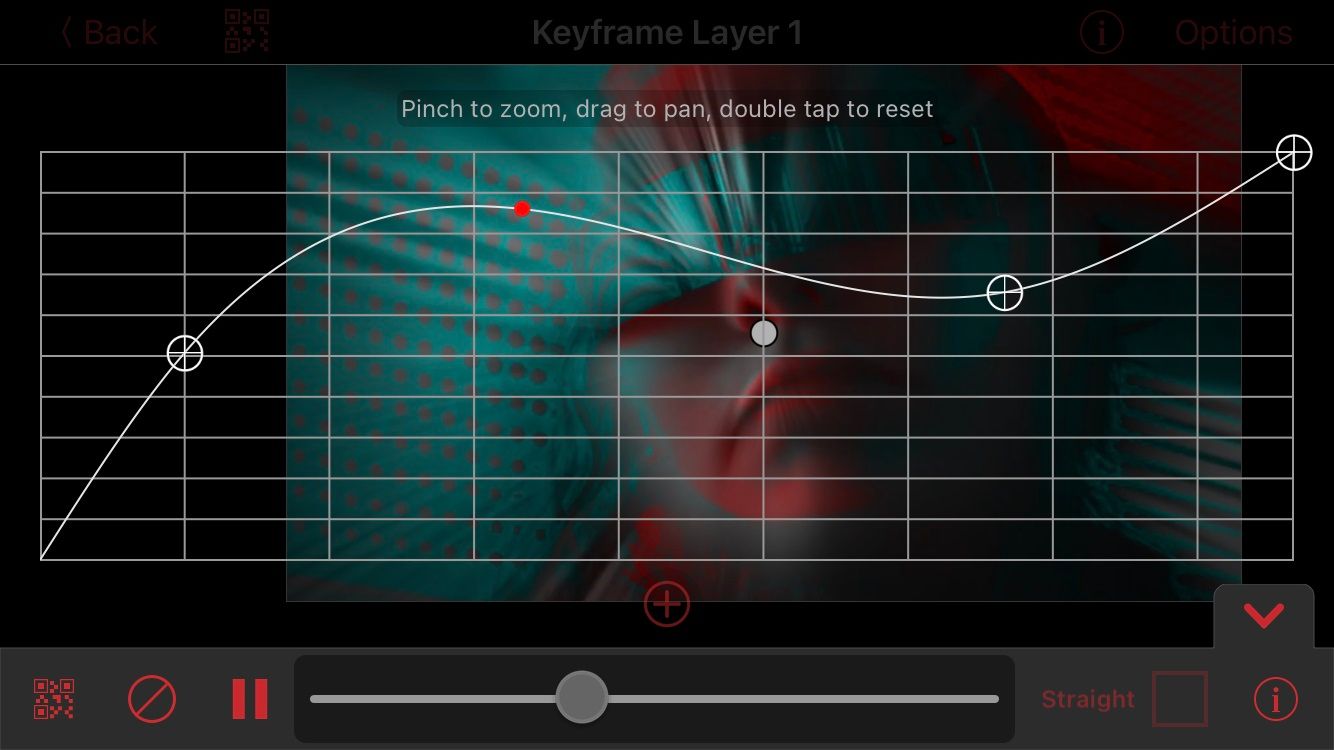
Have a look at the below keyframe graph on Video Star. You can put a keyframe wherever you want, and the graph lines will follow your placement. In this example, we adjusted the size (scale), so during playback, this will result in a smooth zoom-in-out-in effect. It won't be jumpy like hold interpolation, since the graph lines are curved.
Anything goes in bezier interpolation graphs, and therefore many video editing programs offer presets, (for free or to purchase separately), or allow you to export keyframe settings as a code to use again in the future. If you're new to graph editing, presets and codes can help you get the graph you're looking for without placing the keyframes yourself.
Keyframes Are a Pretty Useful Tool for Video Editing
Keyframes are an essential tool for any video edit that includes movement and it removes the necessity to manually edit every frame. With keyframes, you can manipulate animations exactly how you want, and so the transitions become their own effect in the edit.
The possibilities are endless with keyframes, so why not shoot a couple of shots and load up your video editing software to give them a try?


0 Comments