
If you don't have a Print Screen button on your keyboard, or that key isn't working properly, you have to come up with an alternate method for taking Windows screenshots. And as it turns out, the classic method of hitting Print Screen, pasting the image into Paint, and saving it is pretty slow anyway.
There are plenty of reasons you wouldn't want to use Print Screen for screenshots. Thus, let's quickly look at how to screenshot on Windows without using Print Screen at all.
1. Use Snip & Sketch or the Snipping Tool
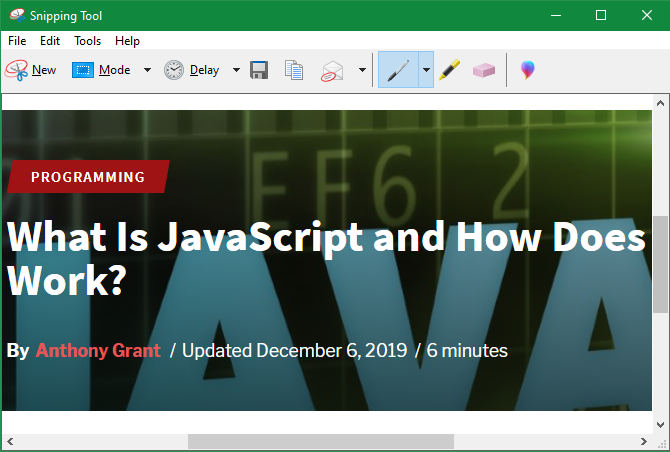
Ever modern version of Windows comes with a built-in screenshot utility called the Snipping Tool. With it, you can snap quick screenshots of the entire screen, individual windows, square regions, or freeform selections.
Just open the Start menu and search for "snipping" to start using it. It's much more useful than pasting into Paint, and you can pin it to your Taskbar for easy access. See our guide to using the Snipping Tool for more help.
If you're on Windows 10, you can instead use the newer Snip & Sketch utility. This is largely similar to the Snipping Tool, but has a few extra features. Most notably, you can press Win + Shift + S to open the screenshot utility from anywhere.
This makes it easy to capture, edit, and save screenshots—and you never need the Print Screen key.

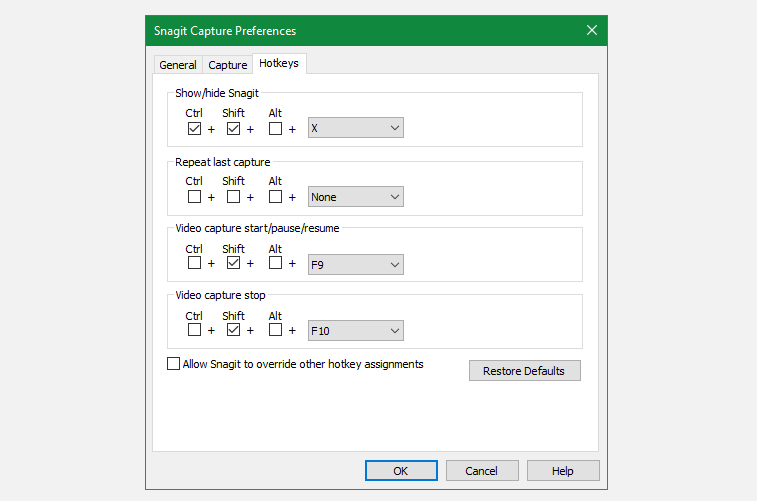
2. Install a Third-Party Screenshot App
While Windows has several screenshot methods built-in, third-party options offer far more control and customization. All you have to do is install one of the best screenshot tools for Windows and change that app's keyboard shortcut to whatever you want.
Most screenshot utilities allow you to set different keyboard shortcuts for the various kinds of screenshots. For example, you might use Ctrl + Shift + 3 for a full-screen screenshot and Ctrl + Shift + 4 to take a screenshot of just the current window.
Once you've captured your screenshot, most screenshot tools have great editors that allow you to add arrows, obfuscation, and a lot more. You won't ever have to edit a screenshot in Paint again.
3. Remap Another Key to Print Screen
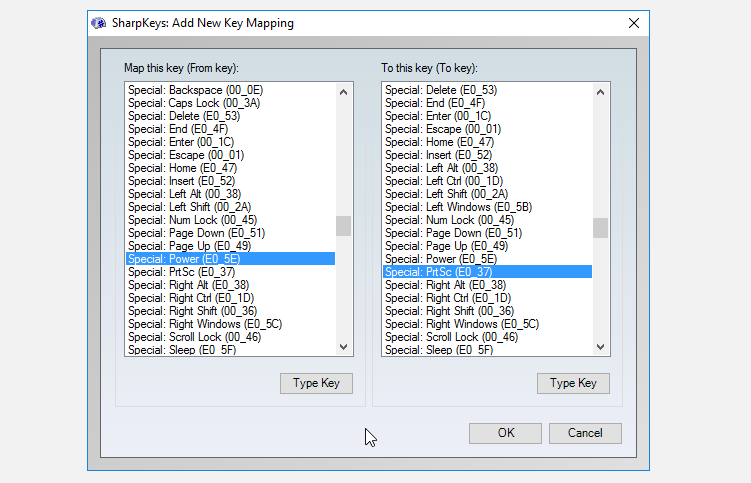
There are certain tools, such as SharpKeys, that let you remap keys on your computer. Using these, you can change a button on your keyboard that you never use---like Power or Media Play---into another Print Screen key.
While this can work if you really want a dedicated key for capturing screenshots, it's not a great idea in most cases. You should be absolutely certain that you'll never use the remapped key. Even then, the other methods mentioned here are more convenient and flexible.
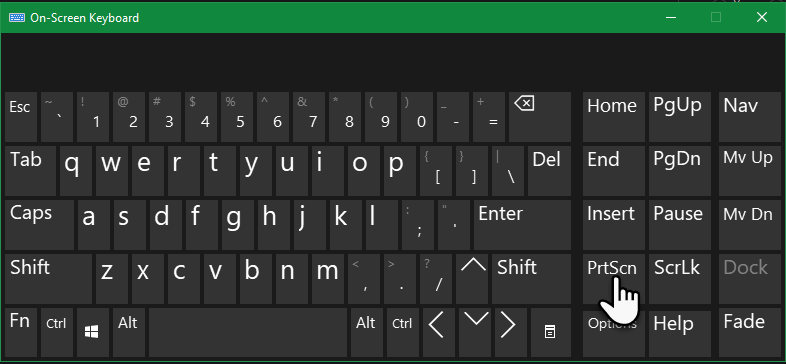
4. Open the On-Screen Keyboard
One of the accessibility tools included in Windows is an on-screen keyboard. It's useful for people who have trouble using a keyboard, or when you need to enter text but your keyboard isn't working. However, you can also take advantage of it to access the Print Screen key.
To start, open the on-screen keyboard by typing on screen or osk into the Start menu and launching the utility. This will open a keyboard inside a normal app window. Click the PrtScn key on the right side, and your system will respond just as if you'd pressed the Print Screen button on a real keyboard.
From there, you can paste the screenshot into Paint or another image editor of your choice to edit and save it.
Who Needs Print Screen for Screenshots?
With these methods, you don't need a Print Screen key to easily take screenshots in Windows. Using an alternate method is faster and more flexible than pasting into Paint, so give one of these a try and revamp your screenshot workflow!
And if you mainly take screenshots in your browser, you have even more options.


0 Comments