Windows 10 has its fair share of errors, and one of the issues you can encounter on your PC is the “video dxgkrnl fatal error.” This error usually occurs when your PC is using outdated graphics drivers.
However, there are other reasons as well as to why this error pops up. Luckily, you have quite a few fixes to apply and potentially fix the video dxgkrnl fatal error on your PC.
1. Use the Hardware Troubleshooter
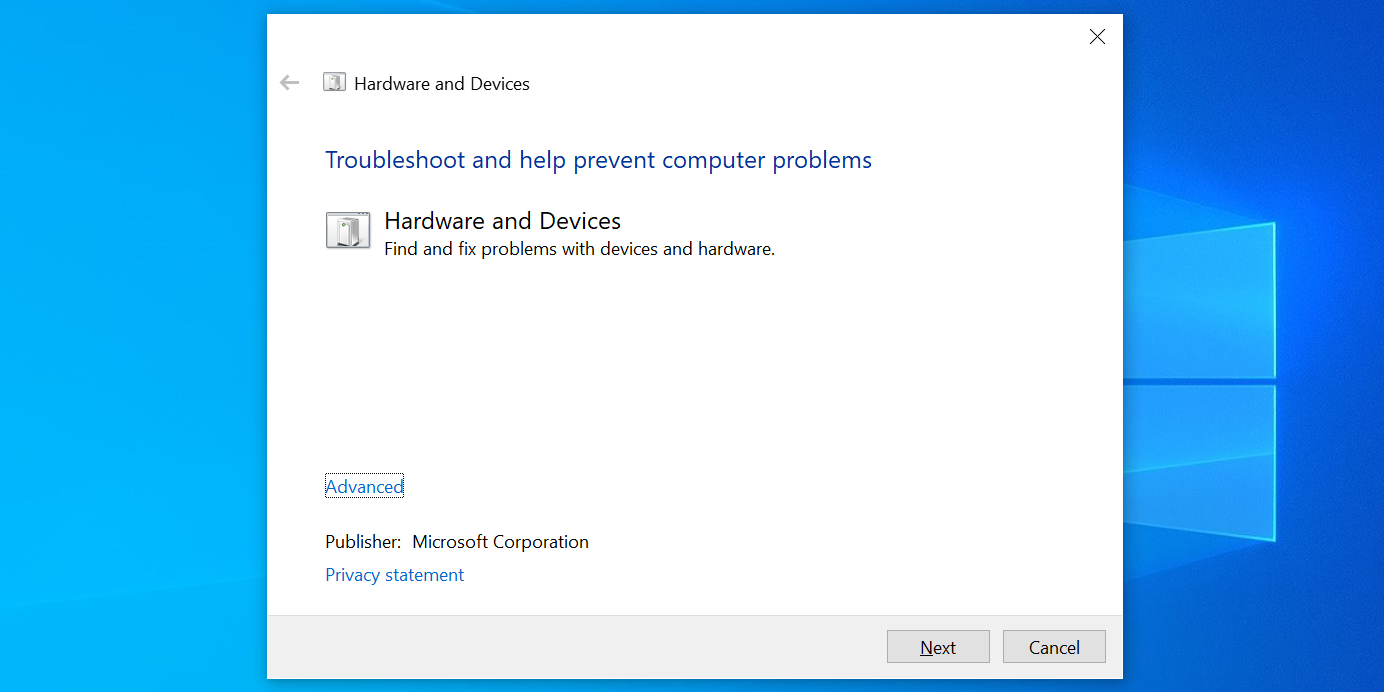
A good thing about Windows 10 is that it comes with several troubleshooters. One of these is a hardware troubleshooter that allows you to find and fix issues with your hardware devices.
When you see the “video dxgkrnl fatal error” on your PC, it’s worth running this troubleshooter to see what issues it can find and fix.
To do that:
- Open the Run dialog by pressing Windows Key + R at the same time.
- Type the following in Run and press Enter:
msdt.exe -id DeviceDiagnostic - On the Hardware and Devices troubleshooter screen, click the Next button.
- Wait for the troubleshooter to find and fix issues with your hardware devices.
2. Fix Corrupt Files
The most common reason for many Windows 10 issues is corrupt files. If any core system files have gone corrupt on your PC, that may be why you see the “video dxgkrnl fatal error.”
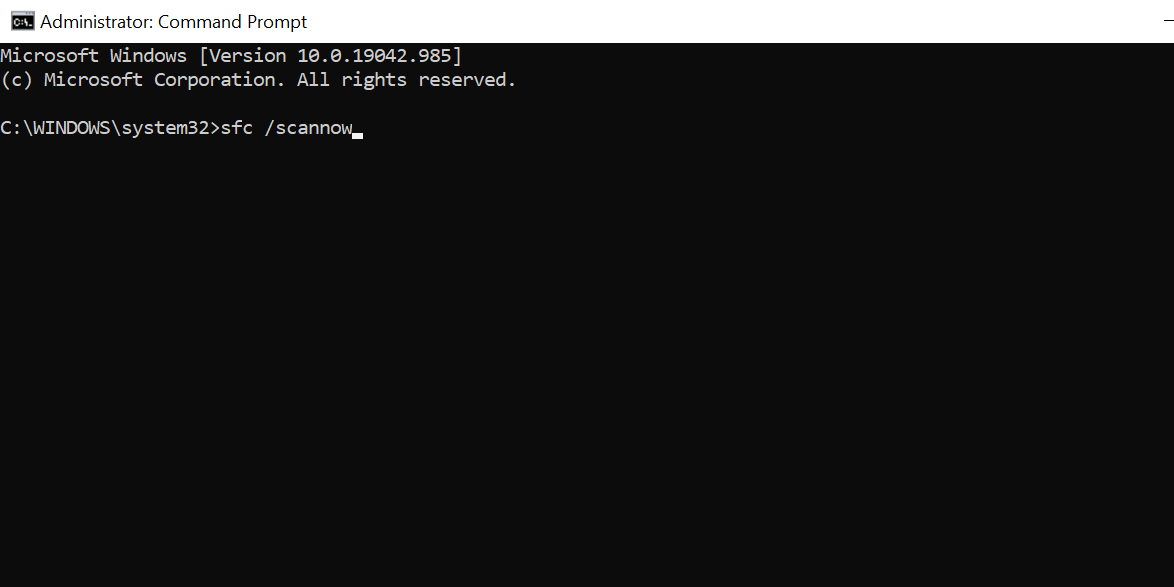
In this case, use Windows 10’s built-in corrupt file checker. This is a command that you can run from Command Prompt to find and fix corrupt files on your computer.
To use this command:
- Open the Start menu, search for Command Prompt, and select Run as administrator.
- Type the following command in Command Prompt and press Enter:
sfc /scannow - Wait for the command to find and fix corrupt files on your PC. This can take a while.
3. Reinstall Your Graphics Card Drivers
Your Windows 10 PC uses the installed graphics card drivers to display items on your screen. If there’s an issue or fault with these drivers, reinstalling them can fix the issue.
To reinstall graphics card drivers:
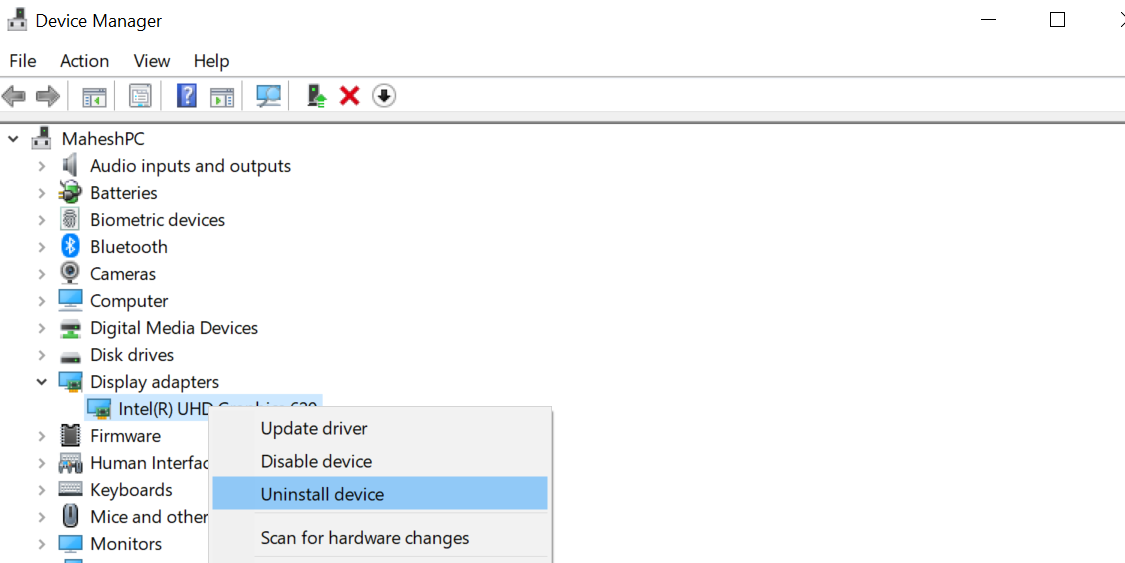
- Press Windows Key + X and select Device Manager from the menu.
- Expand the Display adapters menu in Device Manager.
- Right-click your graphics card in the list and select Uninstall device.
- Follow the on-screen instructions to remove the drivers.
- Restart your PC.
- When your PC boots back up, open Device Manager.
- Click the Action menu at the top and select Scan for hardware changes. This should find your graphics card and install the required drivers for you.
Alternatively, you can download the required drivers from your graphics card manufacturer’s website. Manufacturers like Intel, AMD, and Nvidia all have their graphics card drivers available to download on their websites.
4. Use System Restore
If you see the “video dxgkrnl fatal error” after you made a change to your PC, that change might be the culprit. In this case, you can roll back to a restore point which will revert all your changes up to the creation date of that point.
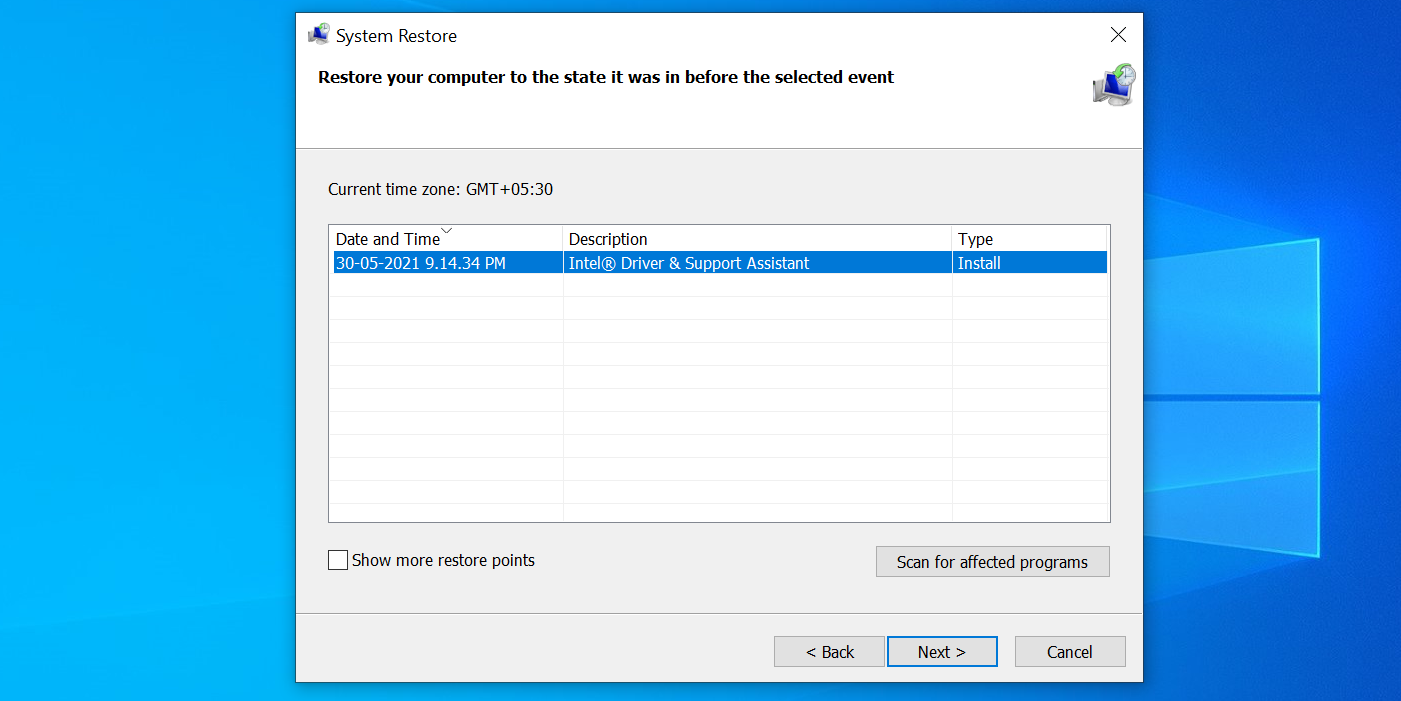
You can use System Restore on your Windows 10 PC to roll back to a specific point, and here’s how:
- Open the Start menu, search for Create a restore point, and select the Best match.
- Click the System Restore button on the following screen.
- Select Next on the first screen of the System Restore wizard.
- On the following screen, select a restore point to roll back to. Then, click Next at the bottom.
- Click Finish to start restoring your PC.
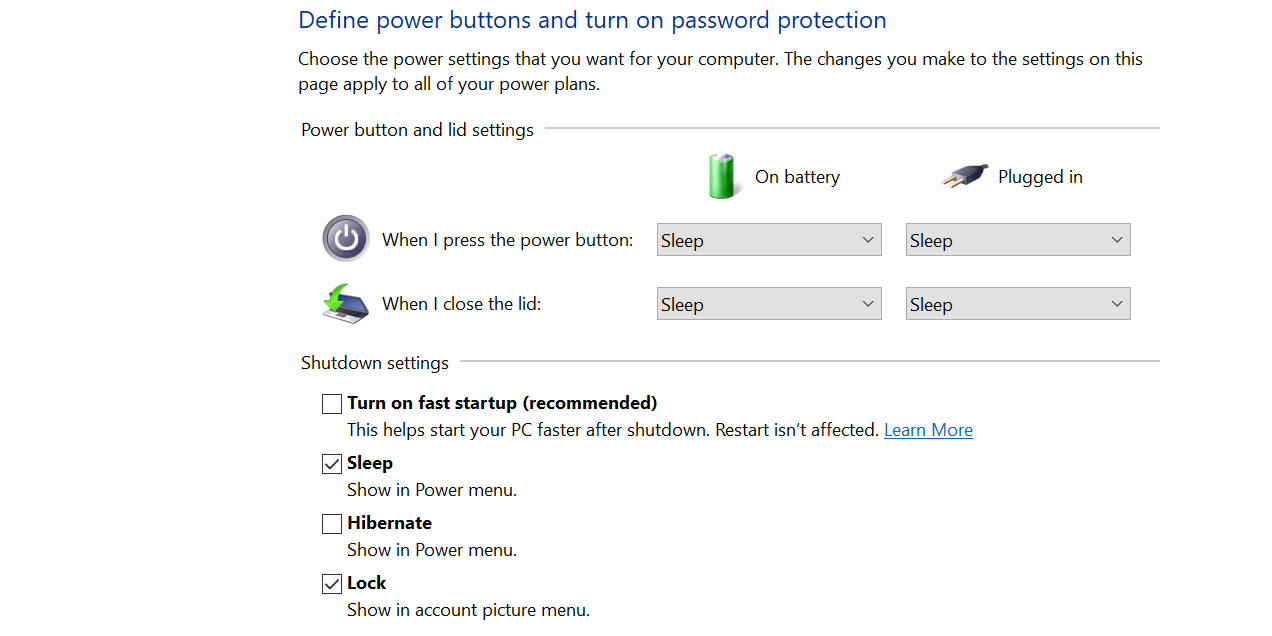
5. Turn Off Fast Startup
Fast startup in Windows 10 allows your PC to boot up at a faster rate. This can sometimes cause issues with other elements on your PC.
It’s worth toggling this option off to see if your issue gets resolved:
- Open Control Panel on your PC.
- Click System and Security on the Control Panel window.
- Select Power Options on the following screen.
- Click Choose what the power button does on the left sidebar.
- Click Change settings that are currently unavailable. This allows you to make changes to the fast startup option.
- Deactivate the Turn on fast startup (recommended) option.
- Click Save changes at the bottom to save your changes.
- Reboot your PC.
6. Update Windows 10
Running an older version of Windows 10 almost always guarantees to cause problems. Your “video dxgkrnl fatal error” could be the result of an outdated Windows system.
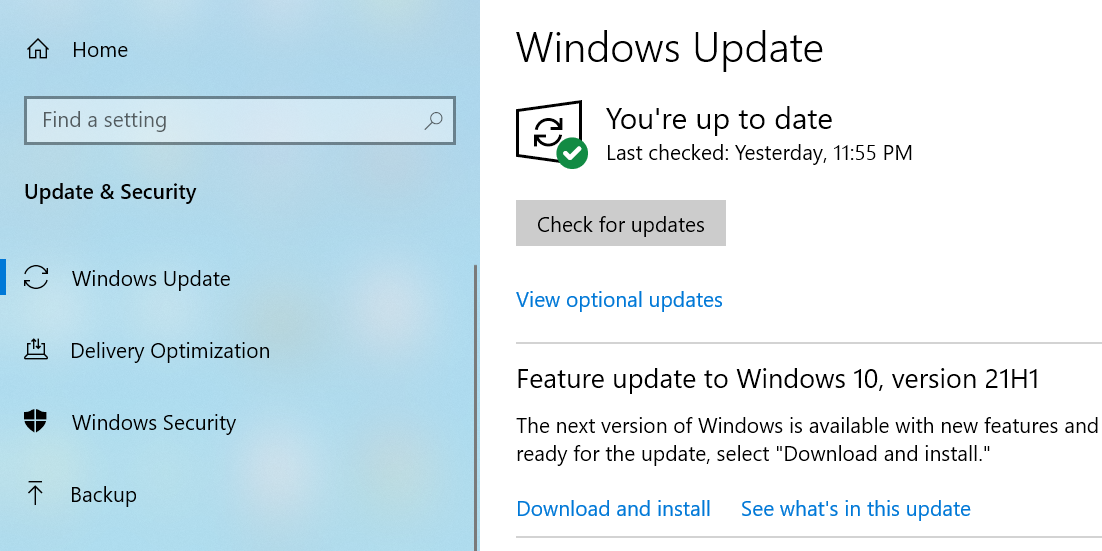
To fix this, visit the Settings app and update your PC to the latest version:
- Make sure you’re connected to the internet.
- Press Windows Key + I to open the Settings app.
- Click Update & Security on the Settings window.
- Select Windows Update from the left sidebar.
- Click Check for updates on the right pane.
- If you see any available updates, click Install now to install them.
- Restart your PC.
7. Reset Windows 10
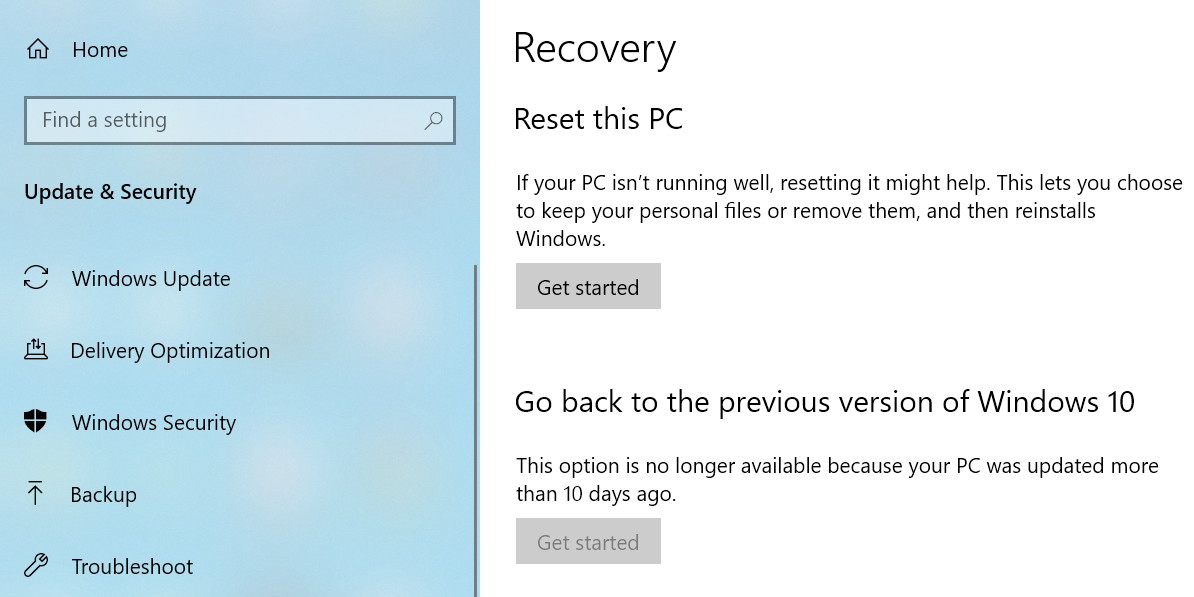
If you still haven’t been able to fix the “video dxgkrnl fatal error,” then it might be a good idea to reset your PC. This removes all your configured setting options and brings back the default values.
You’ll get the option to keep or remove your stored files when you begin to reset your PC.
- Open the Settings app by pressing Windows Key + I.
- In Settings, click Update & Security at the bottom.
- Select Recovery from the left sidebar on the following screen.
- On the right pane, click Get started under the Reset this PC section.
- Select Keep my files if you’d like to reset your PC while keeping your files.
- Select Remove everything to remove all your files as well as settings.
- Finish the reset process.
There Are Many Ways to Fix the VIDEO DXGKRNL FATAL ERROR in Windows 10
If you ever get the “video dxgkrnl fatal error” on your Windows 10 PC, do not panic. This issue is fixable in most cases, and all you basically need to do is apply some standard fixes. Our guide above should help you do just that.
0 Comments