
Does your PC randomly wake up and pop up a window that reads “Checking for Updates”? Usually, this is caused by the "MoUSOCoreWorker.exe" program—a Microsoft task that helps coordinate the installation of Windows updates.
Fortunately, there's no need to worry—it's really easy to get it fixed. We’ll show you how to fix your PC so that it doesn’t wake up irregularly to check for updates.
1. Override the MoUSO Core Worker Process
The MoUSO Core Worker process (MoUSOCoreWorker.exe) orchestrates Windows update sessions in the background. It's pretty important, but if this process keeps randomly waking your PC, then you can override it so that it won’t disrupt you.
So, here are the steps for overriding the MoUSO Core Worker Process:
- Press Win + R to open the Run command dialog box.
- Type CMD and then press Ctrl + Shift + Enter to open an elevated Command Prompt.
- Type the following command and press Enter:
powercfg /requestsoverride process MoUSOCoreWorker.exe executionWhen the process is complete, close the Command Prompt and then restart your PC to save these changes.
2. Disable the Wake Timers
The wake timers on your PC might be the reason you’re encountering this issue. So, let’s take a look at how you can disable them to prevent your PC from waking up randomly:
- Press Win + R to open the Run command dialog box.
- Type control.exe powercfg.cpl,,3 and then press Enter to open the Power Options window.
- Click the Sleep drop-down menu and then select Allow wake timers.
- Next, click the On battery and Plugged in options and select Disable from their drop-down menus.
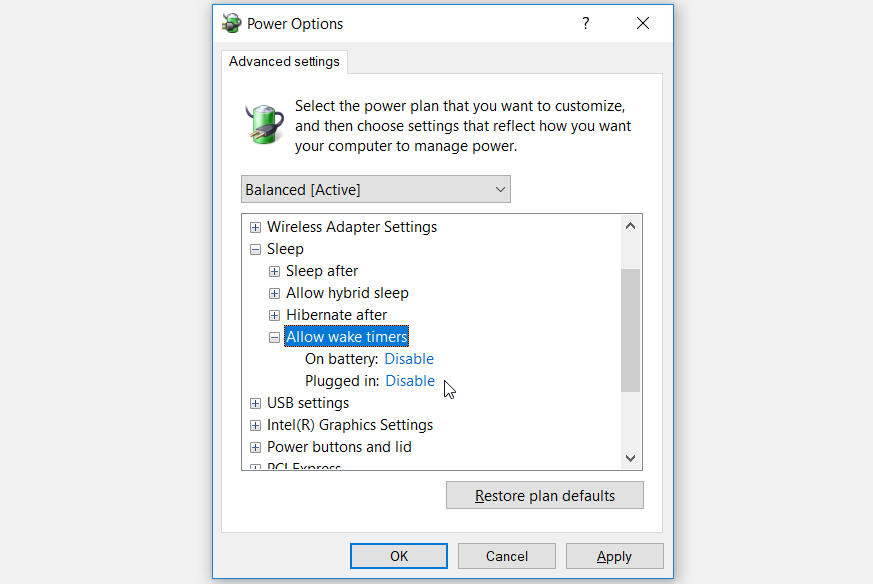
When you finish, click Apply and then click OK to save these changes.
3. Configure Some Settings in the Task Scheduler
Your PC is most likely to randomly wake up based on the settings you’ve configured in the Task Scheduler. So, let’s take a look at how you can tweak some Task Scheduler settings to resolve the issue at hand:
- Press Win + R to open the Run command dialog box.
- Type taskschd.msc and then click OK to open the Task Scheduler.
- On the left-hand side pane, navigate to Task Scheduler Library > Microsoft > Windows > UpdateOrchestrator.
- Next, right-click the Schedule Scan task in the middle pane and select Disable.
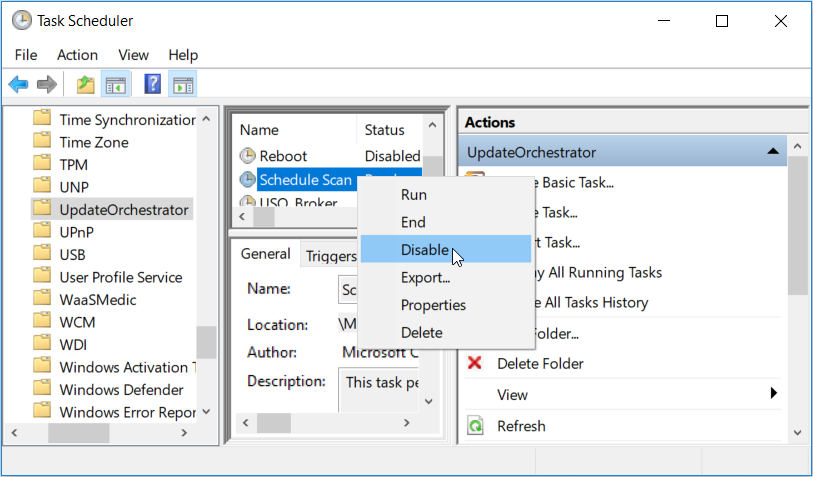
Finally, close the Task Scheduler window and restart your Device.
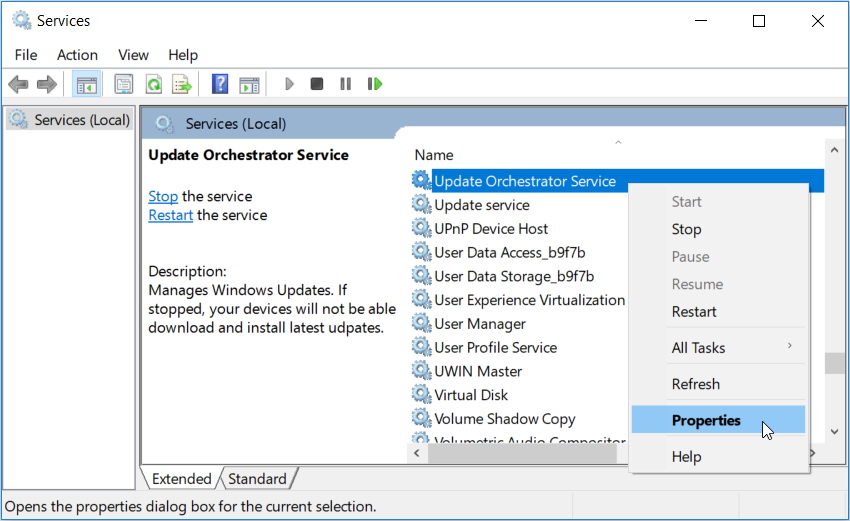
4. Disable the Update Orchestrator and Windows Update Services
To prevent your PC from checking updates randomly, you could disable the Update Orchestrator and the Windows Update Services. Here’s how you can do this:
- Press Win + R to open the Run command dialog box.
- Type services.msc and then click OK.
- Locate the Update Orchestrator Service, right-click on it, and then select Properties.
In the next window, select Disabled under the Startup type drop-down menu and then click the Stop button.
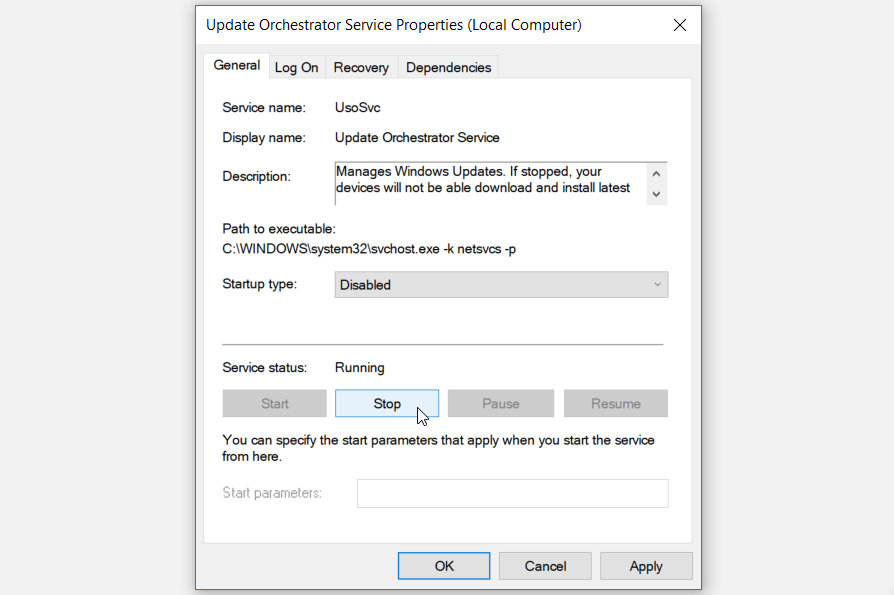
Click Apply and then click OK.
When you finish, right-click the Windows Update Service and then disable it as per the previous steps. Finally, restart your PC to save these changes.
5. Restore the Default Power Settings Via the Command Prompt
In some cases, this issue might be caused by the way you’ve configured the power settings. If you’re unsure of which settings you should tweak, then resetting the power settings to their defaults could help.
Here’s how you can restore your PC’s power settings via the Command Prompt:
- Press Win + R to open the Run command dialog box.
- Type CMD and then press Ctrl + Shift + Enter to open an elevated Command Prompt.
- Type the following command and press Enter:
powercfg -restoredefaultschemesWhen the process is complete, close the Command Prompt and restart your device.
6. Run the Windows Update and Power Troubleshooters
Since this is a “system update” and “power” issue, then the Windows Update and Power troubleshooters could come in handy.
Let’s first take a look at how you can run the Windows Update troubleshooter:
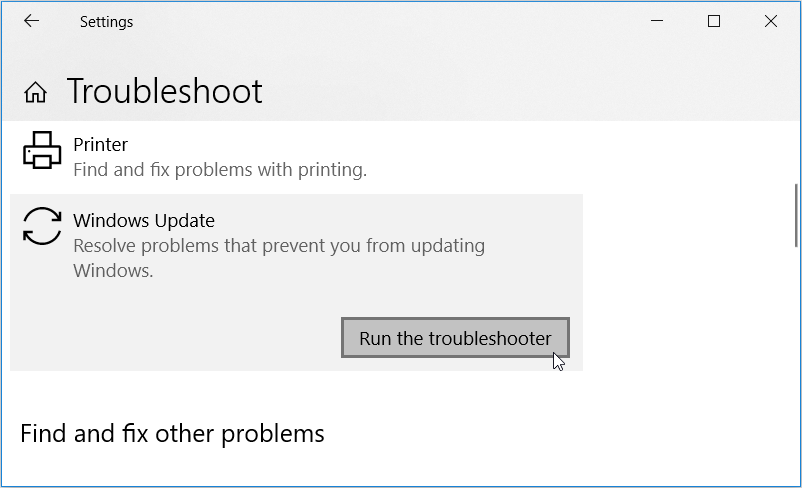
- Navigate to Win Start Menu > PC Settings > Update & Security and then click Troubleshoot on the left-hand side pane.
- Scroll down on the right-hand side pane, click the Windows Update option, and then click the Run the troubleshooter button. Follow the on-screen instructions to finalize the process.
Next, here’s how you can use the Power troubleshooter to tackle the issue:
- Locate the Power troubleshooter, click on it, and then click Run the troubleshooter.
- Follow the on-screen instruction to complete the process and then restart your PC when you finish.
7. Pause Your Windows Updates
Pausing your Windows updates could also help resolve this problem. Let's take a look at how you can do this:
- Navigate to Win Start Menu > PC Settings > Update & Security and then click Windows Update on the left-hand side pane.
- Press the Advanced options on the right-hand side pane.
- In the next window, turn on the button under the Pause Updates option.
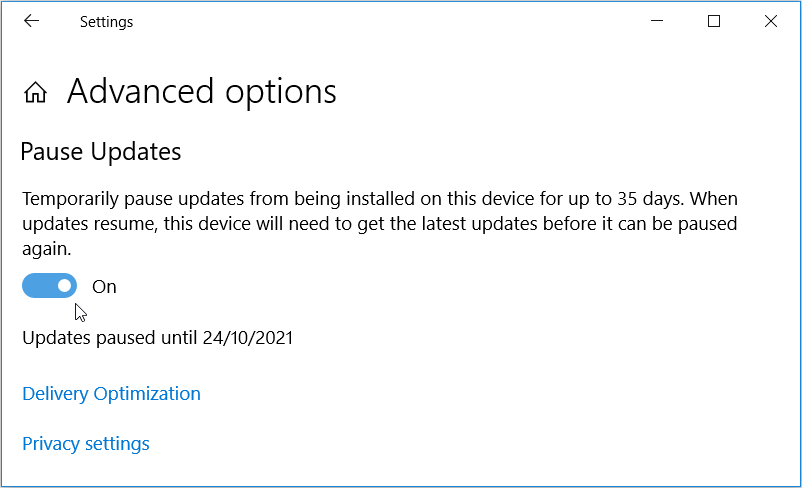
This should pause your updates for 35 days, and you can resume your updates anytime by turning off the Pause Updates button.
8. Enable Metered Connection
By default, Windows doesn’t automatically check for updates over a metered connection (a type of internet connection that has data limitations to it). In this instance, you’ll have to manually check for updates should you wish to upgrade your PC.
So, let’s see how you can enable a metered connection to prevent random Windows updates from popping up:
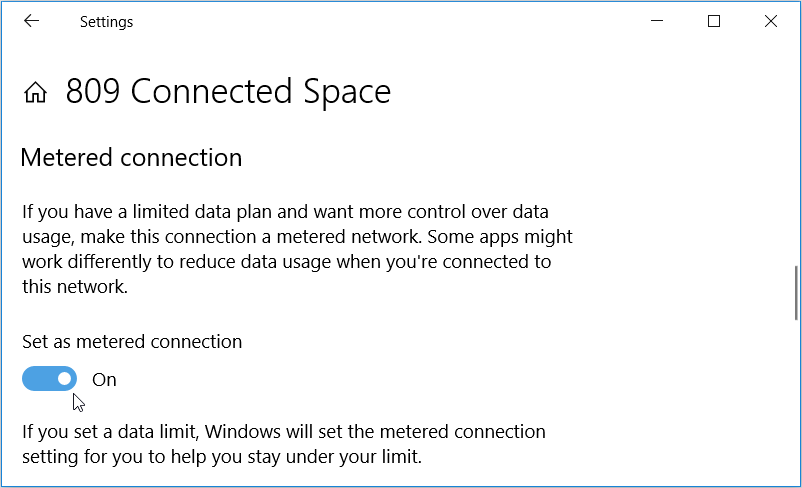
- Click the Wi-Fi icon on the taskbar, select the Wi-Fi network you’re currently connected to, and then click the Properties option below it.
- In the next window, turn on the button under the Set as metered connection option.
9. Edit the Windows Registry
You could easily tackle this issue by editing a few keys in the Windows Registry. But since you’ll be handling sensitive information, it’s best to start by backing up the Registry. That way, you’ll be on the safe side should anything go wrong.
Now, here’s how you can resolve the issue at hand via the Registry Editor:
- Press Win + R to open the Run command dialog box.
- Type Regedit and then click OK to open the Registry Editor.
- Navigate to HKEY_LOCAL_MACHINE > SOFTWARE > Policies > Microsoft > Windows > WindowsUpdate > AU.
- Double-click the NoAutoRebootWithLoggedOnUsers value on the right-hand side pane to edit it.
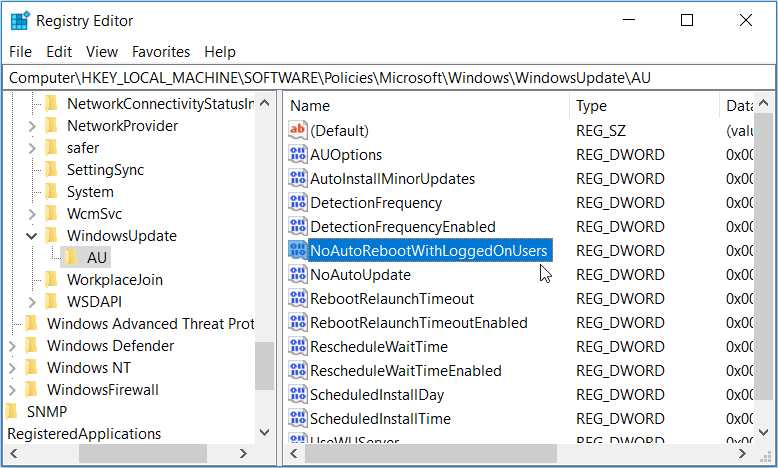
In the next window, set the Value data to 1 and then click OK.

If the NoAutoRebootWithLoggedOnUsers value isn’t present, here’s how you can create it:
- Navigate to the AU key/folder as per the previous steps and then right-click on a blank space on the right-hand side pane.
- Select New > DWORD (32-bit) Value and then name your new value as NoAutoRebootWithLoggedOnUsers.
- Double-click the value, set its Value data to 1, and then click OK.
When you finish, close the Registry Editor and then restart your PC.
Easily Get Rid of Random Windows Updates
It’s annoying when your PC randomly wakes up to check for updates. However, tackling this issue is incredibly easy. Simply apply any of the tips we’ve provided, and your PC won’t wake up irregularly.


0 Comments