If you want the data from a disk (such as a Windows installation disk), but you don't want to purchase a physical CD, you can use the ISO file instead. An ISO file is a "blueprint" of a disk, meaning it contains all the data you'd find if you bought the physical CD. Manufacturers use ISO files to distribute drivers, software, or operating systems to end-users.
While you can format an ISO onto a CD, Microsoft Windows 10 comes with a built-in tool that allows you to mount ISO files in the operating system itself. That means you don't need to purchase a disk if you want to run the ISO. In this article, we will demonstrate how to mount ISO images using PowerShell commands, alongside some third-party tools on Windows.
1. How to Use File Explorer to Mount ISO Images
If you're using Windows 10 or 11, you don't need third-party software to mount ISO images. You can do everything you need within File Explorer, without any additional tools or downloads. Here's how:
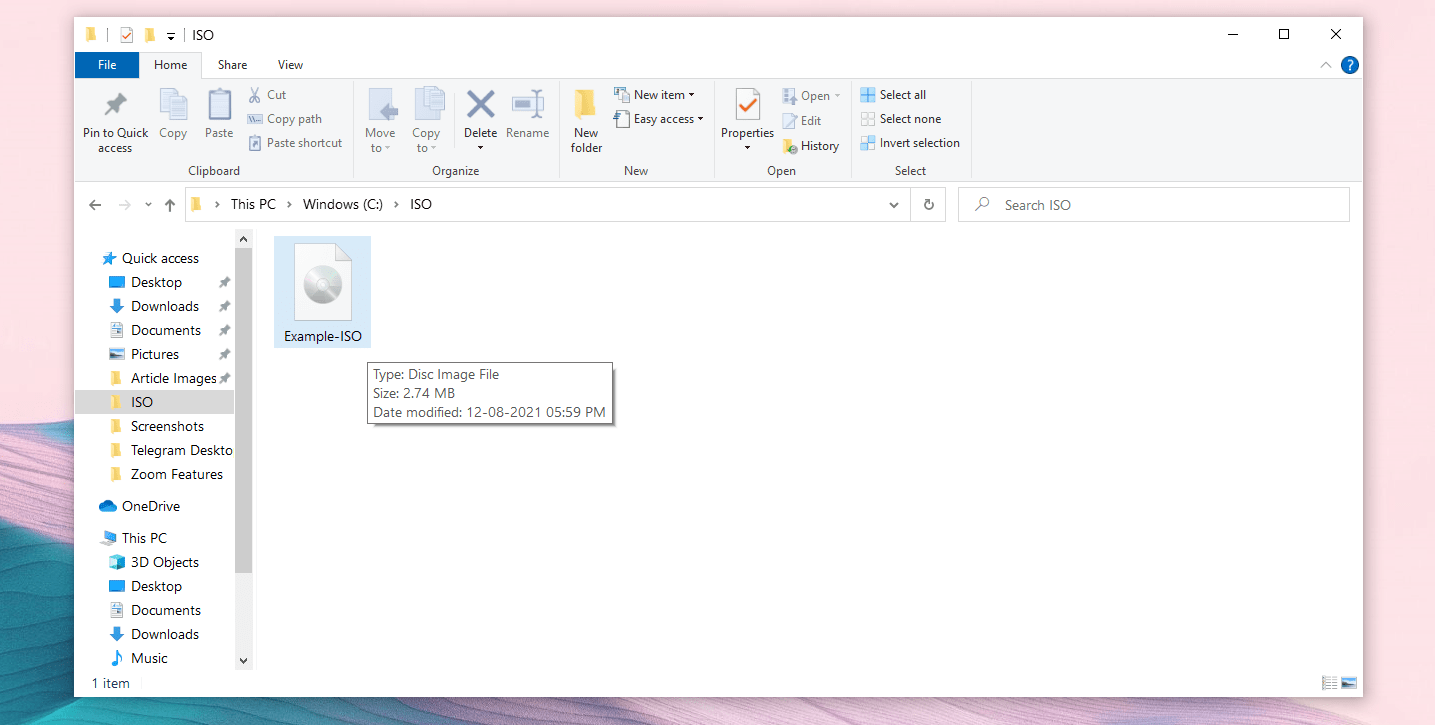
- Open File Explorer, and navigate to the folder where your ISO image is located.
- Double-click on the ISO file to mount it.
- Once mounted, you will see it as a new drive under This PC on Windows. Windows is now treating the ISO file as if it were a CD, so use it as you would a normal disk.
- Just like a CD, you can right-click the drive and select Eject to unmount the ISO file once you're done. After ejecting the file, you won’t see the Image in the drive until you mount it back.

How to Mount ISO Images Using the Context Menu
Alternatively, you can also use this method to mount ISO images in File Explorer. To do so, follow these steps:
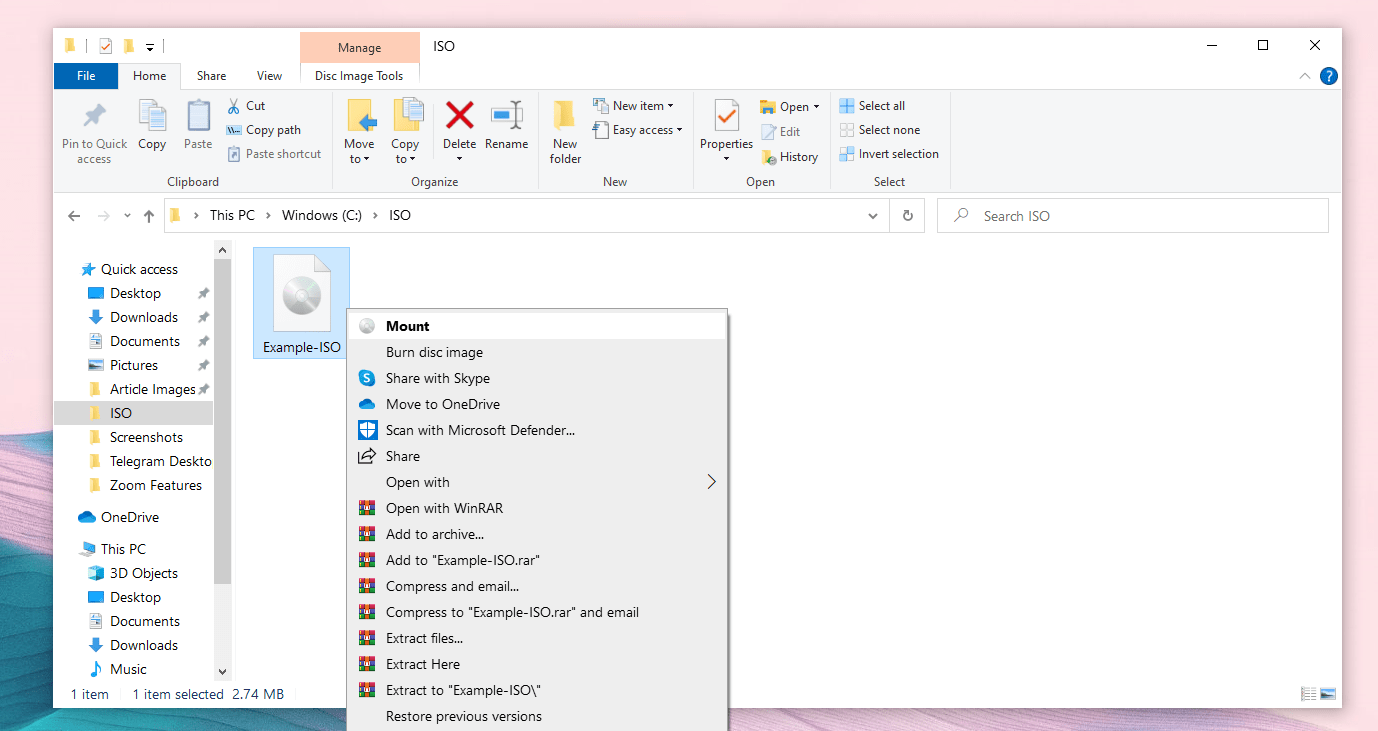
- Open File Explorer, and navigate to the folder where your ISO image is located.
- Right-click on the file and select the Mount option from the context menu.
- Once mounted, you will see it as a new drive under This PC on Windows.
- You can right-click the drive and select Eject to unmount the ISO file.
- Once done, you won’t see the image in the drive until you mount it back.

How to Mount ISO Files From the Ribbon Menu
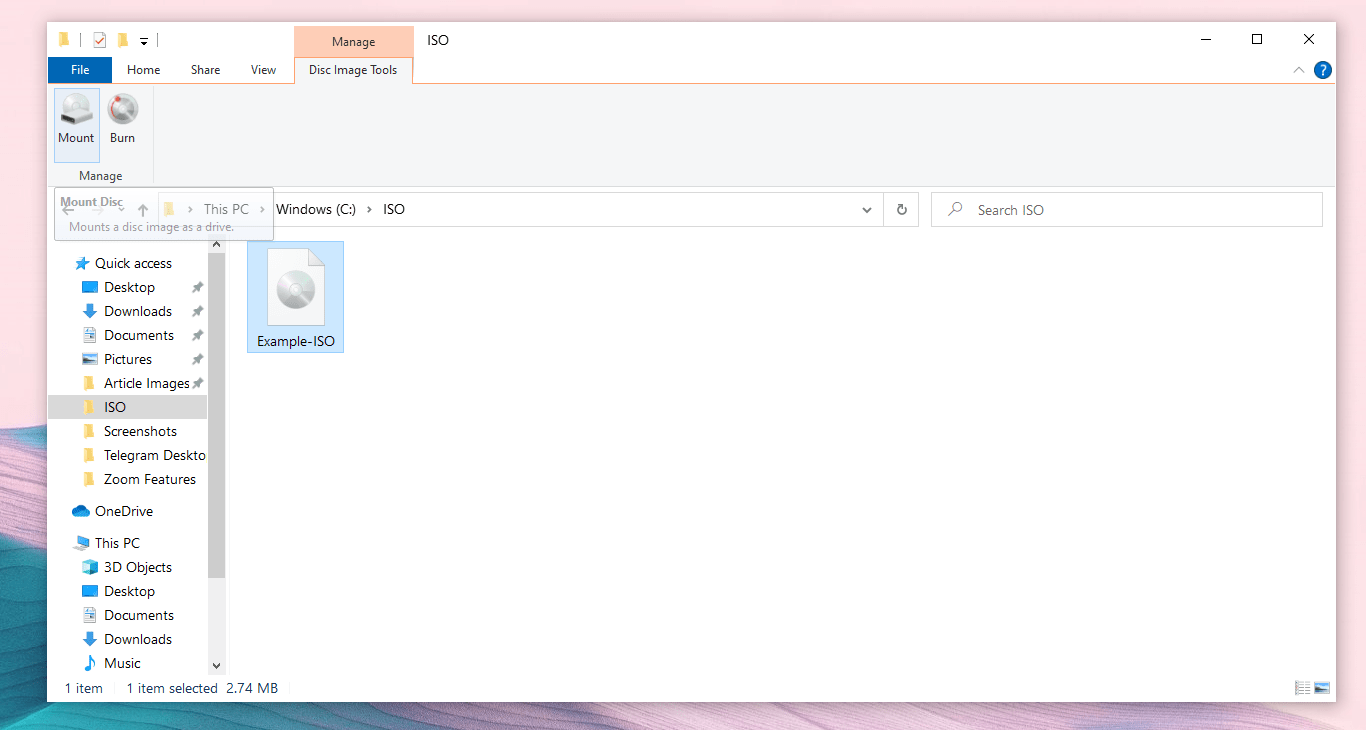
You can also use the ribbon menu to perform the same task. To mount an ISO file in the File Explorer using the ribbon menu, follow these steps:
- Open File Explorer, and navigate to the folder where your ISO image is located.
- Click the ISO file to select it.
- Select the Manage option on the File Explorer’s ribbon menu.
- Click on the Mount option under that.
- Once mounted, you will see it as a new drive under This PC on Windows.
- You can right-click the drive and select Eject to unmount the ISO file. Once completed, you won’t see the Image in the drive until you mount it back.

2. How to Use Third-Party Software to Mount ISO Disk Image Files
If you run Windows 7 or lower versions, Windows Disk Image Burner isn't available to you. However, you can still use some third-party software to mount ISO files on Windows 7 or lower. Some popular ISO mounting tools that you can use are:
For this guide, we will be using WinRAR to demonstrate how to mount ISO images.
How to Extract ISO Files Using WinRAR
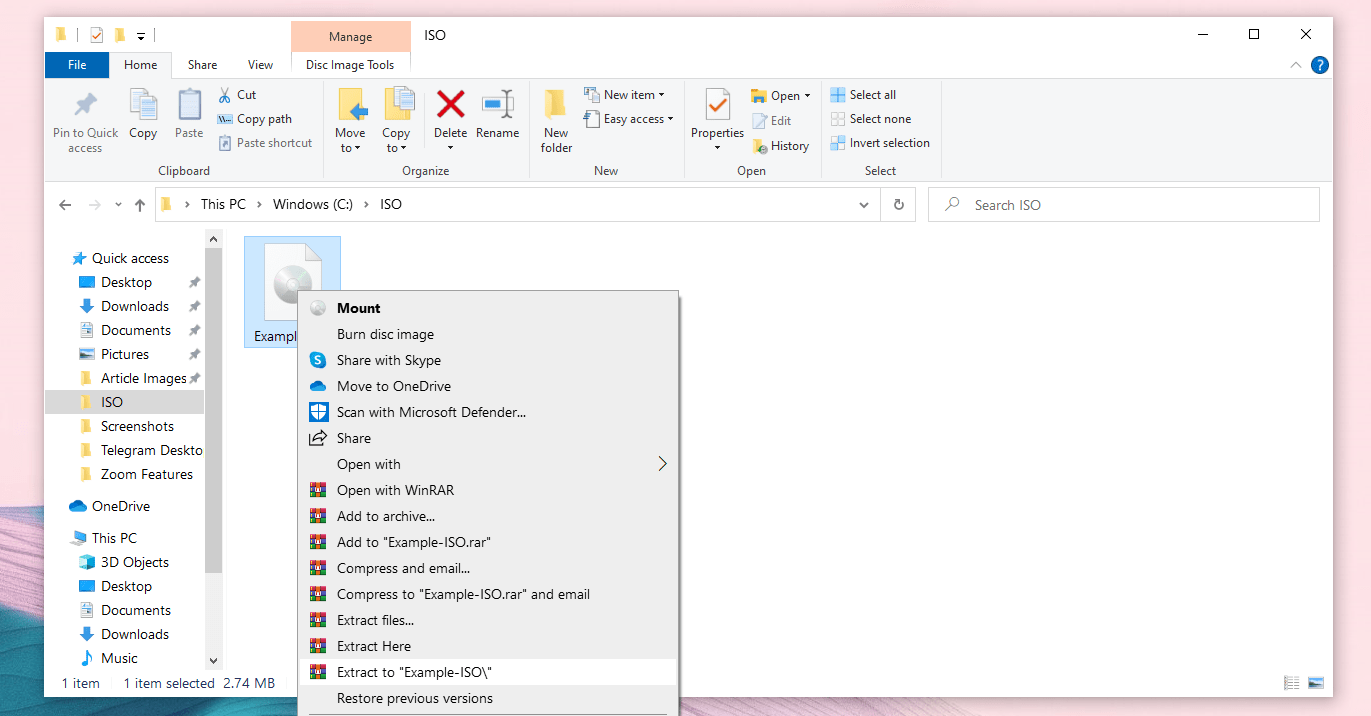
To extract ISO files using WinRAR, follow the steps below:
- Download and install WinRAR on your computer.
- Navigate to the ISO’s file location in File Explorer.
- Right-click on the ISO file and select Extract to "[FILENAME]".

This will extract the contents of the ISO image into the ISO file folder. The disk image will not be mounted, but you can extract the contents of the disk image to any location you desire without mounting it.
Mount ISO Files on Windows Effortlessly
Mounting ISO files on Windows 10 or above is relatively easy compared to previous versions. This is because Windows 10 comes with a native tool in File Explorer.
You can choose any of the methods mentioned above to mount ISO images if you are running Windows 10. Although the processes are different, they’ll end up the same.
0 Comments