Creating a website can seem like a daunting task considering the costs associated with web hosting and domain names. Maybe you want to start your own personal blog to express ideas and emotions residing in you. Or maybe you've started a new business and want a personalized website that represents the brand well.
With WordPress, you don't have to worry about buying expensive hosting or hiring a web developer to create the website for you. Even you can easily design your own website with WordPress, for free.
Here's how to start a free website with WordPress.com.
Step 1: Create a Free WordPress Account
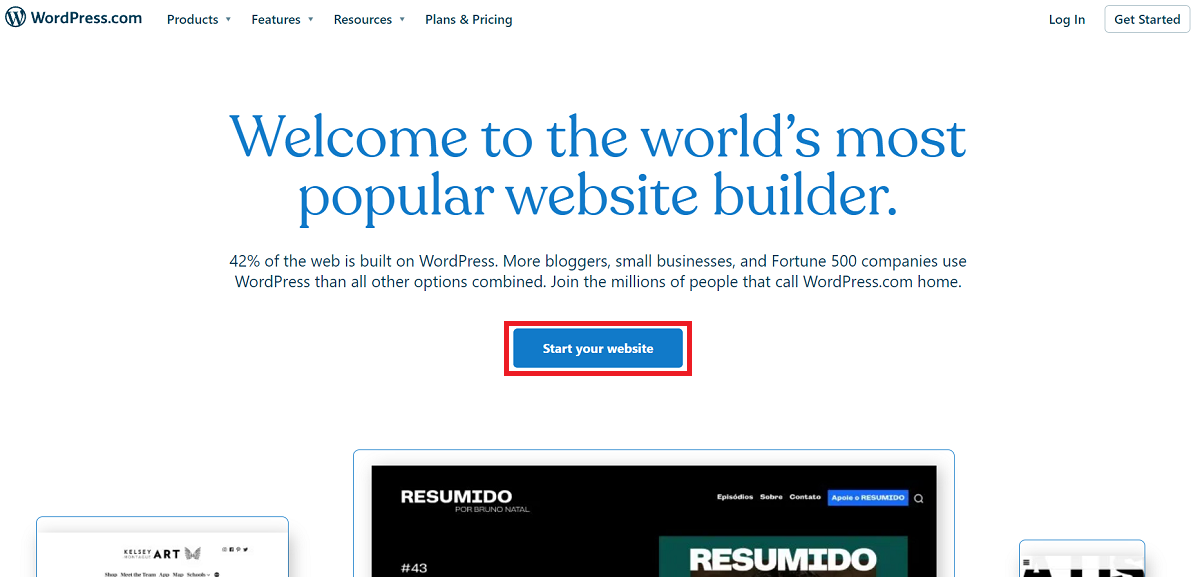
Before you get to designing the website, choosing a name, and all that good stuff, you'll have to set up your account on WordPress. To begin, head over to wordpress.com and click on Start your website.
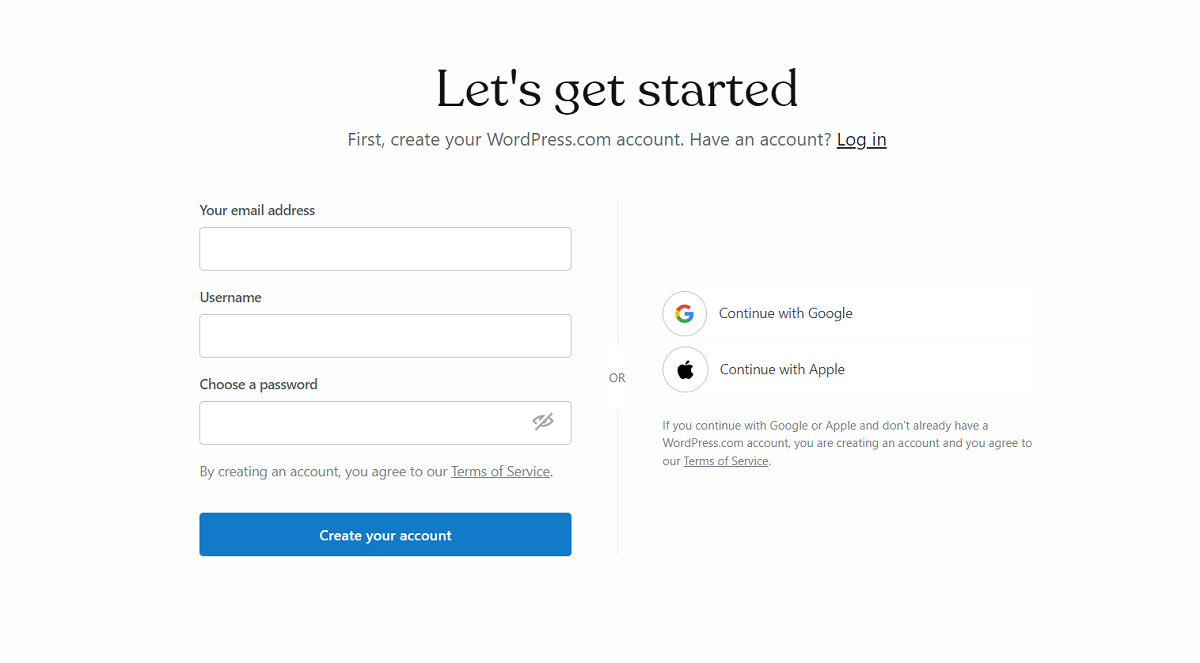
WordPress will prompt you to create a new account if you don't have one already. You can either enter your registration details manually or choose to sign up using your Google or Apple account.
Step 2: Choose a Domain Name
After creating your account, it's time to choose a domain name. A domain name is a unique identifier that directs the users to your website. For example, in www.google.com, "google.com" is the domain name.
WordPress recommends using a "short and memorable" domain for your website. A short and catchy domain name is easy to remember and in turn, attracts more audience. On the other hand, it's obvious not to use long domain names like "thisismypersonalwordpresswebsite." It's hard to remember and not to mention, barely readable.
Once you're done with the domain name, enter it into the corresponding text field and check if the name is available.
Note that WordPress offers free domain names for the first year, but you can only avail that offer if you purchase the annual WordPress subscription. Make sure you only select the free *.wordpress.com subdomain plan.
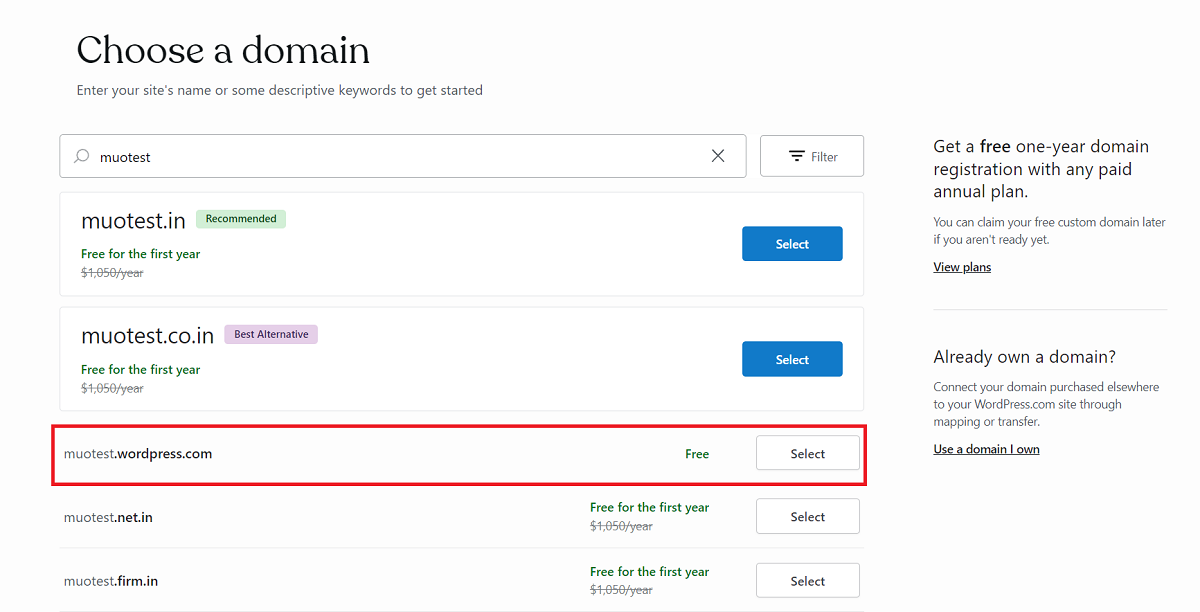
You'll be redirected to the Pricing web page. Click on the start with a free site option located under the heading "Choose a plan."
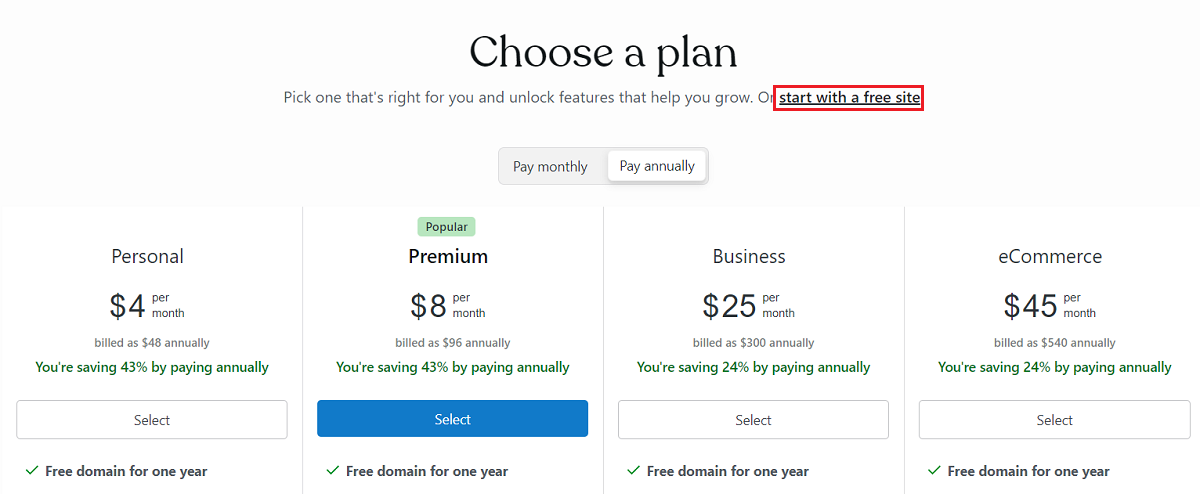
If you are serious about creating a website with your own custom domain, feel free to select a plan that suits your taste. Remember, WordPress offers a free domain name for a year with the annual plans.
Step 3: Design and Set Up the Website
After a brief "Building your website" loading screen, you'll be asked to select a design for your website. You can either start with a blank page (by selecting Blank Canvas) or choose any of the free themes provided. You also get an option to skip the site design process if you want.
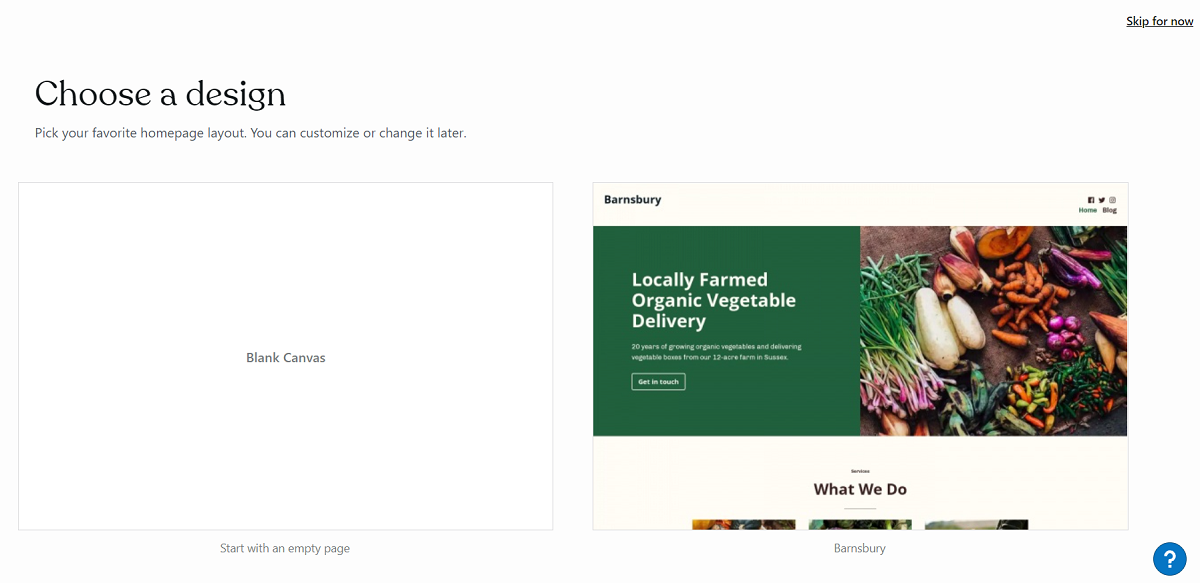
For the purpose of this guide, we'll be using the Alves theme (available for free at the Choose a Design web page). Click on the theme tile to select it and WordPress will start applying the layout and design to your website.
Right now, your website will not be available to the public. Other people will see a "Coming soon" web page if they open your website. You, however, can see the website with the applied theme on your device.
Once done, you'll be redirected to the WordPress dashboard, where most of the magic will happen. WordPress provides a simple "checklist" that you can follow to complete the basic setup.
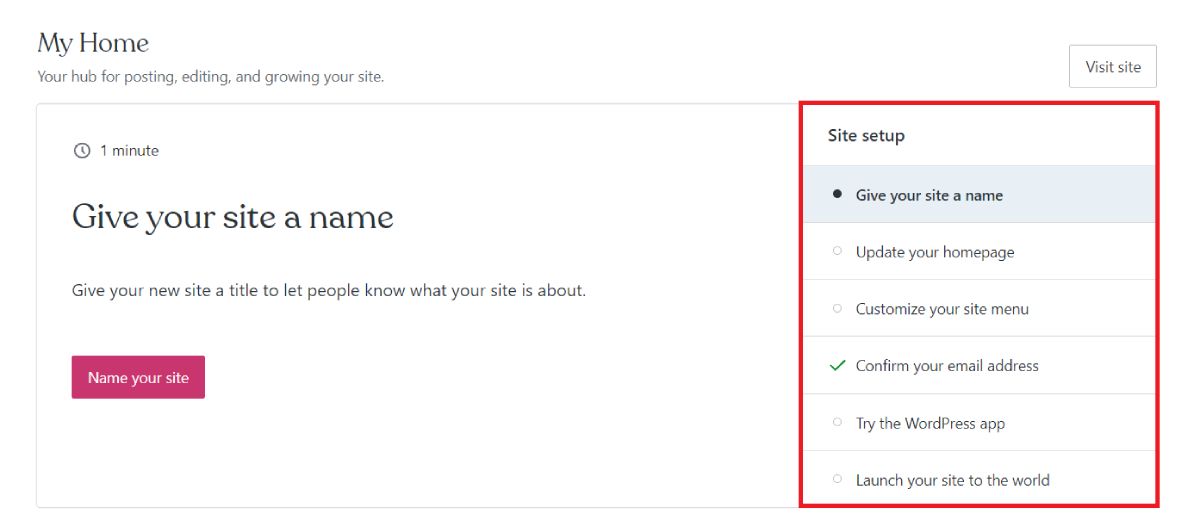
Configure the Site Identity
To begin, click on the Name your site button. Here, add the name of your website and the site tagline.
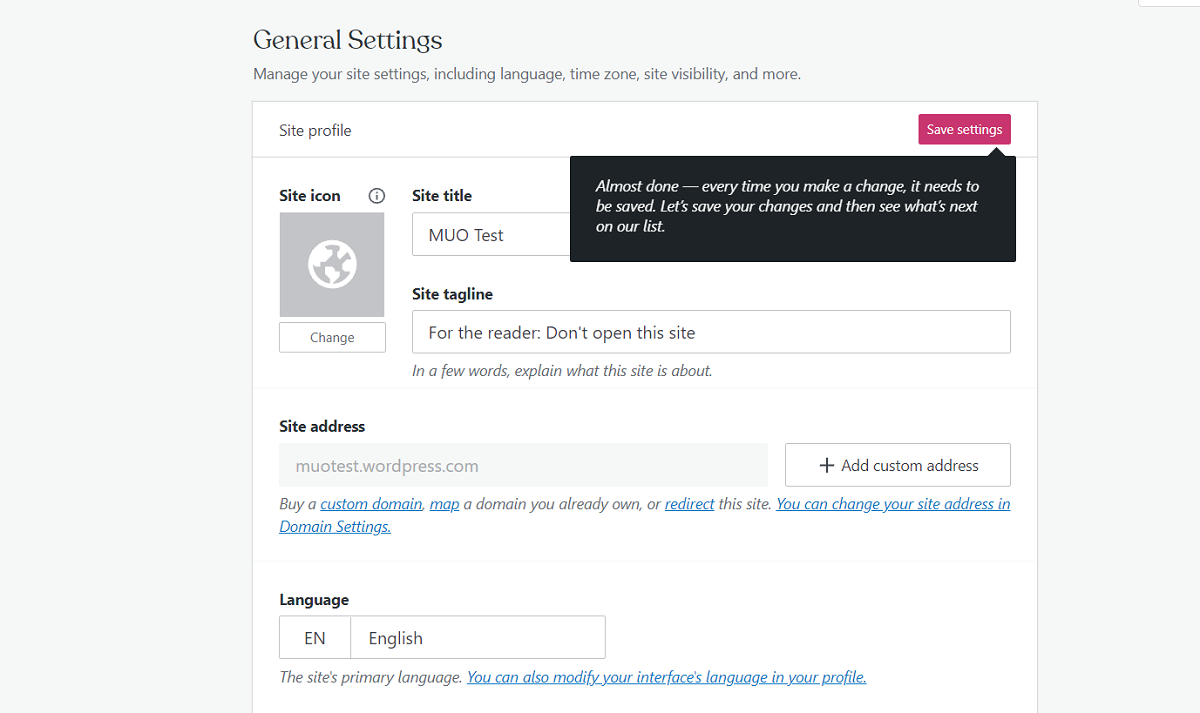
You can also change the time zone, modify the footer credits, and launch your website for the public. To save the changes, click on the Save settings button at the top.
Set Up the Homepage
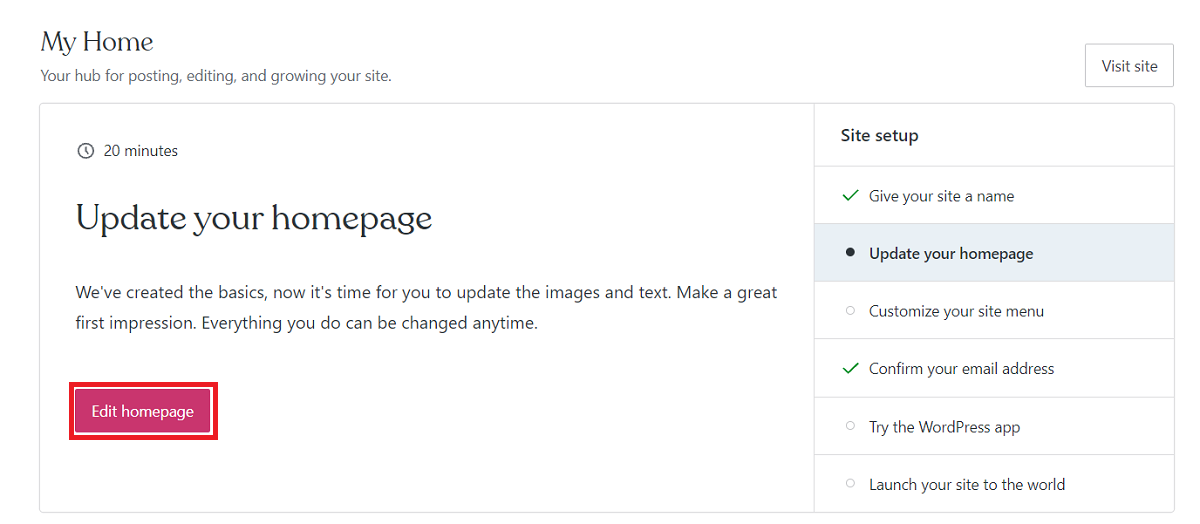
Head back to the dashboard and click on the Edit Homepage button. WordPress provides an interactive tour to familiarize users with the interface; it's optional, however.
The default editor in WordPress uses blocks to denote elements. You can add and remove blocks to change the appearance of a web page.
To modify an existing block, simply click on it. For example, to change the largest heading on the web page, click on it and the edit cursor will appear.
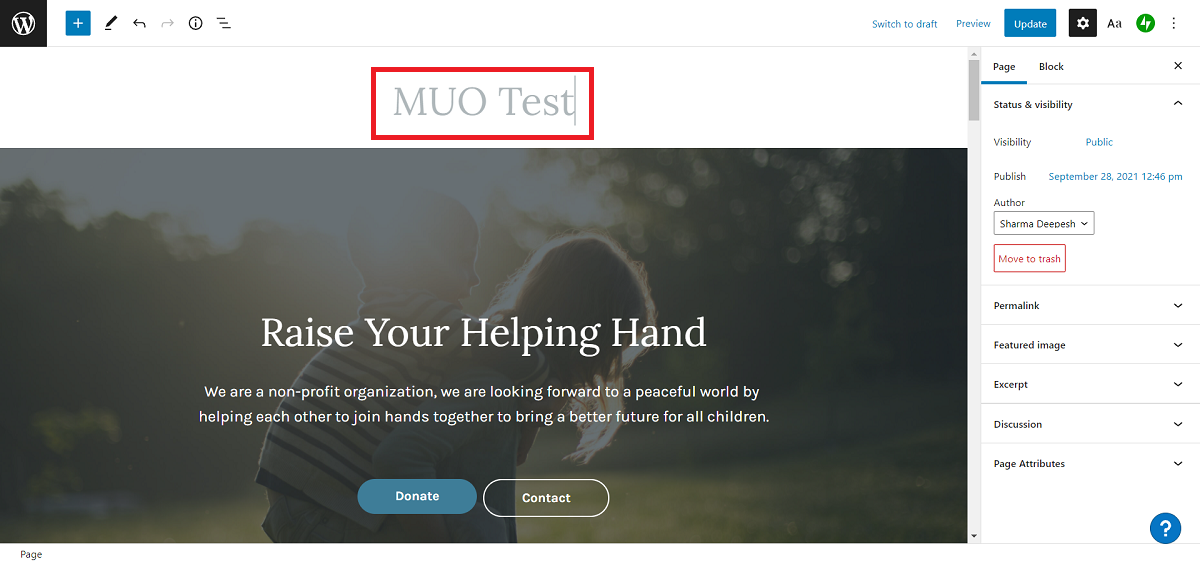
Similarly, you can edit all the other blocks to personalize the website.
Furthermore, if you want to introduce a new element to the web page, click on the Add button located at the top-left corner of the screen. Then, choose the block you want to add and drag it to an appropriate position.
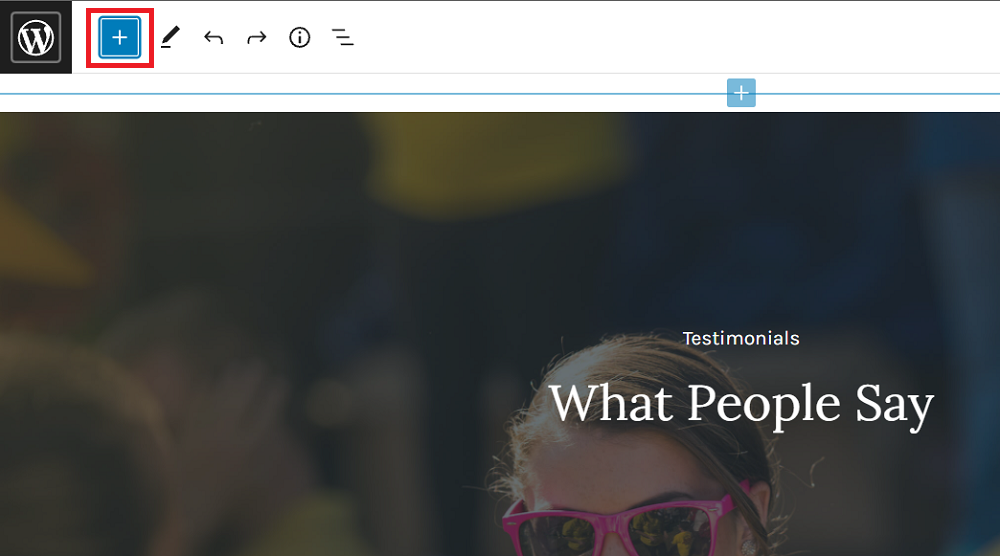
For example, to add an extra button: click on the Add option, select Button from the list, and drag-and-drop to the appropriate location on the page.
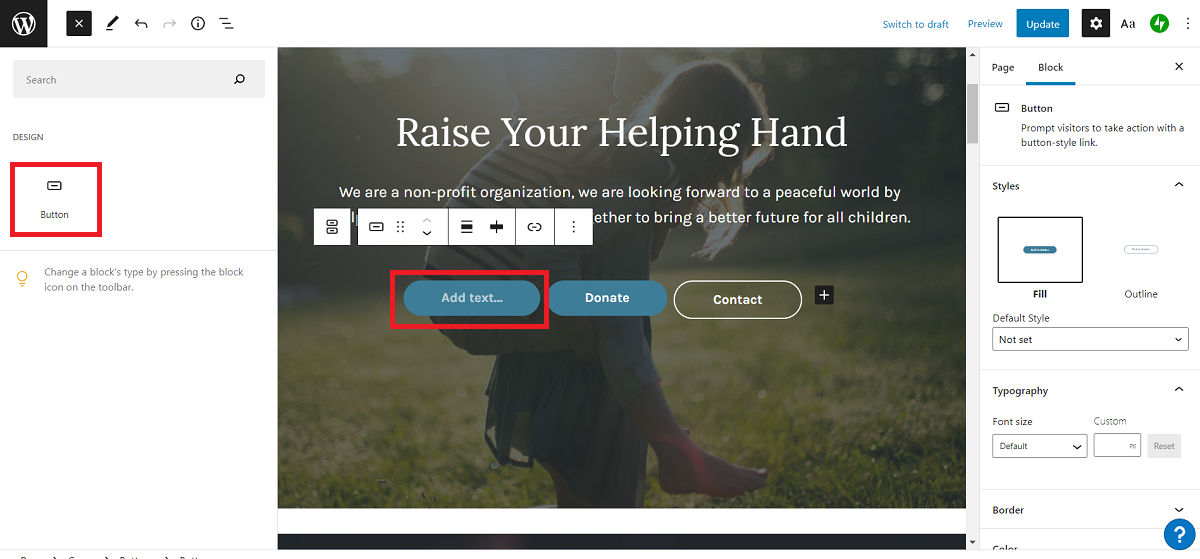
To further customize a block, click on the element and switch to the Block tab in the right sidebar. You'll get the options to tweak the dimensions, change the font, color, and more. To modify page-level information, switch to the Page tab. Here, you can select the featured image, edit the permalink, add an excerpt, etc.
Once you're done customizing the homepage, click on the Update button at the top-right corner, and close the editor. You can also Preview the web page to check how it'll render on the actual website.
You can create additional pages from the dashboard. Click on the Pages option from the left sidebar and select Add new page. The steps to customize the web page is similar to that of the homepage.
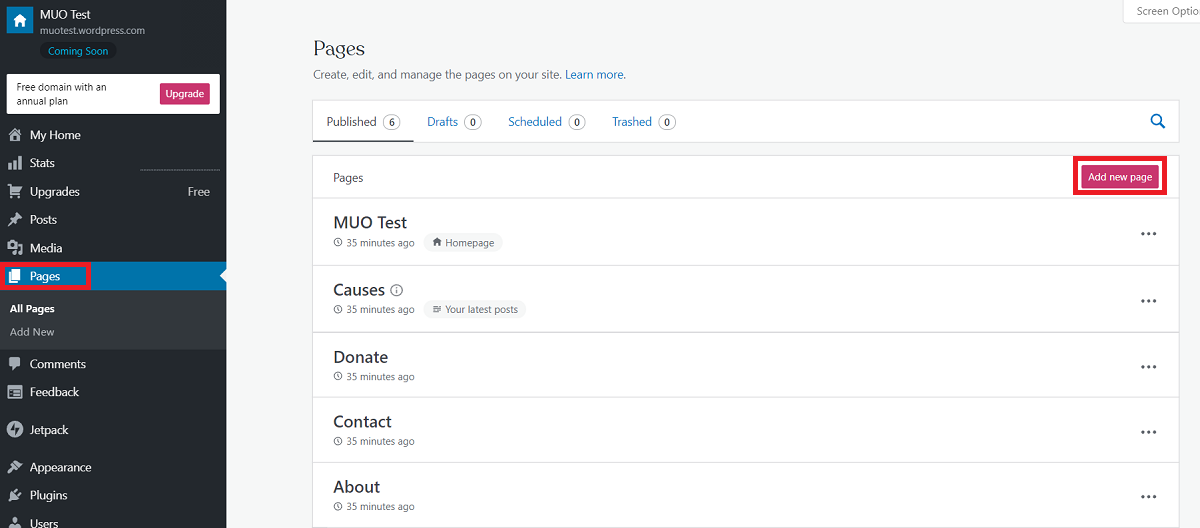
For those who want to create a blog, you can add posts to your website and display them on the homepage. Several blog themes are also available that will ease the process of setting up the website for you.
Step 4: Add a Site Menu
If you want to create a website with multiple pages, it is important to create a navigation menu for the same. Head back to the dashboard and select the Add a menu option.
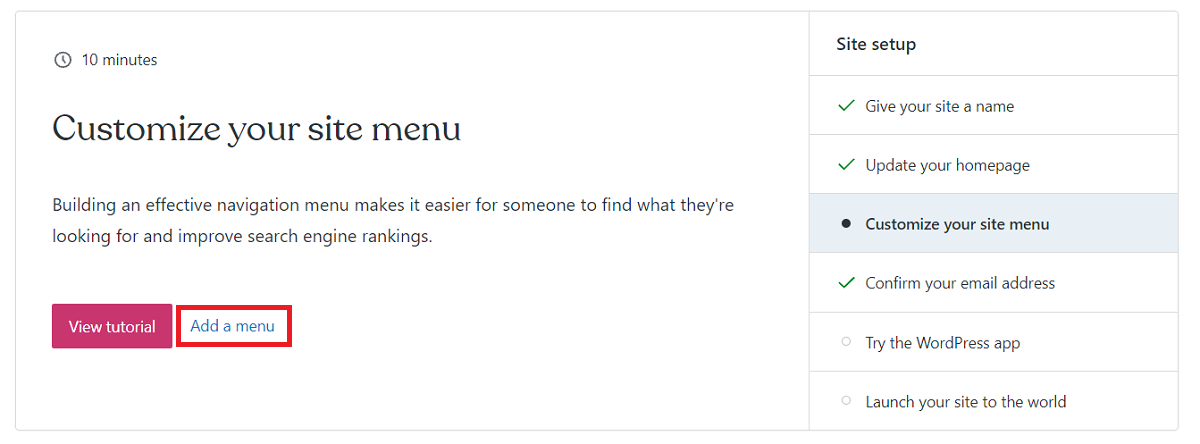
You'll be redirected to the WordPress Customizer, where you can edit various aspects of the website. From the left sidebar, select Menus and click on Primary. You can remove the default entries by clicking on the entry and selecting Remove.
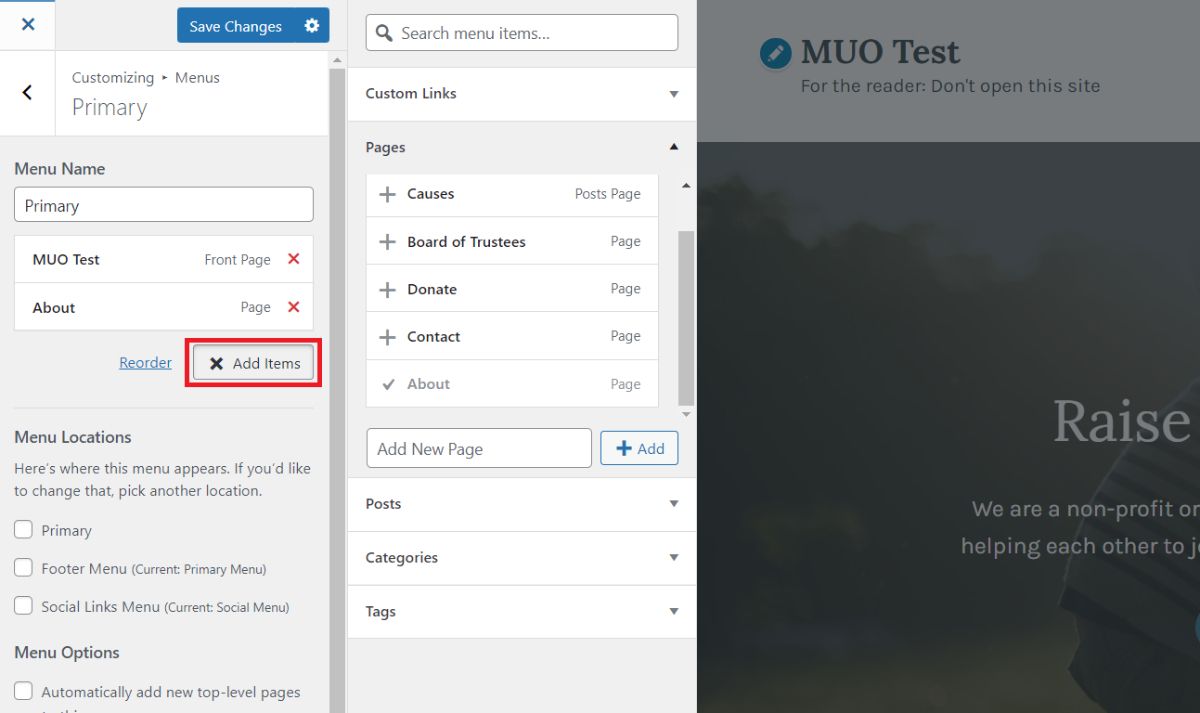
To add new links, click Add Items and select the page you want to add to the menu. Make sure you've created the web page that you want to display on the menu beforehand.
To display the menu on the page header, select Primary from the list of Menu locations.
Once done, click Save Changes to continue.
Step 5: Launch the Website
The final step is to launch the website and make it available to the public. To do so, click on the Settings option from the left sidebar and select the General option. Then, scroll down and click on the Launch site button.
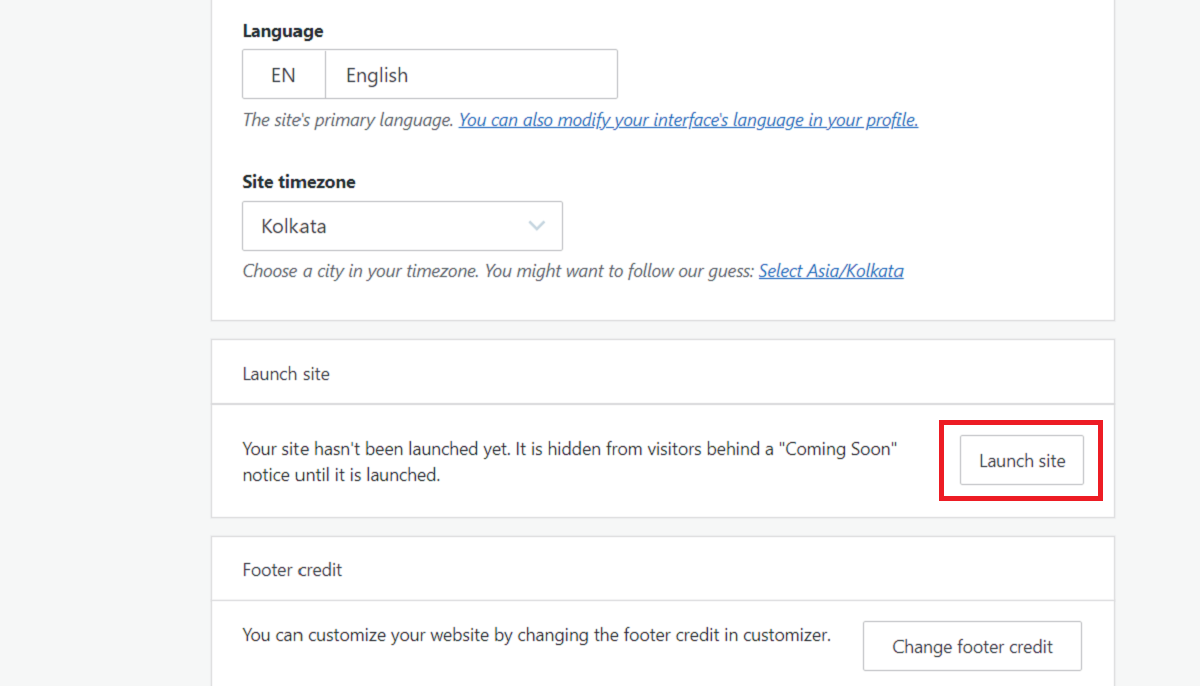
WordPress will ask you to select a domain name for your website again. Scroll down and click on the Skip purchase option to continue with the WordPress free subdomain address. Then again, select the start with a free site option to proceed.
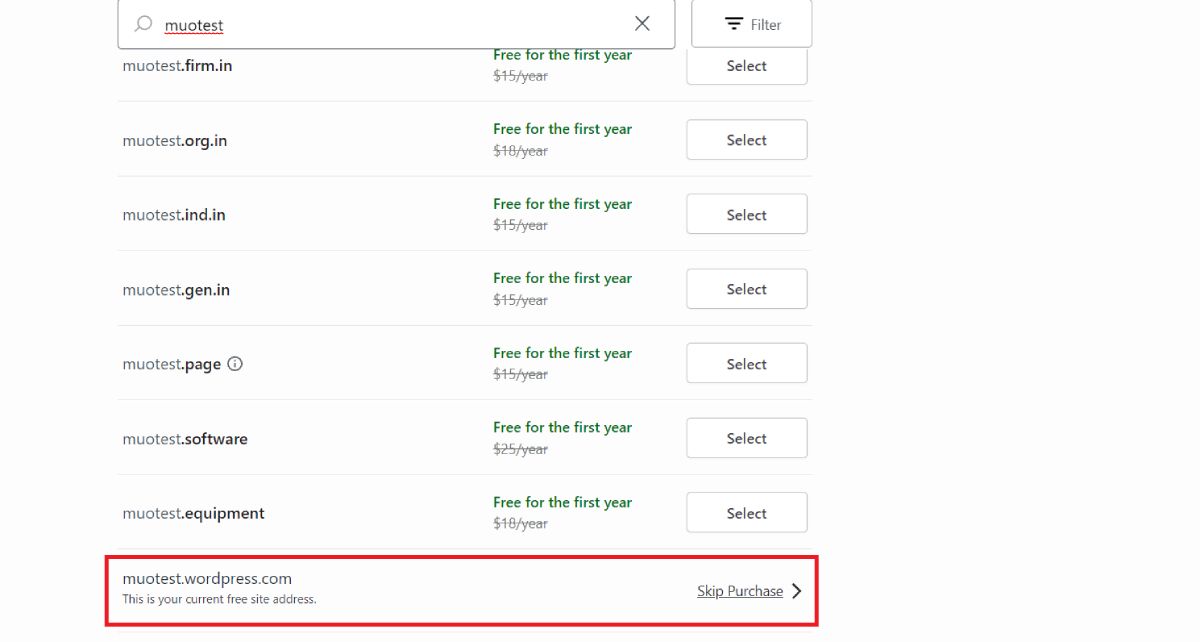
Type the URL of your website in a browser to access it.
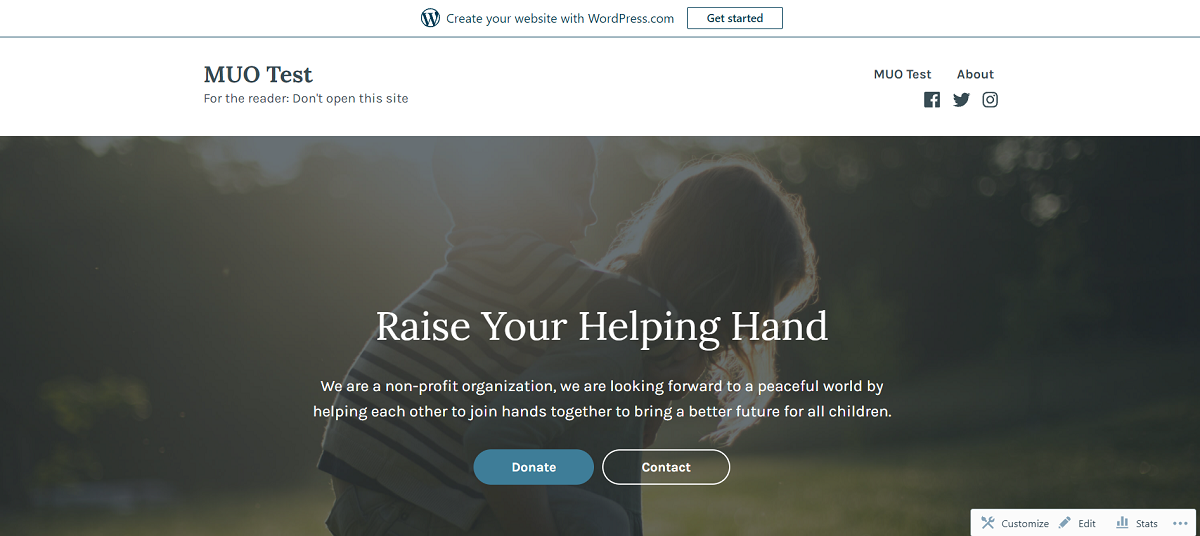
Congratulations! You've successfully set up your own website using WordPress.
Should You Purchase the Premium WordPress Plans?
Although you can do (almost) everything using the free account, having a premium subscription will bring some additional features to the table. For example, you'll be able to install plugins, set up a custom domain name, use other themes (paid and free both), etc.
Overall, if you're someone who wants to create a basic website for themselves or their business, the free version of WordPress delivers everything. However, if you need a professional-looking website with customizations and plugin support, you should definitely opt for a paid plan.
0 Comments